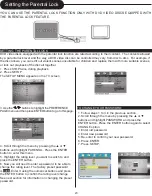


0
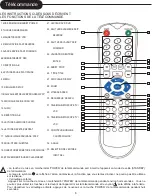
. Appuyez sur la touche de mise en marche/arrêt ‘POWER’ afin de mettre l’appareil en marche.
Appuyez sur la touche ‘VCR’ afin de changer le mode de visionnement au mode du magnétoscope.
. Insérez la vidéocassette désirée.
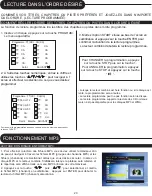
Lecture du magnétoscope
3. Si vous désirez lancer la lecture, appuyez sur la touche
‘
’.
Lorsque l’image présente des parasites lors de la lecture,
ajustez-la à l’aide des touches d’ALIGNEMENT ‘Tracking’
+/-.
• Pour obtenir une pause de l’image, appuyez sur la touche
‘
’ pendant la lecture.
4. Pour arrêter, appuyez sur la touche .
• Pour effectuer une pause pendant la lecture, appuyez sur
la touche
de lecture/pause.
5 Pour effectuer une lecture rapide vers l’avant ou l’arrière,
appuyez sur la touche
ou
, respectivement.
• Appuyez sur la touche d’ÉJECTION ‘EJECT’ sur le
devant de l’appareil ou sur la touche d’éjection ‘ ’ de la
télécommande pour retirer la vidéocassette de l’appareil.
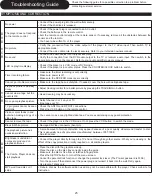
Enregistrement
Pour enregistrer à l’aide du magnétoscope :
. Appuyez sur la touche de mise en marche/arrêt ‘POWER’
afin de mettre l’appareil en marche.
• Appuyez sur la touche ‘VCR’ afin de changer le mode de
visionnement au mode du magnétoscope.
• Mettez le téléviseur en marche; ensuite, syntonisez le canal
3 ou choisissez l’entrée A/V désirée.
. Insérez une vidéocassette.
• Insérez une vidéocassette qui possède une languette de
protection contre les effacements accidentels.
3. À l’aide de la touche d’augmentation/diminution des canaux
‘CH +/-‘ et des touches numériques, choisissez le canal de
télédiffusion désiré ou l’unité d’entrée externe que vous désirez
enregistrer.
4. Choisissez la vitesse désirée (SP ou SLP) à l’aide de la
touche de VITESSE ‘SPEED’.
5. Appuyez sur la touche d’ENREGISTREMENT ‘REC’.
6. Appuyez sur la touche ‘
’ pour effectuer une pause de
l’enregistrement; appuyez de nouveau pour reprendre la lecture.
• Si la pause continue pendant cinq minutes, l’enregistrement
sera annulé automatiquement.
7. Pour arrêter l’enregistrement, appuyez sur la touche ‘ ’.
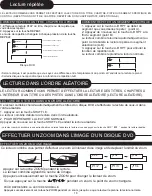
Si vous désirez visionner un disque DVD pendant l’enregistrement
d’une vidéocassette, insérez un disque DVD dans le lecteur.
• Placez le disque DVD désiré sur le plateau du disque;
appuyez sur la touche ‘DVD’.
Pour permuter au mode du lecteur DVD, appuyez sur la
touche ‘
’. Ensuite, vous pourrez visionner un disque DVD.
Appuyez sur la touche ‘DVD’ afin de changer la sortie du
lecteur au mode ‘DVD’.
. Insérez le disque DVD désiré.
• Vous ne pouvez pas copier un disque DVD protégé contre la
copie.
. Insérez une vidéocassette vierge.
3. Appuyez sur la touche d’enregistrement ‘REC’.
4. Pour arrêter la copie, appuyez sur la touche ‘VCR’, puis sur
la touche ‘ ’.
• Sinon, le lecteur DVD continuera de jouer et l’image, d’être
copiée.
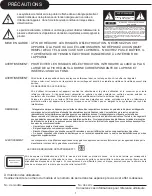
Cet appareil contient de nombreuses innovations technologiques protégées par certains brevets américains et d’autres droits
d’auteur appartenant à Macrovision Corporation et à d’autres propriétaires. Seule Macrovision Corporation peut, à sa discrétion,
autoriser l’utilisation de cette technologie brevetée, qui ne peut être utilisée que pour l’usage domestique ou autre usage limité
tel que stipulé par MacroVision. Il est défendu de démonter cet appareil à des fins de contrefaçon industrielle ni pour en étudier
ou copier les principes d’ingénierie utilisés dans sa fabrication.
Profiter de la lecture d’un disque DVD pendant l’enregistrement
Copier un disque DVD sur une vidéocassette
Содержание C506DVC
Страница 1: ...DVD and VCR Combination User s Manual C506DVC ...
Страница 28: ...Guide de l utilisateur C506DVC Lecteur DVD avec magnétoscope ...
Страница 55: ......