5-12 Cisco 7010 Hardware Installation and Maintenance
Installing and Configuring Processor Modules
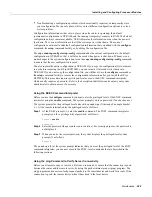
If the microcode version in the display is different from the ROM version you just installed, use the
microcode card-type rom configuration command to change the configuration so the system loads
the ROM microcode for that processor type. Verify that the new microcode version is loading from
ROM and, if necessary, correct the configuration with the following steps:
Step 1
Verify that the system boots correctly. If the enabled LED on the SP (or SSP) or interface
processor you just reinstalled does not go on, repeat the steps in the preceding section,
“Replacing the ROM.”
•
Ensure that the ROM is installed with the notch at the correct end and that none of the
pins are bent.
•
If a pin is bent, remove the ROM, straighten the pin, and try the installation again.
•
If a ROM is installed backwards and power is turned ON, the ROM is damaged and
needs replacement.
Step 2
Check the state of the interfaces with the LEDs and verify that the interfaces return to the
same state they were in before you removed the interface processor (some may have been
shutdown).
Step 3
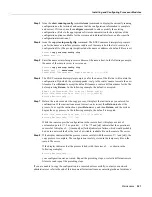
Enter the show controller cxbus command to display the status of the SP (or SSP) and all
interface processors.
Step 4
If the display indicates that the new ROM image is the currently running microcode
version, your installation is complete. If a different (older) version is displayed, the
microcode is still loading from a Flash memory file. Proceed with the following steps to
configure the ROM microcode to load.
Step 5
Enable the privileged level of the EXEC command interpreter (which usually requires a
password) and enter the configuration mode from the terminal:
7010> enable
Password:
7010# configure terminal
Step 6
Enter the command microcode card-type rom to negate the instruction to load from Flash
memory, then issue the microcode reload command to reload the microcode with the new
instructions. The following example shows the command used to load EIP microcode from
ROM:
microcode eip rom
microcode reload
Step 7
Press Ctrl-Z (^Z) to return to the system prompt, and save (write) the new configuration
to memory with the write terminal command.
^Z
write terminal
[OK]
Step 8
Enter the show controller cxbus command again. The first line of the display for the
interface processor (and for all interface processors of the same type) should show the new
ROM microcode version.
The replacement procedure is complete. If the Enabled indicator does not go on after a second
installation attempt, or if any of the interfaces fail to return to their previous state, refer to the
troubleshooting procedures in the chapter “Troubleshooting the Installation.”
Содержание TelePresence Server 7010
Страница 10: ...x Cisco 7010 Hardware Installation and Maintenence ...
Страница 14: ...iv Cisco 7010 Hardware Installation and Maintenance Document Conventions ...
Страница 112: ...2 52 Cisco 7010 Hardware Installation and Maintenance Initial Configuration Information Page ________ ...
Страница 148: ...3 36 Cisco 7010 Hardware Installation and Maintenance Using the Flash Memory Card ...
Страница 158: ...4 10 Cisco 7010 Hardware Installation and Maintenance Troubleshooting the Processor Subsystem ...
Страница 242: ...5 84 Cisco 7010 Hardware Installation and Maintenance Replacing Internal Components ...
Страница 258: ...A 16 Cisco 7010 Hardware Installation and Maintenance MIP Interface Cable Pinouts ...
Страница 270: ...B 12 Cisco 7010 Hardware Installation and Maintenance Interface Processor LEDs ...
Страница 274: ...C 4 Cisco 7000 Hardware Installation and Maintenance ...
Страница 287: ...Index 13 ...

