Maintenance 5-11
Installing and Configuring Processor Modules
Step 5
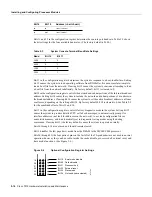
Locate the microcode component; refer to the appropriate SP (or SSP) or interface
processor illustrations in the chapter “Product Overview” for socket locations. The socket
designators for each interface processor follow:
•
AIP: U111
•
CIP: U37 (contains the microcode boot image; the entire microcode image is in the
software/microcode bundle)
•
EIP: U101
•
FEIP: U37
•
FIP: U23
•
FSIP: U81
•
HIP: U133
•
MIP: U41
•
SP: U173
•
SSP: U231
•
TRIP: U41
Step 6
Note the orientation of the notch on the existing microcode component so that you can
install the new component with the same orientation.
Step 7
Use a chip or PLCC-type extractor (for the FSIP) to remove the microcode component from
the socket. Place the removed component on antistatic foam or into an antistatic bag.
Step 8
Insert the new microcode component in the socket with the notched end in the same
orientation as the previous component.
Step 9
Follow the steps in the section “Installing CxBus Interface Processors” in this chapter, to
replace the interface processor, SP, or SSP.
Step 10
Verify that the enabled LED on the interface processor, SP, or SSP goes on and remains on.
If it does not, eject the board and reinstall it in the slot. Turn OFF power before ejecting the
SP or SSP.
Step 11
Connect any network interface cables that were removed.
Step 12
If the system power is OFF, turn it back ON.
Verifying the Microcode Version
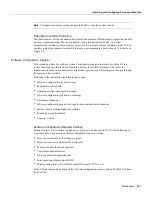
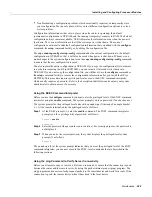
The system automatically reloads the microcode when you insert an interface processor online or
restart the system. The system default is to load the ROM microcode for all processor types.
However, because microcode upgrades are usually distributed as files to be stored and loaded from
Flash memory, the system may be configured to bypass the ROM image for a particular processor
type and load an image from a Flash memory file instead. (This can be true for any or all processor
types.) To determine whether the interface processor you just upgraded is loading the new ROM
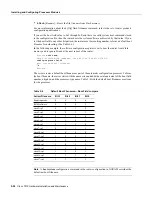
microcode or an image from Flash memory, issue the show controller cxbus command. The first
line of the status display for the SP (or SSP) and for each interface processor displays the currently
loaded and running microcode version for that particular processor type. The following example
shows that the EIP in slot 0 is running EIP Microcode Version 1.0:
7010# show cont cxbus
EIP 0, hardware version 5.1, microcode version 1.0
Interface 0 - Ethernet0/0, station addr 0000.0c02.d0ec (bia 0000.0c02.d0cc)
Содержание TelePresence Server 7010
Страница 10: ...x Cisco 7010 Hardware Installation and Maintenence ...
Страница 14: ...iv Cisco 7010 Hardware Installation and Maintenance Document Conventions ...
Страница 112: ...2 52 Cisco 7010 Hardware Installation and Maintenance Initial Configuration Information Page ________ ...
Страница 148: ...3 36 Cisco 7010 Hardware Installation and Maintenance Using the Flash Memory Card ...
Страница 158: ...4 10 Cisco 7010 Hardware Installation and Maintenance Troubleshooting the Processor Subsystem ...
Страница 242: ...5 84 Cisco 7010 Hardware Installation and Maintenance Replacing Internal Components ...
Страница 258: ...A 16 Cisco 7010 Hardware Installation and Maintenance MIP Interface Cable Pinouts ...
Страница 270: ...B 12 Cisco 7010 Hardware Installation and Maintenance Interface Processor LEDs ...
Страница 274: ...C 4 Cisco 7000 Hardware Installation and Maintenance ...
Страница 287: ...Index 13 ...

