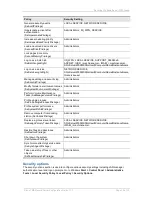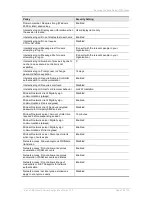
Securing Windows Server 2003 tasks
Cisco TMS Secure Server Configuration Guide 13.0
Page 10 of 34
Secure the SQL Server
SQL Server 2005 installs by default in a local-only configuration designed to reduce surface area.
These additional steps will further reduce exposure by lowering privileges and protocols.
Use Local Service User
SQL Server installs by default to run as the NETWORK SERVICE user. SQL Server also creates user
groups to simplify assigning permissions when SQL is installed. It will create the user group
SQLServer2005MSSQLUser$ComputerName$InstanceName. To reduce privileges of the user
running SQL, create a local Windows user to act as the service account for SQL Server with a strong
password and a username of your choice. The placeholder name sqlserviceuser will be referenced
through the remainder of this document to refer to this account.
1.
In the Start Menu, open Microsoft SQL Server 2005’ Program Group > Configuration Tools
> SQL Server Configuration Manager.
2.
Click SQL Server 2005 Services and double-click ‘SQL Server [InstanceName]’ to open the
properties.
3.
Select Log on as -> This account and enter the account information for sqlserviceuser.
4.
Click OK to save changes and restart the service.
Disable Network Protocols
In the SQL Server Configuration Manager.expand the SQL Server 2005 Network Configuration
tab and select ‘Protocols for [InstanceName]’. Disable all protocols except Shared Memory by right-
clicking on them and selecting Disable.
If changes are made you must restart the SQL Engine to have changes take effect.
Cisco TMS Service User Account
Create a Cisco TMS Service Account
Cisco TMS will install its services to run as the Local System account. To run at lowest possible
privileges, a local Windows account will be configured. Create a local Windows User to act as the
service account for Cisco TMS Services and the Cisco TMS website. Use a strong password and a
username of your choice. The placeholder name tmsserviceuser will be referenced through the
remainder of this document to refer to this account.
1.
In the Start menu, open Administrative Tools > Local Security Policy.
2.
Expand the Local Policy > User Rights Assignment in the tree navigator.
3.
Right- click Log on as a Service in the list to the right.
4.
Click the Add User or Group button and add the tmsserviceuser account by typing in this
name.
5.
Click Check Names.
6.
Click OK to save and add tmsserviceuser and OK to save changes to Local Security settings.
Assign file ACLs for Cisco TMS directories
Table 1 below lists the required ACLs for the Cisco TMS directories on the Cisco TMS server. When
editing these ACLs, remove any additional permissions not listed in the table except for inherited
permissions. Inherited permissions will be modified in a later section. Permissions added here are
described assuming inheritance is allowed on all child directories. Child directories with only inherited
permissions are not listed.
To set permissions to a folder in Windows Explorer:
1.
Right-click the folder, select Sharing and Security from the drop-down menu,
2.
Select the Security tab and set permissions as shown in the table below for each group/user.
Note: This step must be repeated after any future Cisco TMS installations or upgrades as the installer
will default these directories back to the default permissions.


