3-19
Cisco Physical Access 1125 Appliance User Guide
OL-20929-01
Chapter 3 Rack Mounting the Cisco PAM 1125 Appliance
Rack Mounting the Cisco PAM 1125 Appliance
Step 3
Hold the slide rail in desired rack mounting position, with the rail on the inside of the rack and the
brackets facing outward. At the rear of slide rail, press the rear bracket against the rear post of the rack
and secure the bracket to the rack with rack screws.
Step 4
Making certain that you selected the proper mounting holes on the front rail post (in other words, that
the rail is level) place the front bracket against the front post and secure the bracket to the rack with rack
screws.
Step 5
Fully extend the slide rail to its fully extended (locked) position. Press the Slide Extension Release
Levers to release the lock. Move the slide rail in and out throughout its entire range of motion and make
certain it does not bind.
If you notice some binding, recheck the mounting positions.
Step 6
Repeat Steps 2 through 5 for the right slide rail, ensuring that it is parallel and level with the left slide
rail.
Installing the 1125 Appliance into the Slide Rails
To install the Cisco PAM appliance into the slide rails, perform the following procedure:
Step 1
Extend both slide rails into the fully extended (locked) position.
Step 2
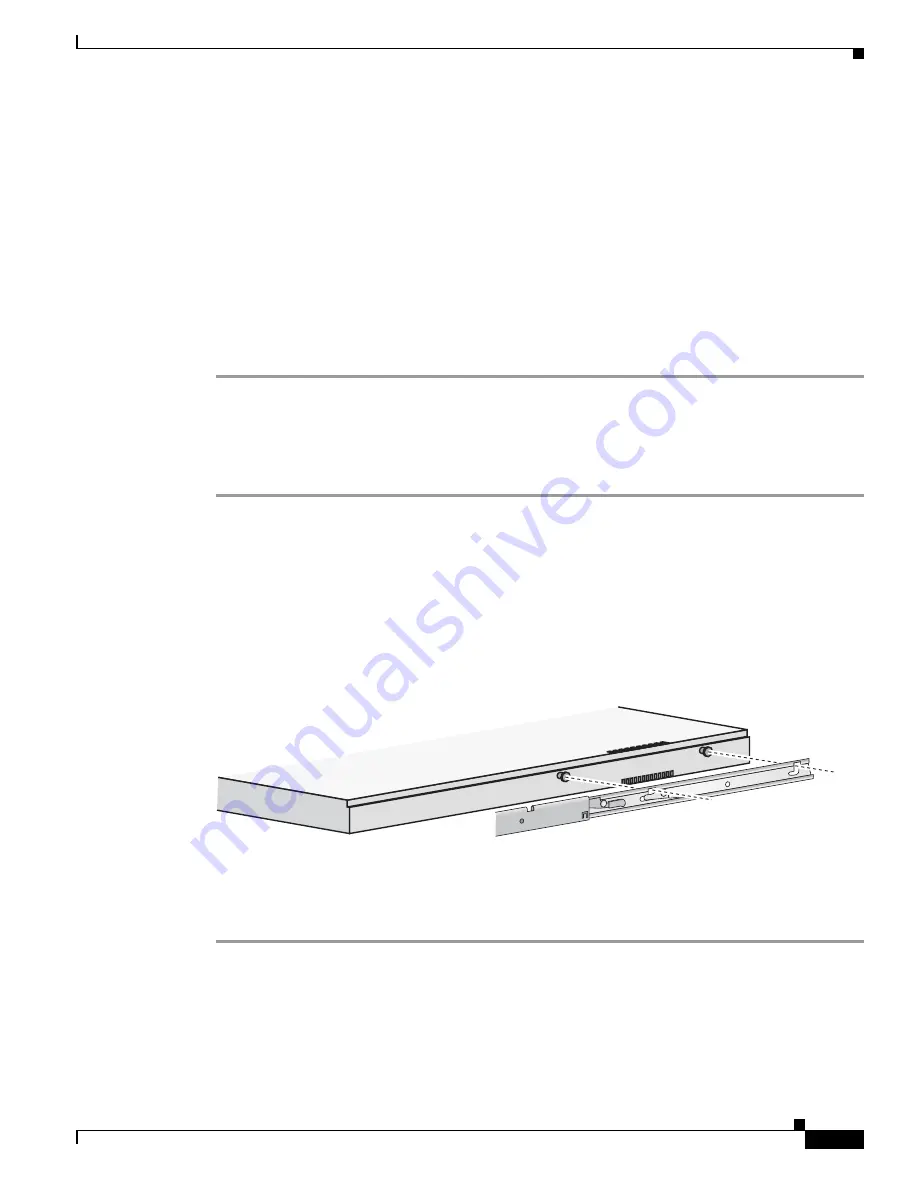
Align the mounting studs with the mounting channels on the slide rails (see
).
Step 3
Carefully place the component’s mounting studs in the mounting channels on the slide rails. Allow the
component mounting studs to fully seat in the mounting channels.
The Component Release Levers (one on each slide rail) pivot to lock when the studs are fully engaged
in the mounting channels and then to release the studs when you press the release. Ensure that the
Component Release Levers are in locked position.
Figure 3-18
Aligning the Slide Rail with the Mounting Studs
231493
Step 4
Press and hold the left and right Slide Extension Release Levers and slowly slide the component and
slide rails into the fully retracted position.


