


cm] above the installed chassis, use two persons to align the back side of the new chassis to the opening between
the two front posts of the rack and push the chassis into the installed chassis until the chassis mounting brackets
come in contact with the rack mounting rails.
• If you are lifting the chassis manually, use two or more persons to move the back end of the chassis through the
front posts until the chassis mounting brackets come in contact with the mounting rails on the rack, lift the chassis
to the lowest possible RU for it on the rack, and align the screw holes in the chassis mounting brackets to the rack
mounting rails.
Use two persons to lift the chassis by using the handle on each side of the chassis. Do not use the handles on
any of the modules installed on the chassis to lift or move the chassis—these handles are for only removing or
installing the modules.
Caution
Step 3
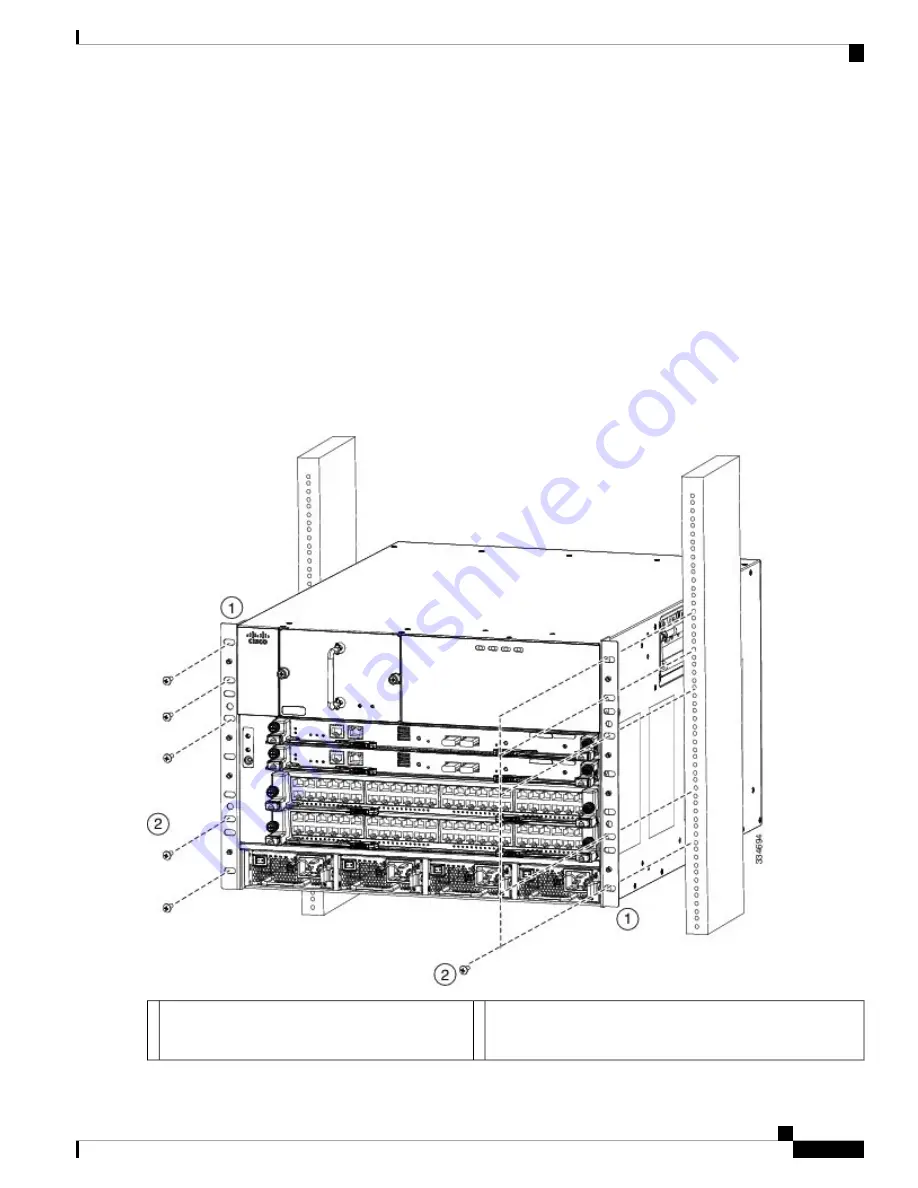
Use five M6 x 19 mm screws (or 12-24 x 3/4 inch screws) to fasten each side of the chassis to the rack. Tighten each of
the 10 screws to 40 in. lbs (4.5 N.m) (see
Figure 2: Mounting the Cisco Nexus 7004 Chassis on a Rack, on page 7
).
Figure 2: Mounting the Cisco Nexus 7004 Chassis on a Rack
Five M4 x 6 mm Phillips-head screws used to attach each
front-mount or center-mount bracket to a mounting rail (use a
total of 12 screws for two brackets).
2
Handles used to adjust the chassis placement or to
lift a chassis that weighs less than 120 pounds (54.4
kg).
1
Installing a Cisco Nexus 7004 Chassis
7
Installing a Cisco Nexus 7004 Chassis
Installing the Chassis in a Rack