Linksys E2500
Appendix A: Troubleshooting
33
Advanced Dual-Band N Router
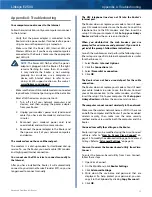
6 . Your web browser automatically opens . Enter the
username and password, and then click
OK
. (If you
copied the password to the Clipboard in step 4, press
Ctrl-V
to paste it into the
Password
field .)
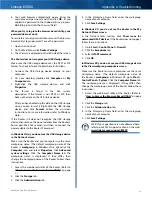
When you try to log into the browser-based utility, your
password does not work.
Your wireless security password also serves as the browser-
based utility’s login password . To see this password:
1 . Open Cisco Connect .
2 . On the Main Menu, click
Router Settings
.
3 . The
Password
is displayed on the left side of the screen .
The Router does not recognize your USB storage device.
Make sure the USB storage device uses the NTFS or FAT
format . To check its format, follow these instructions:
1 . Connect the USB storage device directly to your
computer .
2 . On your desktop, double-click
Computer
or
My
Computer
icon .
3 . Right-click the USB storage device, and click
Properties
.
4 . The format is listed in the File system
description . If the format is not NTFS or FAT, then
back up the data on the USB storage device .
After you have backed up the data on the USB storage
drive, you can format it . Right-click the USB storage
device, and click
Format
. Follow the on-screen
instructions . For more information, refer to Windows
Help .
If the Router still does not recognize the USB storage
device, then remove the power adapter from the Router’s
Power port . Wait five seconds, and then re-connect the
power adapter to the Router’s Power port .
In Windows Vista, you do not see the USB storage device
in the
Network
screen.
Make sure the Router and your computer use the same
workgroup name . (The default workgroup name of the
Router is
workgroup
. In Windows Vista, right-click the
Computer
icon and select
Properties
. Click
Advanced
system settings
. Click the
Computer Name
tab . The
workgroup name is displayed .) If they differ, then
change the workgroup name of the Router . Follow these
instructions:
1 . Access the web-based utility of the Router . (Refer to
“
How to Access the Browser-Based Utility
” on page
1 .)
2 . Click the
Storage
tab .
3 . Click the
Administration
tab .
4 . In the
Workgroup Name
field, enter the workgroup
name of your computer .
5 . Click
Save Settings
.
In Windows XP, you do not see the Router in the
My
Network Places
screen.
In the
Network Tasks
section, click
Show icons for
networked UPnP devices
. If the Router does not appear,
follow these instructions:
1 . Go to
Start > Control Panel > Firewall
.
2 . Click the
Exceptions
tab .
3 . Select
UPnP Framework
.
4 . Click
OK
.
In Windows XP, you do not see your USB storage device
in the
View workgroup computers
screen.
Make sure the Router and your computer use the same
workgroup name . (The default workgroup name of
the Router is
workgroup
. In Windows XP, go to
Start >
Control Panel > System
. Click the
Computer Name
tab .
The workgroup name is displayed .) If they differ, then
change the workgroup name of the Router . Follow these
instructions:
1 . Access the web-based utility of the Router . (Refer to
“
How to Access the Browser-Based Utility
” on page
1 .)
2 . Click the
Storage
tab .
3 . Click the
Administration
tab .
4 . In the
Workgroup Name
field, enter the workgroup
name of your computer .
5 . Click
Save Settings
.
WEB:
If your questions are not addressed here,
refer to our E2500 support section on the web,
www.linksys.com/support/E2500
Содержание LINKSYS E2500V
Страница 1: ...Linksys E2500 Advanced Dual Band N Router User Guide ...
Страница 3: ...Linksys E2500 Table of Contents ii Advanced Dual Band N Router ...
Страница 30: ...27 Advanced Dual Band N Router Linksys E2500 ...
Страница 31: ...28 Advanced Dual Band N Router Linksys E2500 ...
Страница 32: ...29 Advanced Dual Band N Router Linksys E2500 ...
Страница 33: ...30 Advanced Dual Band N Router Linksys E2500 ...

