A-13
Cisco Firepower Management Center 750, 1500, 2000, 3500, and 4000 Hardware Installation Guide
Appendix A Memory Upgrade Instructions for Firepower Management Centers
Replacing the DIMMs
Step 2
Locate the DIMMs on the system board. See
depending on
your FireSIGHT Management Center model, for the location of the DIMM connectors.
Step 3
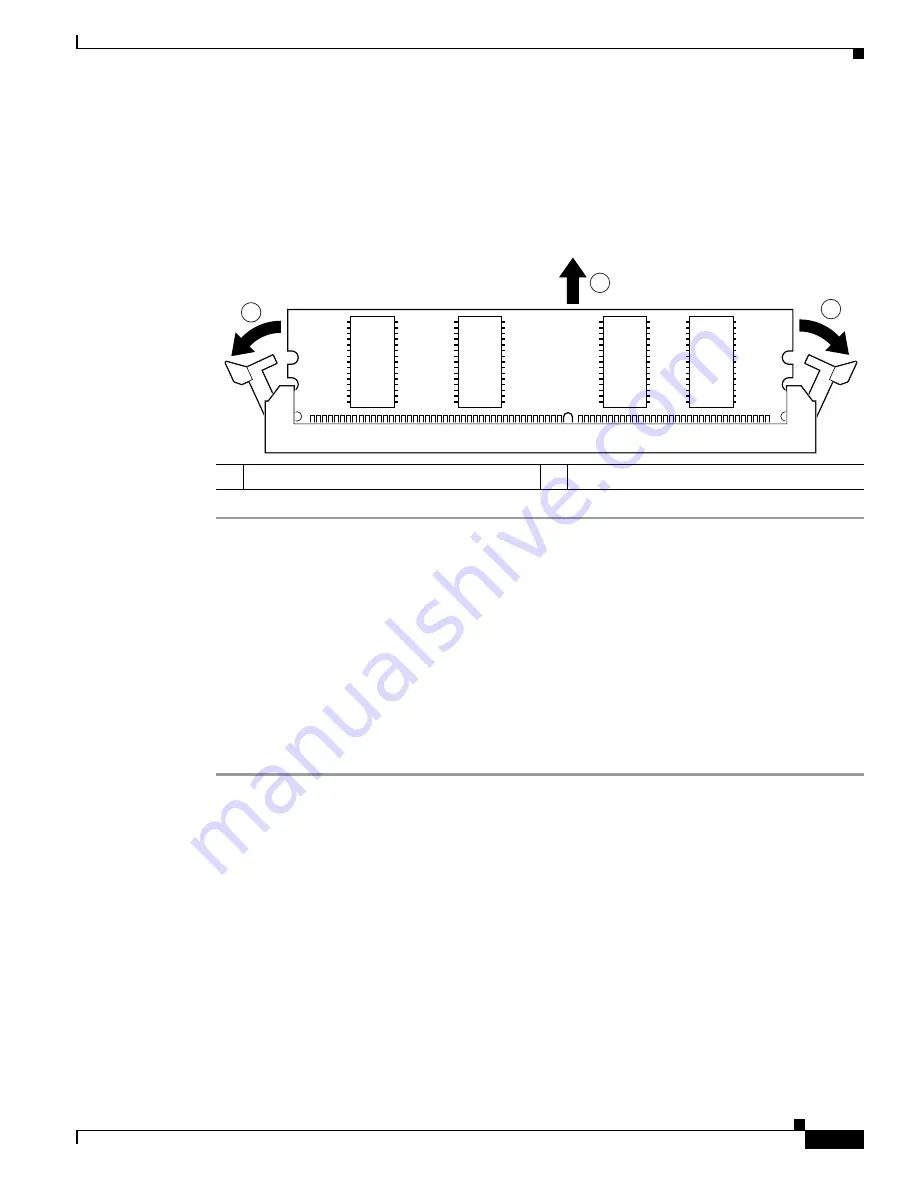
Pull the latches away from the DIMM at both ends; this lifts the DIMM slightly. Then lift the DIMM out
of the connector. See
.
Figure A-12
Removing a DIMM
What to Do Next:
•
Place any removed DIMMs in anti-static bags to protect them from ESD damage. Observe
applicable Federal, state, and local regulations regarding the disposal of these components.
•
Install the new DIMMs from your memory upgrade kit in your FireSIGHT Management Center as
described in the
“Installing DIMMs in Firepower Management Centers” section on page A-13
Installing DIMMs in Firepower Management Centers
To install a DIMM in a Firepower MC750 (Rev. 1 and 2), MC1500, and MC3500:
Step 1
Locate the DIMMs on the system board:
•
Refer to
for the location of the DIMM connectors on the MC750 (Rev. 1).
•
Refer to
for the location of the DIMM connectors on the MC750 (Rev. 2).
•
Refer to
for the location of the DIMM connectors on the MC1500 and MC3500.
•
Refer to
for memory upgrade configurations for each Management Center model.
Step 2
Make sure that both latches on the DIMM connector are in the open position.
Step 3
Orient the DIMM so that the polarization notch lines up with the polarization key on the connector. See
.
Step 4
Align the DIMM carefully into the connector.
Step 5
Carefully and firmly press the DIMM into the connector until the latches close onto the DIMM. Make
sure that both latches rotate to the closed position against the DIMM. See
.
1
Open the latches
2
Lift DIMM out
103466
1
1
2


