2
Connecting your Gateway
A. Disconnect your current modem from your cable outlet or splitter and from
the electrical outlet.
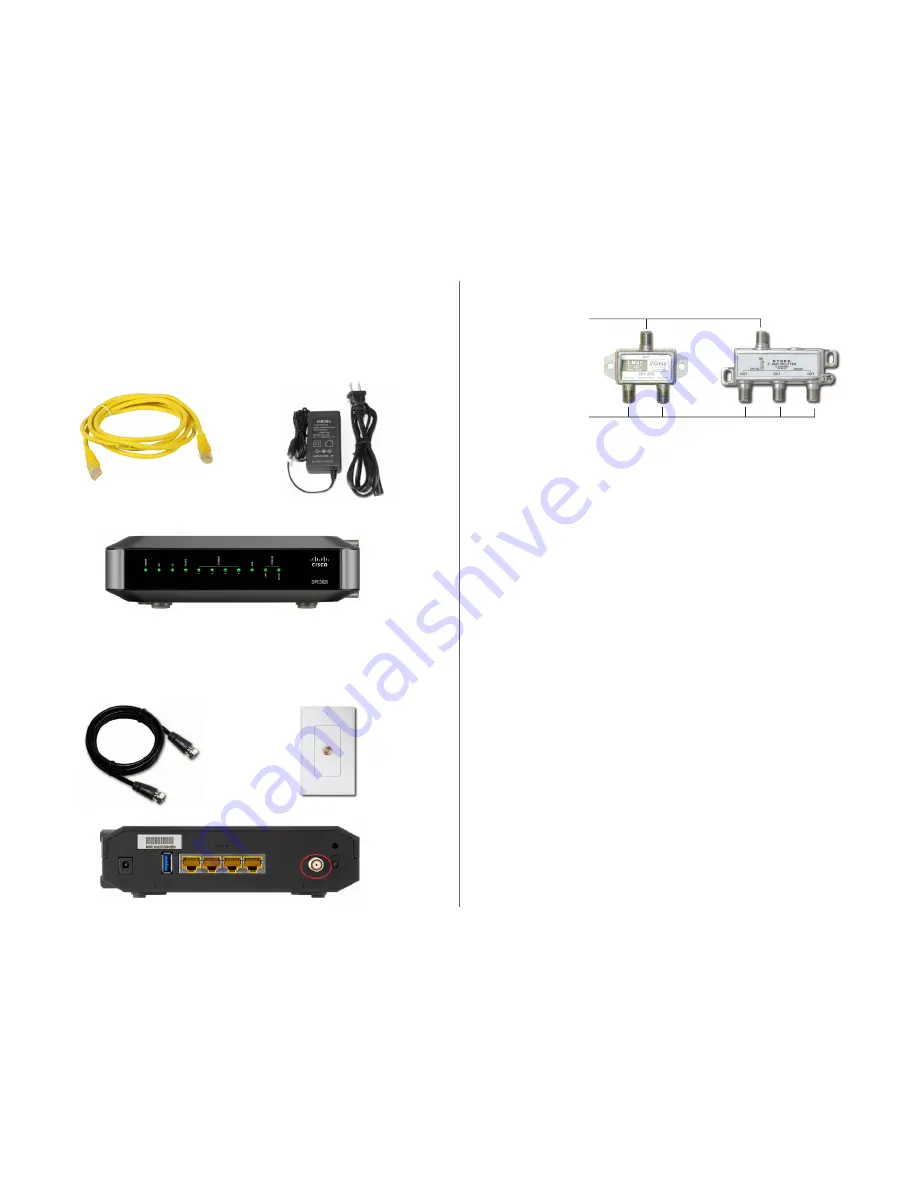
B. Unpack your kit. You should have:
C. Turn on your computer.
D. Now connect the existing coaxial cable coming from the wall to the cable connector
on the back of the gateway (if you have a splitter see below*).
*If you have a splitter, you will have to connect your coaxial cable using the
instructions below:
E. Hand-tighten each connector to avoid damage.
F. Plug the power cord adapter to the power connector on the back of the gateway
and into the electrical outlet. This will turn the gateway on. You can leave the
gateway plugged in when not in use.
NOTE: Do not plug any devices into your gateway until you complete the next step.
G. The first time your gateway is connected and powered up it needs to download
software to enable the wireless functionality. This process takes approximately
ten minutes. After the download is complete, your gateway will reboot itself.
The gateway will be ready for use when the
POWER, DS, US
and
ONLINE
lights
on the front panel of the gateway stop blinking and remain on.
Establishing Wireless Connectivity
There are two methods you can use to establish wireless network connectivity; an initial
Ethernet connection (METHOD A) or by using the WiFi Protected Setup (WPS) method via
the button located on the back of the gateway (METHOD B). If you know that your network
adapter supports WPS you can use the procedure outlined in METHOD B otherwise
please follow the instructions for METHOD A.
For either method you will need to know your network SSID. Your default SSID is NWT
plus the last four digits of your Northwestel Account Number. i.e. NWT1846.
Ethernet Cable
Power Supply
Coaxial Cable
Coaxial Plate on Wall
Cisco DPC3825 Wireless Gateway
Cable Connection
Make sure that the cable coming from the cable outlet on your wall is plugged
into input port of the splitter and the cable going to the modem is hooked up
to the output port.
Input Port
Output Ports


