background image

Wall Mounting a Switch

You can mount the switches on a wall, using wall studs or to a firmly attached plywood mounting backboard.

Read these instructions carefully before beginning installation. Failure to use the correct hardware or to follow
the correct procedures could result in a hazardous situation to people and damage to the system.

Caution

Do not wall-mount the switch with its front panel facing up. Following safety regulations, wallmount the
switch with its front panel facing down or to the side to prevent airflow restriction and to provide easier access
to the cables.

Caution

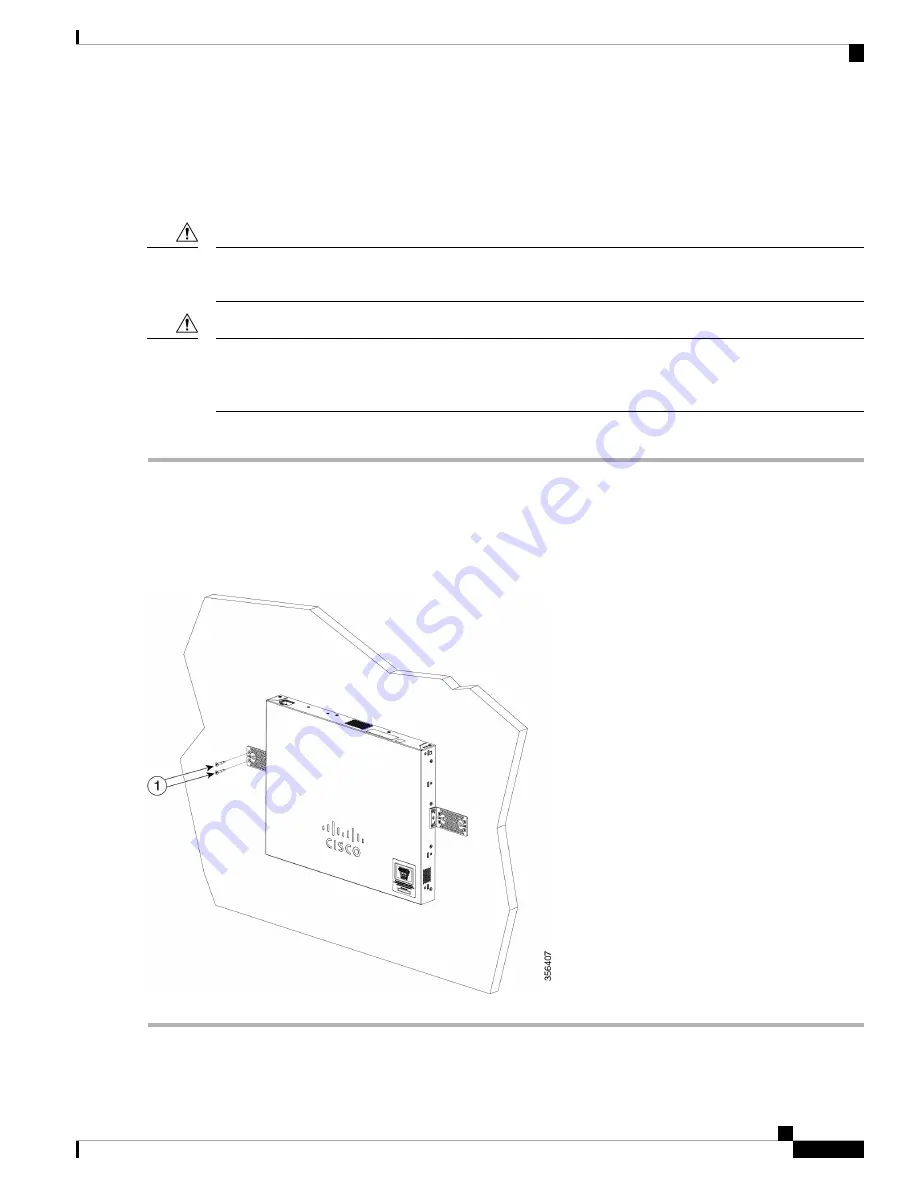
To wall-mount a 24-port switch using brackets:

Step 1

Attach a 19-inch bracket to one side of the switch.

Step 2

Repeat the previous step to attach the other bracket to the opposite side of the switch.

Step 3

After the brackets are securely attached, mount the switch with the front panel facing down. Make sure that the switch
is attached securely to wall studs or to a firmly attached plywood-mounting backboard. Wall-mounting a 24-port switch.

Wall-mounting a 24-port

Get To Know Your Switch

3

Get To Know Your Switch

Wall Mounting a Switch

Содержание CBS 250 Series

Страница 1: ...c routing features far beyond those of an unmanaged or consumer grade switch at a lower cost than fully managed switches With an easy to use web user interface Smart Network Application and Power over Ethernet Plus capability you can deploy and configure a complete business network in minutes Before You Begin Before you begin installing your device ensure that the following items are available RJ ...

Страница 2: ...5 mm high For stability load the rack from the bottom to the top with the heaviest devices on the bottom A top heavy rack is likely to be unstable and might tip over Caution To install the switch into a 19 inch standard chassis Step 1 Place one of the supplied brackets on the side of the switch so that the four holes of the brackets align to the screw holes and then use the four supplied screws to...

Страница 3: ...its front panel facing down or to the side to prevent airflow restriction and to provide easier access to the cables Caution To wall mount a 24 port switch using brackets Step 1 Attach a 19 inch bracket to one side of the switch Step 2 Repeat the previous step to attach the other bracket to the opposite side of the switch Step 3 After the brackets are securely attached mount the switch with the fr...

Страница 4: ...mplate Step 4 Attach the screw template to the wall Step 5 Use a 0 144 inch 3 7 mm or a 27 drill bit to drill a 1 2 inch 12 7 mm hole in the two screw template slots Step 6 Insert two screws in the slots on the screw template and tighten them until they touch the top of the screw template Installing the mounting screws on the wall Figure 3 Installing the mounting screws on the wall Step 7 Remove t...

Страница 5: ...ment The switch is to be connected only to PoE networks without routing to the outside plant Danger Table 1 Switches with Power Over Ethernet PoE PSE Support PoE PD Chipset Type Description SKU Name AF AT 1 69208M 8 Port Gigabit PoE Smart Switch CBS250 8PP D AF AT TPS2388 8 Port Gigabit PoE Smart Switch CBS250 8PP E 2G AF AT TPS2388 8 Port Gigabit PoE Smart Switch CBS250 8P E 2G Get To Know Your S...

Страница 6: ...ching powered devices PD These devices include VoIP phones IP cameras and wireless access points The PoE switches can detect and supply power to pre standard legacy PoE PD Due to the PoE legacy support it is possible that a PoE switch acting as a PSE may mistakenly detect and supply power to an attaching PSE including other PoE switches as a legacy PD Even though PoE switches are PSE and as such s...

Страница 7: ...dules so that the switch can link to other switches These ports are also commonly referred to as mini 10GigaBit Interface Converter ports The term SFP is used in this guide The SFP ports are compatible with the following Cisco SFP 1G optical modules MGBSX1 MGBLX1 MGBLH1 MGBT1 as well as other brands The SFP ports are compatible with the following Cisco SFP 1G optical modules MGBSX1 MGBLX1 MGBLH1 M...

Страница 8: ...a member unit is removed from the stack its system LED will continue to flash according to above definition The following are per port LEDs LINK ACT Green Located on the left of each port The LED lights steady when a link between the corresponding port and another device is detected and flashes when the port is passing traffic SFP if present Green Located on the right of a 10G port The LED lights ...

Страница 9: ...is using into your browser to use the web based interface If you are managing the switch through a console port connection the link is retained To configure the switch using the web based interface Step 1 Power on the computer and your switch Step 2 Connect the computer to any network port Step 3 Set up the IP configuration on your computer a If the switch is using the default static IP address of...

Страница 10: ...e port proceed with the following steps Step 1 Connect a computer to the switch console port using a Cisco console cable purchased separately or a cable with mini USB connector Step 2 Start a console port utility such as HyperTerminal on the computer Step 3 Configure the utility with the following parameters 115200 bits per second 8 data bits no parity 1 stop bit no flow control Step 4 Enter a use...

Страница 11: ...category and repeat this process until you see the desired page and then select the page to display it in the main window Basic or Advanced Display Mode The product supports many features and therefore the WEB GUI includes hundreds of configuration and display pages These pages are divided into the following display modes Basic Basic subset of configuration options are available If you are missing...

Страница 12: ...Get To Know Your Switch 12 Get To Know Your Switch Basic or Advanced Display Mode ...

Отзывы: