7-3
Cisco ASA Series Firewall CLI Configuration Guide
Chapter 7 Inspection of Basic Internet Protocols
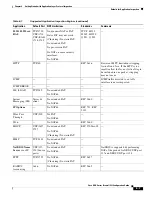
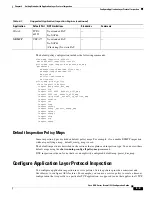
DNS Inspection
Procedure
Step 1
Configure DNS Inspection Policy Map, page 7-3
Step 2
Configure the DNS Inspection Service Policy, page 7-6
.
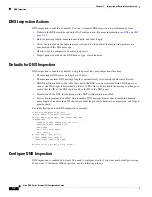
Configure DNS Inspection Policy Map
You can create a DNS inspection policy map to customize DNS inspection actions if the default
inspection behavior is not sufficient for your network.
When defining traffic matching criteria, you can either create a class map or include the match
statements directly in the policy map. The following procedure explains both approaches.
Before You Begin
Some traffic matching options use regular expressions for matching purposes. If you intend to use one
of those techniques, first create the regular expression or regular expression class map.
Procedure
Step 1
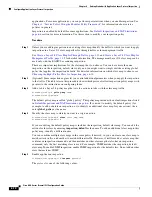
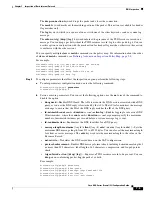
(Optional) Create a DNS inspection class map by performing the following steps.
A class map groups multiple traffic matches.You can alternatively identify
match
commands directly in
the policy map. The difference between creating a class map and defining the traffic match directly in
the inspection policy map is that the class map lets you create more complex match criteria, and you can
reuse class maps.
To specify traffic that should not match the class map, use the
match not
command. For example, if the
match not
command specifies the string “example.com,” then any traffic that includes “example.com”
does not match the class map.
For the traffic that you identify in this class map, you specify actions to take on the traffic in the
inspection policy map.
If you want to perform different actions for each
match
command, you should identify the traffic directly
in the policy map.
a.
Create the class map by entering the following command:
hostname(config)#
class-map type
inspect dns
[
match-all
|
match-any
]
class_map_name
hostname(config-cmap)#
Where
the class_map_name
is the name of the class map. The
match-all
keyword is the default, and
specifies that traffic must match all criteria to match the class map. The match-any keyword
specifies that the traffic matches the class map if it matches at least one
match
statement. The CLI
enters class-map configuration mode, where you can enter one or more
match
commands.
b.
(Optional) To add a description to the class map, enter the following command:
hostname(config-cmap)#
description
string
Where
string
is the description of the class map (up to 200 characters).
c.
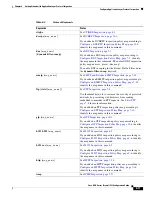
Specify the traffic on which you want to perform actions using one of the following
match
commands. If you use a
match not
command, then any traffic that does not match the criterion in
the
match not
command has the action applied.
Содержание ASA 5512-X
Страница 5: ...P A R T 1 Service Policies and Access Control ...
Страница 6: ......
Страница 50: ...3 14 Cisco ASA Series Firewall CLI Configuration Guide Chapter 3 Access Rules History for Access Rules ...
Страница 51: ...P A R T 2 Network Address Translation ...
Страница 52: ......
Страница 126: ...5 28 Cisco ASA Series Firewall CLI Configuration Guide Chapter 5 NAT Examples and Reference DNS and NAT ...
Страница 127: ...P A R T 3 Application Inspection ...
Страница 128: ......
Страница 255: ...P A R T 4 Connection Settings and Quality of Service ...
Страница 256: ......
Страница 288: ...12 14 Cisco ASA Series Firewall CLI Configuration Guide Chapter 12 Quality of Service History for QoS ...
Страница 303: ...P A R T 5 Advanced Network Protection ...
Страница 304: ......
Страница 339: ...P A R T 6 ASA Modules ...
Страница 340: ......
Страница 398: ...17 28 Cisco ASA Series Firewall CLI Configuration Guide Chapter 17 ASA CX Module History for the ASA CX Module ...

