background image

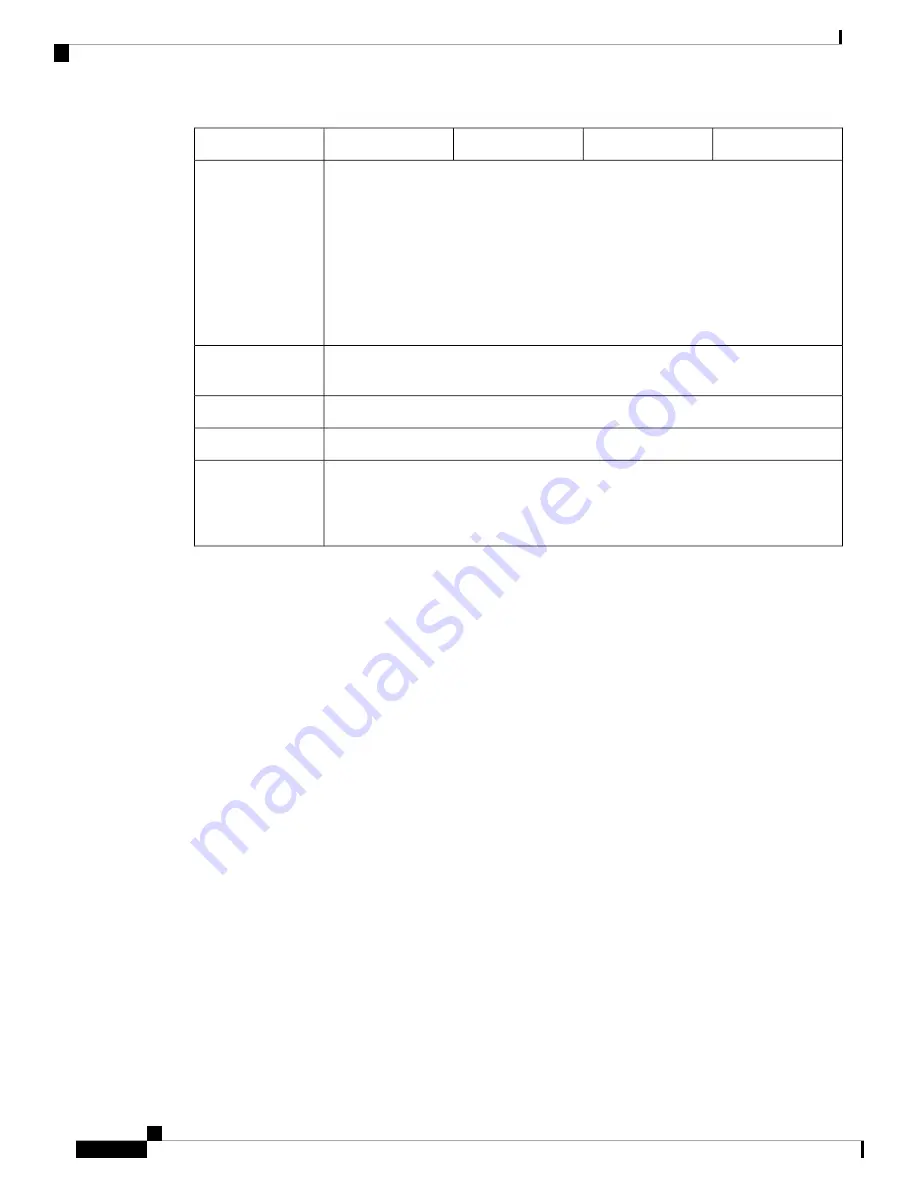
3140

3130

3120

3110

Feature

Two Nonvolatile Memory Express (NVMe) SSD slots

Ships with one 900-GB SSD installed in slot 1. You can order a second RAID1 SSD
for slot 2. The RAID1 SSD is preconfigured for RAID1.

Slot 2 is reserved for the optional software RAID1 configuration.

Note

Hot-swapping is supported with 2 SSDs. However, you must enter a CLI
command to remove one disk from the RAID before hot swapping. See the
CLI configuration guide for your software for the procedure.

Note

Storage

Displays the serial number and a QR code that points to the low touch provisioning
(LTP) guide.

Pullout asset card

On rear panel

Grounding lug

On rear panel

Power switch

Resets the system to factory default without requiring serial console access

The reset button is recessed. Press with a pin and hold longer than 5 seconds
to set the system back to the factory default.

Note

Reset button

Deployment Options

Here are some examples of how you can deploy the Secure Firewall 3100:

• As a firewall:

• At the enterprise internet edge in a redundant configuration

• At branch offices in either a high availability pair or standalone

• At data centers in a high availability pair or clustered, which serves the needs of smaller enterprises

• As a device that provides additional application control, URL filtering, or IPS/threat-centered capabilities:

• Behind an enterprise internet edge firewall in an inline configuration or as a standalone (requires

hardware fail-open network module support)

• Deployed passively off a SPAN port on a switch or a tap on a network, or standalone

• As a branch native SD-WAN solution that offers remote deployment and is managed over a 4G LTE

• As a VPN device:

• For remote access VPN

• For site-to-site VPN

Cisco Secure Firewall 3110, 3120, 3130, and 3140 Hardware Installation Guide

4

Overview

Deployment Options

Содержание 3110

Страница 1: ...140 Hardware Installation Guide First Published 2022 04 06 Last Modified 2022 06 28 Americas Headquarters Cisco Systems Inc 170 West Tasman Drive San Jose CA 95134 1706 USA http www cisco com Tel 408 526 4000 800 553 NETS 6387 Fax 408 527 0883 ...

Страница 2: ...CISCO OR ITS SUPPLIERS HAVE BEEN ADVISED OF THE POSSIBILITY OF SUCH DAMAGES Any Internet Protocol IP addresses and phone numbers used in this document are not intended to be actual addresses and phone numbers Any examples command display output network topology diagrams and other figures included in the document are shown for illustrative purposes only Any use of actual IP addresses or phone numbe...

Страница 3: ...ardware Bypass 20 1 Gb SX 10 Gb SR 10 Gb LR 25 Gb SR 25 Gb LR Network Module with Hardware Bypass 22 Power Supply Module 24 Dual Fan Modules 26 SSDs 27 Supported SFP SFP QSFP Transceivers 28 Hardware Specifications 32 Product ID Numbers 33 Power Cord Specifications 35 Installation Preparation 45 C H A P T E R 2 Installation Warnings 45 Safety Recommendations 47 Maintain Safety with Electricity 48 ...

Страница 4: ...assis Using Slide Rails 54 Ground the Chassis 61 Installation Maintenance and Upgrade 65 C H A P T E R 4 Install Remove and Replace the Network Module 65 Remove and Replace the SSD 67 Remove and Replace the Dual Fan Module 70 Remove and Replace the Power Supply Module 71 Connect the DC Power Supply Module 74 Secure the Power Cord on the Power Supply Module 77 Cisco Secure Firewall 3110 3120 3130 a...

Страница 5: ...cations on page 32 Product ID Numbers on page 33 Power Cord Specifications on page 35 Features The Cisco Secure Firewall 3100 is a standalone modular security services platform that includes the Secure Firewall 3110 3120 3130 and 3140 See Product ID Numbers on page 33 for a list of the product IDs PIDs associated with the 3100 series The Secure Firewall 3100 supports Cisco Firepower Threat Defense...

Страница 6: ...52 AMD 7282 AMD 7272 Processor 32 24 16 12 Core count 2 35 GHz 2 3 GHz 2 8 GHz 2 9 GHz Core clock 4 x 64 GB 4 x 32 GB 2 x 64 GB 2 x 32 GB System memory One 1 10 Gb small form factor pluggable SFP port Management port One RJ 45 serial port Console port USB 3 1 Type A 900 mA port USB port 8 SFP fixed ports and 8 copper RJ 45 ports Named Ethernet 1 1 through 1 16 Network ports Eight 1 10 25 Gb SFP po...

Страница 7: ... 10 Gb SFP SR multimode hardware bypass FPR3K XNM 6X10SRF 6 port 10 Gb SFP LR single mode hardware bypass FPR3K XNM 6X10LRF 6 port 25 Gb SFP SR multimode hardware bypass FPR3K XNM 6X25SRF 6 port 25 Gb SFP LR single mode hardware bypass FPR3K XNM 6X25LRF 8 port 10 100 1000Base T hardware bypass FPR3K XNM 8X1GF Network modules Two power supply slots Ships with two 400 W AC power supply modules Hot s...

Страница 8: ... 5 seconds to set the system back to the factory default Note Reset button Deployment Options Here are some examples of how you can deploy the Secure Firewall 3100 As a firewall At the enterprise internet edge in a redundant configuration At branch offices in either a high availability pair or standalone At data centers in a high availability pair or clustered which serves the needs of smaller ent...

Страница 9: ... are two sets of four screws that you can use to secure the chassis to your rack Chose the screws that fit your rack Note Figure 2 Secure Firewall 3100 Package Contents Console cable RJ 45 to DB 9 part number 72 3383 01 2 Secure Firewall 3100 chassis 1 SFP transceiver Optional in package if ordered 4 One or two power cords country specific See Power Cord Specifications on page 35 for a list of sup...

Страница 10: ...ackage if ordered 7 Two power supply module tie wraps and clamps part number 52 100162 01 10 Cisco Secure Firewall 3100 This document has a URL pointing to the hardware installation guide a URL pointing the regulatory and safety guide and a QR code and URL pointing to the Getting Started Guide 9 Serial Number and QR Codes The pullout asset card on the front panel of your Secure Firewall 3100 chass...

Страница 11: ...e shows an example compliance label found on the bottom of the chassis and the pullout asset card found on the front panel of the chassis Cisco Secure Firewall 3110 3120 3130 and 3140 Hardware Installation Guide 7 Overview Serial Number and QR Codes ...

Страница 12: ...ure Firewall 3100 Getting Started Guide 4 QR code pointing to the LTP document 3 Front Panel The following figure shows the front panel of the Secure Firewall 3100 See Front Panel LEDs on page 11 for a description of the LEDs Cisco Secure Firewall 3110 3120 3130 and 3140 Hardware Installation Guide 8 Overview Front Panel ...

Страница 13: ...s a 1 10 Gb fiber SFP port RJ 45 Console Port The Secure Firewall 3100 chassis has a standard RJ 45 console port You can use the CLI to configure your 3100 through the RJ 45 serial console port by using a terminal server or a terminal emulation program on a computer The RJ 45 8P8C port supports RS 232 signaling to an internal UART controller The console port does not have any hardware flow control...

Страница 14: ...ware bypass 6 port 10 Gb SFP LR single mode hardware bypass 6 port 25 Gb SFP SR multimode hardware bypass 6 port 25 Gb SFP LR single mode hardware bypass 8 port 10 100 1000Base T hardware bypass 4 port 40 Gb QSFP The 4 port 40 Gb and 8 port 25 Gb network modules are supported only on the 3130 and 3140 Note Factory Reset Button The Secure Firewall 3100 chassis has a recessed reset button that reset...

Страница 15: ... 25 Gb LR Network Module with Hardware Bypass on page 22 for more information about the network module See 10 100 1000Base T Network Module with Hardware Bypass on page 20 for more information about the network module See 40 Gb Network Module on page 17 for more information about the network module Front Panel LEDs The following figure shows the Secure Firewall 3100 front panel LEDs Figure 6 Secur...

Страница 16: ... is detected Amber No link or network failure 5 Alarm Status Off No alarms Amber Environmental error Green Status is ok 8 CDO Status Green flashing slowly twice in 5 seconds Cloud is connected Green and amber flashing Cloud connection failure Green Cloud is disconnected See the Easy Deployment Guide for 1000 2100 or 3100 Series Cisco Secure Firewalls for more information on LTP Note 7 System Statu...

Страница 17: ...The system is powering up before the BIOS boots This takes one to five seconds at most Green The system is fully powered up 12 SSD 2 Status Off The SSD is not present Green The SSD is present no activity Green flashing The SSD is active Amber The SSD has a problem or failure 11 Activity Status Role of a high availability pair Off The unit is not configured or enabled in a high availability pair Gr...

Страница 18: ...power supply module The 12 V main power is OFF When the switch is in the ON position the 12 V main power is turned on and the system boots Before you move the power switch to the OFF position use the shutdown commands so that the system can perform a graceful shutdown This may take several minutes to complete After the graceful shutdown is complete the console displays It is safe to power off now ...

Страница 19: ...thernet traffic per port and is supported only on the 3130 and 3140 The top ports are numbered from left to right Ethernet X 1 Ethernet X 3 Ethernet X 5 and Ethernet X 7 The bottom ports are numbered from left to right Ethernet X 2 Ethernet X 4 Ethernet X 6 and Ethernet X 8 see the figure below Up arrows are the top ports and down arrows are the bottom ports see the figure below This network modul...

Страница 20: ...nt the bottom ports Off No SFP Amber No link or network failure Green Link up Green flashing Network activity 12 Ethernet X 8 11 For More Information See 40 Gb Network Module on page 17 for a description of the 40 Gb network module See 1 Gb SX 10 Gb SR 10 Gb LR 25 Gb SR 25 Gb LR Network Module with Hardware Bypass on page 22 for a description of the 1 10 25 Gb network module Cisco Secure Firewall ...

Страница 21: ...hrough Ethernet X 4 See Supported SFP SFP QSFP Transceivers on page 28 for the list of Cisco supported transceivers Starting with FTD 7 2 and ASA 7 18 1 you can break the four 40 Gb ports into four 10 Gb ports using the supported breakout cables With the four port 40 Gb network module you now have 16 10 Gb interfaces The added interfaces are Ethernet 2 1 1 through Ethernet 2 1 4 The hardware and t...

Страница 22: ...nformation See 1 10 25 Gb Network Module on page 15 for a description of the 1 10 25 Gb network module See 1 Gb SX 10 Gb SR 10 Gb LR 25 Gb SR 25 Gb LR Network Module with Hardware Bypass on page 22 for a description of the 1 10 25 Gb network module See 10 100 1000Base T Network Module with Hardware Bypass on page 20 for a description of the 1 Gb network module See Hardware Bypass Network Modules o...

Страница 23: ...ime you may experience dropped connections Caution There are three configuration options for hardware bypass network modules Passive interfaces Connection to a single port For each network segment you want to monitor passively connect the cables to one interface This is how the nonhardware bypass network modules operate Inline interfaces Connection to any two like ports 10 Gb to 10 Gb for example ...

Страница 24: ...upport hot swapping if you are replacing a network module with the same type of network module You must first disable the network port and then reenable it after replacement If you replace the 10 100 1000Base T network module with another supported network module you must reboot the chassis so that the new network module is recognized See the configuration guide for your operating system for the d...

Страница 25: ...Ethernet X 3 and Ethernet X 4 Ports 3 and 4 are paired together to form a hardware bypass pair LED B2 applies to this paired port 3 Captive screw 6 Ethernet X 7 and Ethernet X 18 Ports 7 and 8 are paired together to form a hardware bypass pair LED B4 applies to this paired port 5 Handle 8 Power LED 7 Right Port LED Unlit No connection or port is not in use Green Link up Green flashing Network acti...

Страница 26: ...rm hardware bypass paired sets In hardware bypass mode data is not processed by the Secure Firewall 3100 but is routed to the paired port This network module has built in SPF transceivers Hot swapping and field replacement of transceivers is not supported The hardware and the system support hot swapping if you are replacing a network module with the same type of network module You must first disab...

Страница 27: ...e paired together to form a hardware bypass pair 3 Ethernet X 11 top port Ethernet X 12 bottom port Ports 11 and 12 are paired together to form a hardware bypass pair 6 Ethernet X 9 top port Ethernet X 10 bottom port Ports 9 and 10 are paired together to form a hardware bypass pair 5 Captive screw 8 Bypass LEDs B1 through B3 Off Bypass mode is disabled Green Port is in standby mode Amber flashing ...

Страница 28: ...n is available The 3110 and 3120 ship with one AC power supply you can order two and the 3130 and 3140 ship with two AC power supplies You can also install DC power supply modules instead of AC power Facing the back of the chassis the power supply modules are numbered left to right PSU1 and PSU2 The power supply module is hot swappable See Product ID Numbers on page 33 for a list of the PIDs assoc...

Страница 29: ...cy 85 at 50 load Efficiency 1 1 redundancy with dual power supply modules Redundancy DC Power Supply The power supplies can supply up to 800 W power across the input voltage range The load is shared when both power supply modules are plugged in and running at the same time The system does not consume more than the capacity of one power supply module so it always operate in full redundancy mode whe...

Страница 30: ...failing fan or over current Amber Fault detected power supply not working properly Includes over voltage over current over temperature and fan failure 1 For More Information See Remove and Replace the Power Supply Module on page 71 for the procedure for removing and replacing the power supply module in the Secure Firewall 3100 Dual Fan Modules The Secure Firewall 3100 has two dual fan modules that...

Страница 31: ...ach hold one NVMe 900 GB SSD By default the Secure Firewall 3100 ships with one 900 GB SSD installed in slot 1 The second SSD slot is reserved for software RAID1 The RAID1 SSD is shipped already configured If you have two SSDs installed they form a RAID when you boot up Hot swapping is supported With two SSDs you can swap SSD 1 without powering off the chassis However you must issue the raid remov...

Страница 32: ... the SSD See the configuration guide for your software for the procedures for removing and adding an SSD from the RAID1 configuration Supported SFP SFP QSFP Transceivers The SFP SFP QSFP transceiver is a bidirectional device with a transmitter and receiver in the same physical package It is a hot swappable optical or electrical copper interface that plugs into the SFP SFP QSFP ports on the fixed p...

Страница 33: ... be emitted from the end of the unterminated fiber cable or connector Do not view directly with optical instruments Viewing the laser output with certain optical instruments for example eye loupes magnifiers and microscopes within a distance of 100 mm may pose an eye hazard Warning Statement 1057 Hazardous Radiation Exposure Use of controls adjustments or performance of procedures other than those...

Страница 34: ... Supported 1 Gb SFP Transceivers Comments PID Optics Type 1 Gb copper SFP current version GLC TE 1G 1000Base T 850 nm GLC SX MMD 1G multimode 1310 nm GLC LH SMD 1G single mode 40 km GLC EX SMD 1G SM extended r 80 km GLC ZX SMD 1G SM The following table lists the supported transceivers for the fixed ports on all 3100 models and the FPR X NM 8X10G FPR X NM 8X25G network modules Table 5 Supported 10 ...

Страница 35: ...ers for the fixed ports and the FPR X NM 4X40G network module Table 7 Supported 40 Gb SFP Transceivers for FPR3K X NM 4X40G Comments PID Optics Type QSFP 40G SR4 40G SR4 Ethernet only QSFP 40G SR4 S 40G SR4 S 300 m with OM3 QSFP 40G CSR4 40G CSR4 LC connector QSFP 40G SR BD 40G SR BD Ethernet only QSFP 40G LR4 S 40G LR4 S Ethernet and OTU3 QSFP 40G LR4 40G LR4 LR4 Lite up to 2 km WSP Q40GLR4L 40G ...

Страница 36: ...0 5 inches 4 39 x 9 4 x 26 67 cm Network module dimensions H x W x D Network Module 1 6 lb 73 kg SSD 0 25 lb 11 kg Power supply module 201 lb 91 17 kg Fan module 0 5 lb 23 Chassis component weights 25 lb 11 4 kg 2 power supply modules 1 network module 2 dual fan modules 1 SSD 23 lb 10 5 kg 1 power supply module 1 network module 2 dual fan modules 1 SSD Chassis weight 100 240 VAC 6 A at 100 VAC 50 ...

Страница 37: ...cure Firewall 3100 PIDs Description PID Chassis Cisco Secure Firewall 3110 ASA chassis 1 RU FPR3110 ASA K9 Cisco Secure Firewall 3120 ASA chassis 1 RU FPR3120 ASA K9 Cisco Secure Firewall 3130 ASA chassis 1 RU FPR3130 ASA K9 Cisco Secure Firewall 3140 ASA chassis 1 RU FPR3140 ASA K9 Cisco Secure Firewall 3110 next generation firewall chassis 1 RU FPR3110 NGFW K9 Cisco Secure Firewall 3120 next gen...

Страница 38: ...rail kit spare FPR3K SLIDE RAILS Cable management brackets FPR3K CBL MGMT Cable management brackets spare FPR3K CBL MGMT Rack mount brackets FPR3K BRKT Rack mount brackets spare FPR3K BRKT Network Modules 6 port 1 Gb SFP hardware bypass network module SX multimode FPR3K XNM 6X1SXF 6 port 1 Gb SFP hardware bypass network module SX multimode spare FPR3K XNM 6X1SXF 6 port 10 Gb SFP hardware bypass ne...

Страница 39: ... QSFP network module spare FPR3K XNM 8X25G 4 port 40 Gb QSFP network module FPR3K XNM 4X40G 4 port 40 Gb QSFP network module spare FPR3K XNM 4X40G Network module blank slot cover FPR3K NM BLANK Network module blank slot cover spare FPR3K NM BLANK Power Cord Specifications Each power supply has a separate power cord Standard power cords or jumper power cords are available for connection to the secu...

Страница 40: ...tina CAB ACR Cord set rating 10 A 250 V Length 2 5 m 2 Plug EL 219 IRAM 2073 1 Connector IEC 60320 C13 3 Figure 17 Australia CAB ACA Cord set rating 10 A 250 V Length 2 5 m 2 Plug A S 3112 1 Connector IEC 60320 C13 3 Figure 18 Brazil CAB C13 ACB Cisco Secure Firewall 3110 3120 3130 and 3140 Hardware Installation Guide 36 Overview Power Cord Specifications ...

Страница 41: ... 250 V Length 2 5 m 2 Plug GB2099 1 2008 1 Connector IEC 60320 C13 3 Figure 20 Europe CAB ACE Cord set rating 10 A 250 V Length 1 5 m 2 Plug CEE 7 VII 1 Connector IEC 60320 C13 3 Figure 21 India Jumper CAB C13 C14 3M IN Cisco Secure Firewall 3110 3120 3130 and 3140 Hardware Installation Guide 37 Overview Power Cord Specifications ...

Страница 42: ...4 IN Cord set rating 10 A 250 V Length 1 4 m 2 IEC 60320 C14G 1 Connector IEC 60320 C13 3 Figure 23 India PWR CORD IND D Cord set rating 10 A 250 V Length 1 8 2 Plug IS 6538 1971 1 Connector IEC 60320 C13 3 Cisco Secure Firewall 3110 3120 3130 and 3140 Hardware Installation Guide 38 Overview Power Cord Specifications ...

Страница 43: ...25 Italy CAB ACI Cord set rating 10 A 250 V Length 2 5 m 2 Plug CEI 23 16 1 Connector IEC 60320 C13 3 Figure 26 Japan CAB JPN Cord set rating 12 A 125 V Length 2 5 m 2 Plug JIS C8303 1 Connector IEC 60320 C13 3 Cisco Secure Firewall 3110 3120 3130 and 3140 Hardware Installation Guide 39 Overview Power Cord Specifications ...

Страница 44: ...AB C13 C14 2M JP PSE Mark Cord set rating 10 A 250 V Length 2 m 6 5 ft 2 IEC 60320 2 2 E 1 Connector IEC 60320 C13 3 Figure 29 Jumper CAB C13 C14 2M Cord set rating 10 A 250 V Length 2 m 2 IEC 60320 C14G 1 Connector IEC 60320 C13 3 Cisco Secure Firewall 3110 3120 3130 and 3140 Hardware Installation Guide 40 Overview Power Cord Specifications ...

Страница 45: ... Korea CAB AC C13 KOR Cord set rating 10 A 250 V Length 1 8 m 2 Plug KSC 8305 1 Connector IEC 60320 C13 3 Figure 32 North America CAB AC Cord set rating 10 A 125 V Length 2 1 m 2 Plug NEMA 5 15P 1 Connector IEC 60320 C13 3 Cisco Secure Firewall 3110 3120 3130 and 3140 Hardware Installation Guide 41 Overview Power Cord Specifications ...

Страница 46: ...4 Switzerland CAB ACS Cord set rating 10 A 250 V Length 2 5 m 2 Plug SEV 1011 1 Connector IEC 60320 C13 3 Figure 35 Taiwan CAB ACTW Cord set rating 10 A 125 V Length 2 29 m 2 Plug CNS10917 1 Connector IEC 60320 C13 3 Cisco Secure Firewall 3110 3120 3130 and 3140 Hardware Installation Guide 42 Overview Power Cord Specifications ...

Страница 47: ... Kingdom CAB ACU Cord set rating 10 A 250 V Length 2 5 m 2 Plug BS1363A SS145 1 Connector IEC 60320 C13 3 Cisco Secure Firewall 3110 3120 3130 and 3140 Hardware Installation Guide 43 Overview Power Cord Specifications ...

Страница 48: ...Cisco Secure Firewall 3110 3120 3130 and 3140 Hardware Installation Guide 44 Overview Power Cord Specifications ...

Страница 49: ... Definition IMPORTANT SAFETY INSTRUCTIONS Before you work on any equipment be aware of the hazards involved with electrical circuitry and be familiar with standard practices for preventing accidents Read the installation instructions before using installing or connecting the system to the power source Use the statement number provided at the end of each warning statement to locate its translation ...

Страница 50: ...vironment 69 7 kPa Warning Statement 1017 Restricted Area This unit is intended for installation in restricted access areas Only skilled instructed or qualified personnel can access a restricted access area Warning Statement 1021 SELV Circuit To avoid electric shock do not connect SELV circuits to telephone network voltage TNV circuits LAN ports contain SELV circuits and WAN ports contain TNV circ...

Страница 51: ...lation Only trained and qualified personnel should be allowed to install replace or service this equipment Warning Statement 1040 Product Disposal Ultimate disposal of this product should be handled according to all national laws and regulations Warning Statement 1073 No User Serviceable Parts There are no serviceable parts inside To avoid risk of electric shock do not open Warning Statement 1074 ...

Страница 52: ...Do not work alone if potentially hazardous conditions exist anywhere in your work space Never assume that power is disconnected always check Look carefully for possible hazards in your work area such as moist floors ungrounded power extension cables frayed power cords and missing safety grounds If an electrical accident occurs Use caution do not become a victim yourself Disconnect power from the s...

Страница 53: ...derations may help you isolate the cause of failures and prevent future problems Site Considerations Considering the following helps you plan an acceptable operating environment for the chassis and avoid environmentally caused equipment failures Electrical equipment generates heat Ambient air temperature might not be adequate to cool equipment to acceptable operating temperatures without adequate ...

Страница 54: ...il rack mounting If you are mounting a chassis in an open rack make sure that the rack frame does not block the intake or exhaust ports If your rack includes closing front and rear doors the doors must have 65 percent open perforated area evenly distributed from top to bottom to permit adequate airflow Be sure enclosed racks have adequate ventilation Make sure that the rack is not overly congested...

Страница 55: ...is back due to damage Note See Package Contents on page 5 for a list of what shipped with the chassis Step 1 Remove the chassis from its cardboard container and save all packaging material Step 2 Compare the shipment to the equipment list provided by your customer service representative Verify that you have all items Step 3 Check for damage and report any discrepancies or damage to your customer s...

Страница 56: ...s specified as a minimum of 17 75 inches 450 mm You need the following to install the Secure Firewall 3100 in a rack Phillips screwdriver Two rack mount brackets part number 700 127244 01 with six 8 32 x 0 375 inch screws part number 48 2286 01 Rack mount screws Four 12 24 x 0 75 inch Phillips screws part number 648 0440 01 for securing the chassis to your rack Four 10 32 x 0 75 inch Phillips scre...

Страница 57: ...h Phillips screws three per side 3 Step 2 Optional Attach the cable management bracket to the rack mount bracket a Install the cable management screws into the rack mount bracket Cisco Secure Firewall 3110 3120 3130 and 3140 Hardware Installation Guide 53 Rack Mount the Chassis Rack Mount the Chassis Using Brackets ...

Страница 58: ...re describes how to install the Secure Firewall 3100 in a rack using slide rails It applies to all models of the 3100 series You use the pegs on the chassis to secure the slide rail See Product ID Numbers on page 33 for a list of the PIDs associated with racking the chassis You can install the optional cable management bracket on all models of the Secure Firewall 3100 The optional cable management...

Страница 59: ...e of the following warnings Statement 164 Lifting Requirement Two people are required to lift the heavy parts of the product To prevent injury keep your back straight and lift with your legs not your back Warning Statement 1006 Chassis Warning for Rack Mounting and Servicing To prevent bodily injury when mounting or servicing this unit in a rack you must take special precautions to ensure that the...

Страница 60: ...install replace or service this equipment Warning Statement 1047 Overheating Prevention To reduce the risk of fire or bodily injury do not operate the unit in an area that exceeds the maximum recommended ambient temperature of 104 F 40 C Warning Statement 1073 No User Serviceable Parts There are no serviceable parts inside To avoid risk of electric shock do not open Warning Step 1 Attach the slide...

Страница 61: ...Phillips screws three per side 3 Step 2 Optional Attach the cable management bracket to the slide rail locking bracket a Install the cable management screws into the slide rail locking bracket Cisco Secure Firewall 3110 3120 3130 and 3140 Hardware Installation Guide 57 Rack Mount the Chassis Rack Mount the Chassis Using Slide Rails ...

Страница 62: ...o secure the cable management bracket to slide rail locking bracket Step 3 Attach the inner rails to the sides of the chassis a Remove the inner rails from the slide rail assemblies b Align an inner rail with each side of the chassis Align the inner rail so that the three slots on the rail line up with the three pegs on the side of the chassis Cisco Secure Firewall 3110 3120 3130 and 3140 Hardware...

Страница 63: ...the side of the chassis to prevent sliding e Install the second inner rail to the opposite side of the chassis and secure with the other M3 x 0 5 x 6 mm screw Step 4 Open the front securing plate on both slide rail assemblies The front end of the slide rail assembly has a spring loaded securing plate that must be open before you can insert the mounting pegs into the rack post holes On the outside ...

Страница 64: ...ng rear rack post holes The slide rail must be level front to rear The rear mounting pegs enter the rear rack post holes from the inside of the rack post e Attach the second slide rail assembly to the opposite side of the rack Make sure that the two slide rail assemblies are at the same height with each other and are level front to back f Pull the inner slide rails on each assembly out toward the ...

Страница 65: ...he Cisco Secure Firewall 3100 Getting Started Guide Ground the Chassis Grounding the chassis is required even if the rack is already grounded A grounding pad with two threaded M4 holes is provided on the chassis for attaching a grounding lug The grounding lug must be Nationally Recognized Testing Laboratory NRTL listed In addition a copper conductor wires must be used and the copper conductor must...

Страница 66: ... suitably installed ground conductor Contact the appropriate electrical inspection authority or an electrician if you are uncertain that suitable grounding is available Warning Statement 1025 Use Copper Conductors Only To reduce risk of fire use copper conductors only Warning Statement 1046 Installing or Replacing the Unit To reduce risk of electric shock when installing or replacing the unit the ...

Страница 67: ...p 5 Place the grounding lug against the grounding pad so that there is solid metal to metal contact and insert the two screws with washers through the holes in the grounding lug and into the grounding pad Figure 45 Attach the Grounding Lug Two 10 32 x 0 38 inch screws 2 Grounding lug 1 Cisco Secure Firewall 3110 3120 3130 and 3140 Hardware Installation Guide 63 Rack Mount the Chassis Ground the Ch...

Страница 68: ...t it to an appropriate grounding point in your site to ensure adequate earth ground What to do next Install the cables according to your default software configuration as described in the Cisco Secure Firewall 3100 Getting Started Guide Cisco Secure Firewall 3110 3120 3130 and 3140 Hardware Installation Guide 64 Rack Mount the Chassis Ground the Chassis ...

Страница 69: ...ace network modules See the configuration guide for your operating system for the procedure for managing network modules You can install all supported network modules in all Secure Firewall 3100 models but the 40 Gb network module FPR3K XNM 4X40G and the 1 10 25 Gb network module FPR3K XNM 8X25G are only recognized when installed in the 3130 and 3140 The software does not support these network mod...

Страница 70: ...r operating system for the procedure to replace an existing network module with the same model c To replace an existing network module with a different model network module power down the chassis by moving the power switch to the OFF position See the configuration guide for your operating system for the procedure to replace an existing network module with a new model See Rear Panel on page 13 for ...

Страница 71: ... the network module into the slot push it firmly into place and close the handle on the front of the network module Step 6 Tighten the captive screw on the upper left side of the network module Step 7 Power on the chassis so that the new network module is recognized Remove and Replace the SSD The chassis supports two NVMe SSDs The first SSD slot SSD 1 is for storage The second slot SSD 2 is for th...

Страница 72: ... 1 Save your configuration Step 2 If you are removing SSD 1 and there is only one SSD installed in the chassis power down the chassis by moving the power switch to the OFF position See Rear Panel on page 13 for more information on the power switch You can only remove the SSD in slot 1 if there are two SSDs installed If you have only one SSD you cannot remove it while the chassis is powered on Step...

Страница 73: ...e blank faceplate in slot 2 by loosening the handle on the faceplate Step 7 Hold the RAID1 SSD with the ejector handle extended in front of slot 2 push it in gently until it is seated and close the ejector handle Do not switch the two SSDs The RAID1 SSD must be installed in slot 2 Caution Step 8 Check the SSD LED to make sure the SSD is operative See Front Panel LEDs on page 11 for a description o...

Страница 74: ...stallation Only trained and qualified personnel should be allowed to install replace or service this equipment Warning Statement 1073 No User Serviceable Parts There are no serviceable parts inside To avoid risk of electric shock do not open Warning Statement 1093 Avoid Sharp Edges Risk of personal injury Avoid sharp edges when installing or removing replaceable units Warning Step 1 Have the dual ...

Страница 75: ...do not hear the fans make sure the fan module is inserted completely into the chassis and the faceplate is flush with the outside surface of the chassis Step 7 Verify that the fan is operational by checking the fan module LED See Front Panel LEDs on page 11 for a description of the fan LEDs Remove and Replace the Power Supply Module Power supply modules are hot swappable You can remove and replace...

Страница 76: ...acturer Do not dismantle crush puncture use sharp tool to remove short external contacts or dispose of in fire Do not use if battery is warped or swollen Do not store or use battery in a temperature 60 C Do not store or use battery in low air pressure environment 69 7 kPa Warning Statement 1022 Disconnect Device To reduce risk of electric shock and fire a readily accessible two poled disconnect de...

Страница 77: ...t disengage the power supply module release tab without first removing the cable Step 2 To remove a power supply module face the back of the chassis and grasp the handle Step 3 Press the release tab toward the left to disengage the power supply The release tab is found on the right side of the power supply Step 4 Place your other hand under the power supply module to support it while you slide it ...

Страница 78: ... on the power supply to make sure the power supply is operative See Power Supply Module on page 24 for a description of the LEDs Connect the DC Power Supply Module The input connector and plug must be UL recognized under UL 486 for field wiring The connection polarity is from left to right negative positive and ground Use the handle on the power supply installation and removal You must support the...

Страница 79: ...u begin installing the DC power supply See Ground the Chassis on page 61 for the procedure Step 1 Verify that the power is off to the DC circuit on the power supply module that you are installing Step 2 While supporting the power supply module with one hand insert the power supply module into the power supply bay and gently push it in See the illustration above for the location of the handle Step ...

Страница 80: ...r 3 Step 6 Repeat these steps for the remaining DC input power source wire as applicable Step 7 Use a tie wrap so secure the wires to the rack so that the wires are not pulled from the terminal block Step 8 Set the DC disconnect switch in the circuit to ON In a system with multiple power supplies connect each power supply to a separate DC power source In the event of a power source failure if the ...

Страница 81: ...the tie wrap through the box shaped channel above the clamp see the following figure One side of the tie wrap has evenly spaced ridges and the other is smooth Be sure the ridged side is face up and that you slide it through the open side of the channel You hear a click as the tie slides through it moves in one direction only To remove the tie wrap from the clamp push the lever on the closed side o...

Страница 82: ...amp a Plug in the power cord into the power supply module and wrap the clamp around the over mold portion of the power cord b Squeeze the clamp ends together so that the annular teeth engage with the mate on the clamp c Make sure the clamp fits snugly into the over mold d Adjust the clamp position on the tie wrap so that the clamp is tight against the front of the over mold and the power cord cann...

Страница 83: ...ease tabs 5 Step 4 If you need to remove the power cord push the release tab on the clamp to force the annular clamp teeth to disengage and the clamp opens up You can then remove the clamp from the power cord Cisco Secure Firewall 3110 3120 3130 and 3140 Hardware Installation Guide 79 Installation Maintenance and Upgrade Secure the Power Cord on the Power Supply Module ...

Страница 84: ...Cisco Secure Firewall 3110 3120 3130 and 3140 Hardware Installation Guide 80 Installation Maintenance and Upgrade Secure the Power Cord on the Power Supply Module ...

Отзывы: