C I R R U S
C O M P O N E N T M A I N T E N A N C E M A N U A L - C A P S
M O D E L S R 2 0
95-01-01
Page 61
All
EFFECTIVITY:
(2)
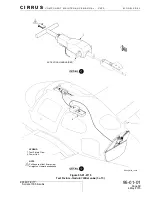
Installation - Parachute Assembly
(a)
Acquire necessary tools, equipment, and supplies.
CAUTION:
Do not attempt to lift or carry parachute assembly by rear harness or rocket
lanyards. For lifting, use 1-inch wide retaining strap handles sewn to top of
parachute assembly.
(b)
Ensure safety pin is installed.
(c)
Ensure line cutters are installed.
(d)
Record serial numbers and expiration dates from top flap of parachute in airplane log
book.
(e)
Serials 1005 thru 1422
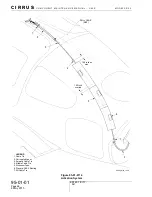
: Near empennage cover opening, lay parachute assembly on sta-
ble, non-abrasive surface, laying assembly with three point shackles facing up, and top of
pack facing aft.
(f)
Serials 1423 & subs
: At 222 bulkhead, lay parachute assembly on fuselage floor with three
point shackles facing up, and top of pack facing aft.
(g)
Unfasten hook and loop securing retaining straps around buckles and route straps forward
towards parachute compartment.
(h)
Remove any shipping string securing rear harness bracket and rocket lanyard to para-
chute assembly.
CAUTION:
Ensure forward harness is not twisted before attaching to three-point
shackle.
Do not pinch harness between spacer and three-point shackle.
(i)
Serials 1005 thru 1422
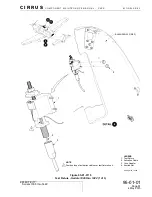
: Install bolts, spacers, washers, and nuts securing forward harness
straps to parachute assembly three-point shackles. Install nuts on inboard side of shack-
les. Torque nuts to 95 - 105 in-lb (10.5 - 11.5 Nm).
CAUTION:
Forcing parachute assembly into enclosure can prevent proper deployment.
If parachute assembly does not easily slide into enclosure, inspect para-
chute assembly and enclosure to determine source of obstruction.
(j)
Serials 1005 thru 1422
: Lower parachute assembly through empennage cover opening
and into parachute compartment.
(k)
Serials 1423 & subs
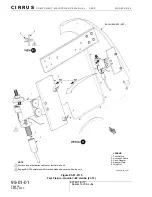
: Insert parachute assembly into parachute compartment.
1
Partially insert top of parachute assembly through access panel CB7 on 222 bulk-
head.
2
Continue to insert parachute assembly into enclosure until bottom of parachute
assembly clears bottom edge of enclosure.
3
Lift parachute assembly up until entire back of parachute assembly lies flat against
back of enclosure.
4
Allow parachute assembly to drop down into position.
Description
P/N or Spec.
Supplier
Purpose
Parachute Assembly
Reference Parts List
Cirrus Design
N/A
4 May 2015


