


S
+
12K / 14K / 16K / 20K Lamp & Filter Instructions
013-100049-03 (Rev.1)
6 of 8 Pages
Filter Replacement Procedure
NOTE
This procedure should be undertaken immediately
after Step 8 of the
Lamp Replacement Procedure
.
The filter, located at the front side of the projector, should be changed whenever the lamp
is replaced. If operating in an extremely dusty environment the filter may have to be
replaced sooner. Use the filter provided in the Christie approved
Lamp and Filter Kit
for the
specific projector model. For more information, refer to Table 1. Projector Models.
STEP 1 — TURN OFF THE PROJECTOR, COOL and UNPLUG
Before removing or installing a filter, turn off the projector and allow it to cool for five
minutes before unplugging.
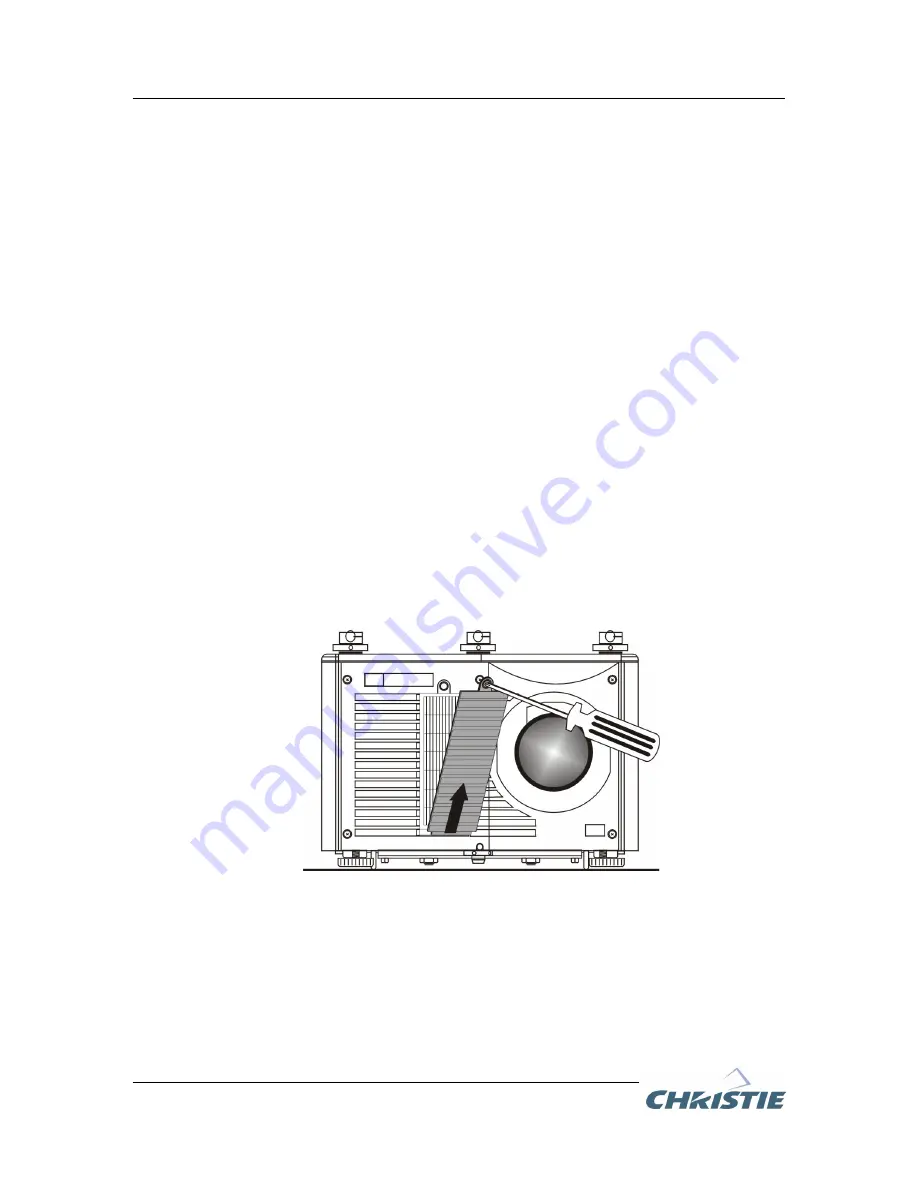
STEP 2 - REMOVE FILTER DOOR
NOTE
When operating a Roadster S+20K
also remove the triangular metal filter brace.
Loosen the ¼-turn screw at the top of the filter grille/door. Lift the door away from the
projector. Refer to Figure 7.
Figure 7. Remove Filter Door
OFFICIALLY RELEASED
Document Control
August 29, 2006


