Installation and setup
HS Series D16-20 Installation and Setup Guide
22
020-001464-02 Rev. 1 (10-2018)
Copyright ©2018 Christie Digital Systems USA Inc. All rights reserved.
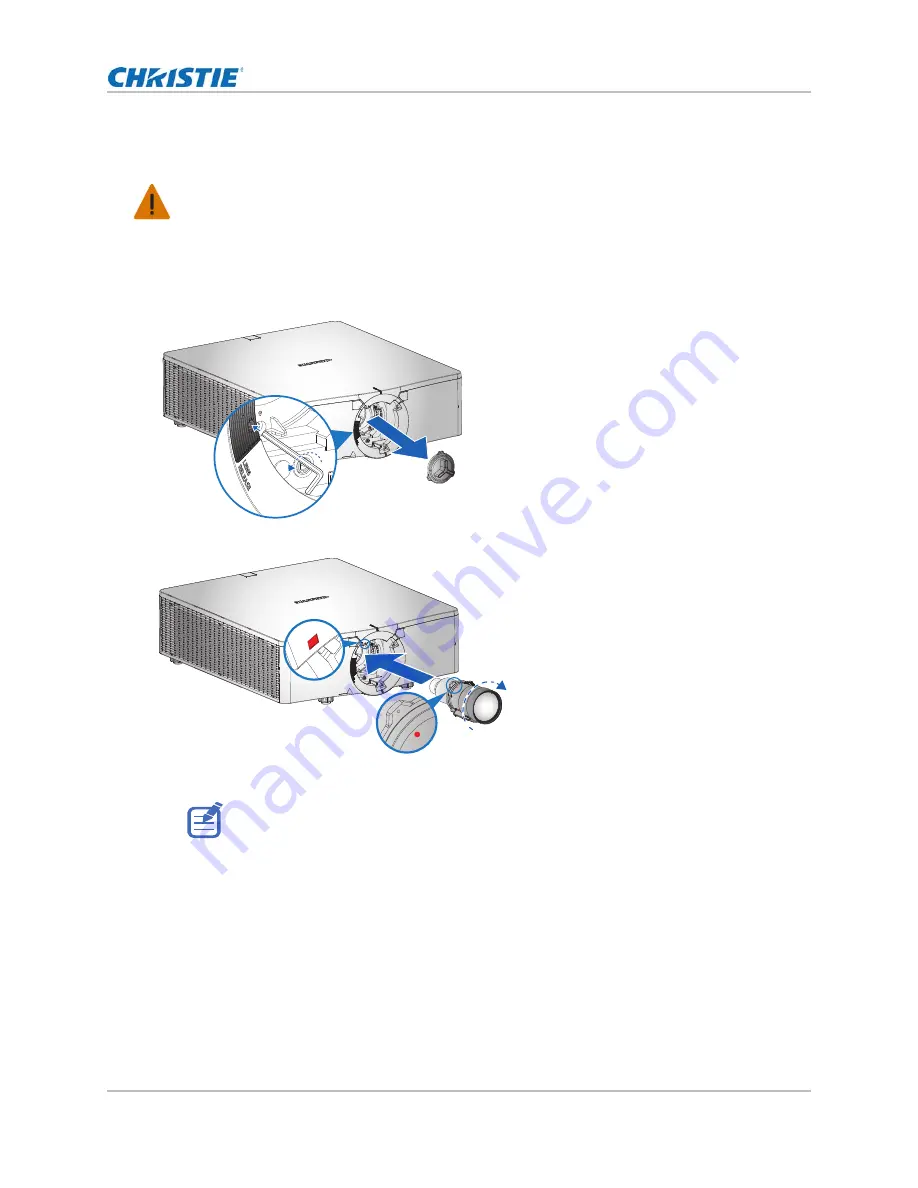
Installing the projector lens
Only use the lens compatible with Christie HS Series D16-20 projectors.
1. Remove the dust cover from the lens opening.
2. Release the screw on the lens release button with an M2.5 Allen key.
3. Align the top of the lens with the red marker on front cover.
4. Insert the lens into the projector and turn it clockwise until you hear a clicking sound.
Calibrating the lens motor
Ensure then lens motor is calibrated before using the projector. Failure to calibrate the lens motor
properly may cause following implications.
• Inability to use the full range of the lens motor.
• Lens motor traveling beyond the lens shifting range.
• Damage to the projector.
Warning! If not avoided, the following could result in death or serious injury.
• Turn off the projector and remove the power cord, before installing or replacing a lens.
• When handling the projector after lens installation, make sure the front lens cap is placed
on the lens to protect the lens surface from potential damage.
• When carrying or moving the projector, do not handle by the lens. This may damage the
lens, the chassis, or other mechanical parts within the projector.
Содержание D16HD-HS D20WU-HS
Страница 1: ...HS Series D16WU HS D16HD HS D20WU HS D20HD HS Installation and Setup Guide 020 001464 02...
Страница 43: ......


