


Installing the new Door Assembly and Cone
36" (50485) & 48" (50454) Hyflo® Retrofit Kit
6
MV1902C
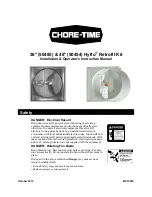
Leveling Doors and tightening down Cone Hardware
Use a Level and rotate the Cone and Door Assembly until the Center Screen Wire
(Item 1, Figure
11)
is Vertical
(See Figure)
. Once the Cone and Door Assembly is vertical, tighten the four 5/16
Flange Nuts
(Item 2)
holding the Cone to the Cone Brackets and also the four 5/16 Flange Nuts
holding the Cone Panels together that were hand tightened in
Figure 4
.
Item
Description
1
Center Grill Wire
2
5/16 Flange Nut
Step 1:
Using a level, Rotate
the Cone and Door
Assembly until the
Center Grill Wire is
vertical
Step 2:
Tighten down four 5/16 Flange
Nuts holding the Cone to the
Cone Brackets and the ones
holding the Cone Panels
together. (Hardware on right
side of Fan not shown)
Figure 11. Leveling Doors and tightening down Cone Hardware
Hardware on right
3
1
side not shown
3
2