Installation Instructions
CTA-025
4
PARTS
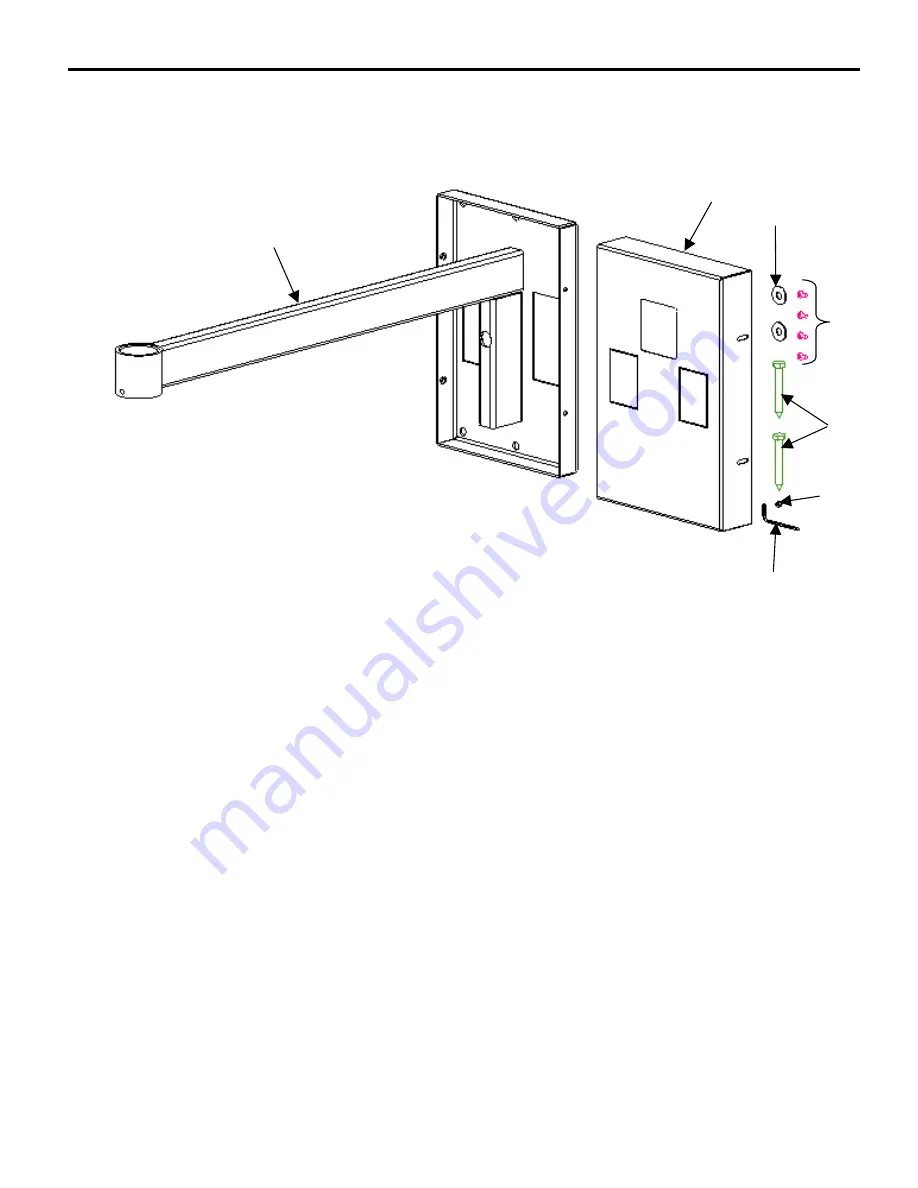
Figure 1. CTA-025 Parts
20
10
40
60
50
70
30
Страница 1: ...ghly study all instructions and illustrations before you begin to install the CTA 025 Pay particular attention to the Warnings and Cautions in this document If you have any questions about this installation contact Chief Manufacturing at 1 800 582 6480 or 952 582 6480 The CTA 025 Single Stud Wall Arm can be used to wall mount RPA UPC or LCDA series ceiling mounts The CTA 025 also provides a mounti...
Страница 2: ...IONS Table 1 CTA 025 Specifications Model L Length fixed Max Support Weight Wall Mount Description CTA 025 25 0 150 lbs 68 0 kg Wood Stud Installation NOTES 1 Metal stud mounting is not recommended 2 For concrete or brick installations use CMA 380 L Length ...
Страница 3: ...ad of all attached components or other equipment WARNING The combined weight of the TV monitor and all attached components and equipment placed on a Chief Wall Arm must not exceed the maximum support weight specified in Table 1 see page 2 WARNING Watch for pinch points Do not put your fingers between movable parts CAUTION Check the unit for shipping damage before you begin the installation CONTENT...
Страница 4: ...Installation Instructions CTA 025 4 PARTS Figure 1 CTA 025 Parts 20 10 40 60 50 70 30 ...
Страница 5: ...h the mount is anchored will safely support five times the combined load of all attached components and equipment 2 Determine a suitable mounting location Keep in mind that you will be mounting the wall arm 10 to a wood stud on center 3 Using a stud sensor locate the wood stud where you will mount the wall arm 10 4 Holding the wall arm 10 against the wall use a pencil awl or small nail to mark the...
Страница 6: ...p screws 50 See Figure 3 STEP 3 Connecting NPT Pipe or Nipple to Wall Arm 1 Locate M6 x 6mm set screw 60 and 1 1 2 NPT pipe or nipple supplied with TV Mount or purchased separately 2 Connect the 1 1 2 NPT pipe or nipple supplied with TV Mount or purchased separately to the wall arm 10 See Figure 4 3 Using the M3 Allen key 70 install the M6 x 6mm set screw 60 Tighten the set screw WARNING Make sure...