background image

Page 9

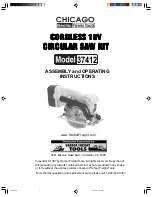
SKU 37412

Assembly Drawing

37412.p65

10/7/03, 11:56 AM

9

Содержание 37412

Страница 1: ...S 3491 Mission Oaks Blvd Camarillo CA 93011 Copyright 1997 by Harbor Freight Tools All rights reserved No portion of this manual or any artwork contained herein may be reproduced in any shape or form without the express written consent of Harbor Freight Tools For technical questions and replacement parts please call 1 800 444 3353 37412 www HarborFreight com 37412 p65 10 7 03 11 55 AM 1 ...

Страница 2: ...se tools must be stored in a dry location to inhibit rust Always lock up tools and keep out of reach of children 5 Do not force tool It will do the job better and more safely at the rate for which it was intended Do not use inappropriate attachments in an attempt to exceed the tool capacity 6 Use the right tool for the job Do not attempt to force a small tool or attachment to do the work of a larg...

Страница 3: ...y alert Watch what you are doing use common sense Do not operate any tool when you are tired 15 Check for damaged parts Before using any tool any part that appears damaged should be carefully checked to determine that it will operate properly and perform its intended function Check for alignment and binding of moving parts any broken parts or mounting fixtures and any other condition that may affe...

Страница 4: ...ger Base into a wall socket Note The Charger Base has an ON red light an OFF green light and a SET button 3 When the Charger Base is plugged into a wall socket the GREEN light will go on This shows that all circuitry is working properly and the Charger Base is ready to charge 4 Press the SET button to start the charge The red light will go on and will continue to be on while the Battery is chargin...

Страница 5: ... of the saw blade and motor adapter 5 align Notice the arrow on the movable guard and the arrow on the saw blade they should be pointing in the same direction 6 Replace washer 2 and nut bolt 1 Tighten with hex key 48 while pressing on the stop button 17 Verify stop button is in the up unlocked position 7 Replace key to its storage hole in the housing of the saw Adjusting The Saw Prior to Cutting 1...

Страница 6: ...l 3 Securely clamp material to be cut to work bench 4 Make sure saw does not cut into supports or workbench 5 Use the appropriate type of blade for the material you are cutting Knob 57 Angle Plate 53 Knob 43 not visible Battery 14 Base 50 Nut Bold 1 Washer 2 Guard 9 Exhaust Hole Movable Guard 8 Hex Key 48 Safe Button 45 Switch Button 47 Stop Button 17 not visible 37412 p65 10 7 03 11 56 AM 6 ...

Страница 7: ... the saw slowly forward to complete the cut 5 When the cut in complete release the power switch button 47 Do not set the saw down until the blade stops turning Maintenance 1 Before remounting the saw blade remove all sawdust that has accumulated around the guard 9 nut bolt 1 and washer 2 2 Regularly inspect all mounting screws and knobs to ensure that they are properly tightened 3 Keep saw blades ...

Страница 8: ...G t e n a l P 3 7 2 r e c a p S 1 8 2 8 4 M w e r c S d u t S 2 9 2 4 r e c a p S 2 0 3 x o B r a e G 1 1 3 8 4 M w e r c S d u t S 2 2 3 r a e G r o t o M 1 3 3 r o t o M 1 m e t I n o i t p i r c s e D y t Q 4 3 d e r e r i W r e p p o C 1 5 3 k c a l b e r i W r e p p o C 1 6 3 e s a C t f e L 1 7 3 0 5 4 M w e r c S d u t S 4 8 3 e s a B r o t o M 1 9 3 5 2 9 2 T S w e r c S 2 0 4 0 2 9 2 T S ...

Страница 9: ...Page 9 SKU 37412 Assembly Drawing 37412 p65 10 7 03 11 56 AM 9 ...

Отзывы: