

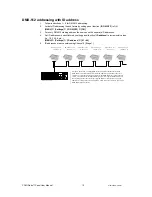


Lens Assembly Installation/Replacement
The COLORado™Panel comes with 15
°
lens assembly pre-installed from the factory. However, there are 2 other
optional lens kits
(CL18X10, CL18X30)
available as accessories, which will alter the beam angle. Please follow the
below instructions for proper replacement/installation.
1.
2.
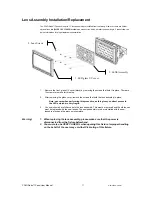
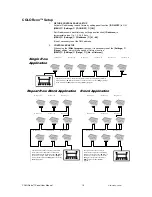
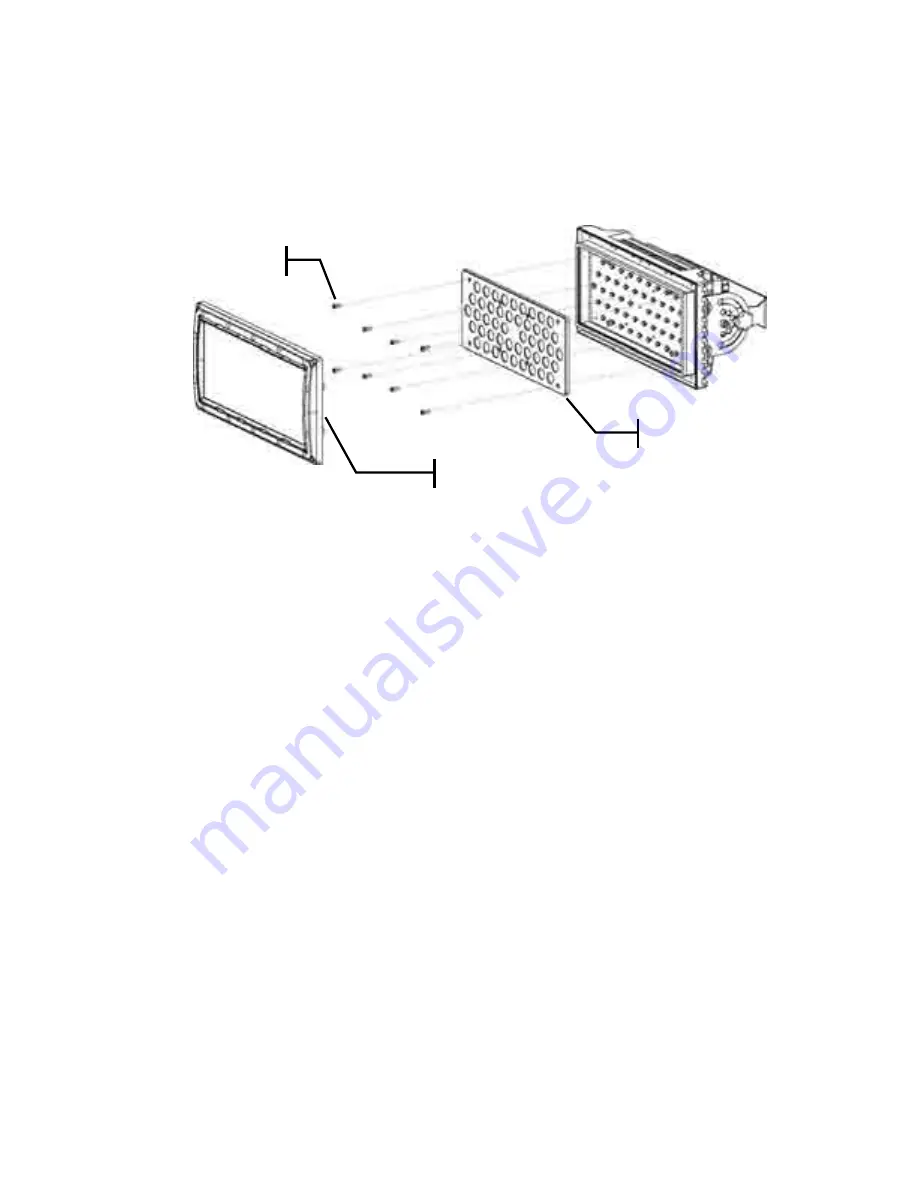
1. LED glass UV cover
2. Lens Screws
3. LENS Assembly
1.
Remove the front, glass UV cover (black) by removing the screws that hold it in place. There are
14 screws to remove for this step.
2.
After removing the glass cover, remove the screws that hold the lens assembly in place.
Note: use care when performing this procedure, as this gives you direct access to
the LEDs, which are very fragile.
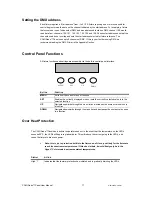
3.
You now should have full access to the lens assembly. This must be removed and the old lenses
must be replaced with the new lenses. The same assembly is to be reinstalled with the new
lenses in place and the process is complete.
Warning!
1. When replacing the lens assembly, please make sure that the power is
disconnected from the fixture beforehand.
2. You must also be VERY CAREFUL when opening this fixture. Improper handling
on the behalf of the user may void the IP-66 rating of this fixture.
COLORado™ Panel User Manual
11
4/25/2008 3:29 PM
Содержание Panel
Страница 31: ...Photometrics COLORado Panel User Manual 31 4 25 2008 3 29 PM ...
Страница 35: ...LED PCB P222 CPNLLED COLORado Panel User Manual 35 4 25 2008 3 29 PM ...
Страница 36: ...LED Driver PCB Schematics COLORado Panel User Manual 36 4 25 2008 3 29 PM ...
Страница 37: ...Display Master PCB Schematics COLORado Panel User Manual 37 4 25 2008 3 29 PM ...
Страница 38: ...COLORado Panel User Manual 38 4 25 2008 3 29 PM ...