9
SETUP
Remove all of the contents inside the Hydrocollator and then replace the wire rack. Make
certain the drain valve is closed before filling the tank with water. The tank should be
approximately 3/4 full with packs removed. The tank may be filled from any standard type
faucet.
Check the voltage rating on the serial decal plate which is located on the back of the unit.
To turn the unit on, simply plug the unit into a 120 Volt~, 60 Hz or 220/240 Volt~, 50-60
HZ outlet as indicated on the decal plate. To turn the unit off, simply unplug from mains
power supply. Do not attempt to use direct current. Follow the procedures indicated in the
Precautionary Instructions. Do not attempt to use the unit if it is not properly grounded.
OPERATION
Hydrocollator® Mobile Heating Units
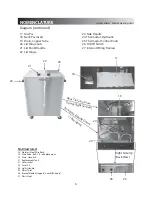
The Hydrocollator is simple and easy to operate. The controls are located in the rear, near
the bottom of the unit. The thermostat controls the temperature of the water. It is located
near the bottom of the unit on the control panel. It has been tested and preset at the
factory to normal operating temperature. If further adjustment is necessary, it can be easily
accomplished by turning the adjusting screw located on the thermostat.
Turning the outer
screw counterclockwise lowers the temperature, while turning it clockwise raises it.
NOTE:
Do not turn the inner stem.
The Hydrocollator units operate through the use of a hydraulic capillary-type thermostat and
can be left plugged in and turned on to provide a ready supply of heated HotPacs.
The HotPac rack is adjustable and accommodates different sizes and types of packs.
SS-2 Unit
– The unit comes complete with eight standard HotPacs.
M-2 and M-4 Units
- The M-2 unit comes complete with 12 standard HotPacs. The M-4 comes
complete with 24 standard HotPacs.
Hydrocollator® Mobile Heating Units


