background image

21

Install the Protector System

®

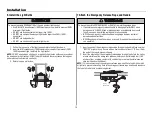
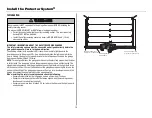
OPTION C

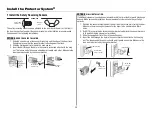
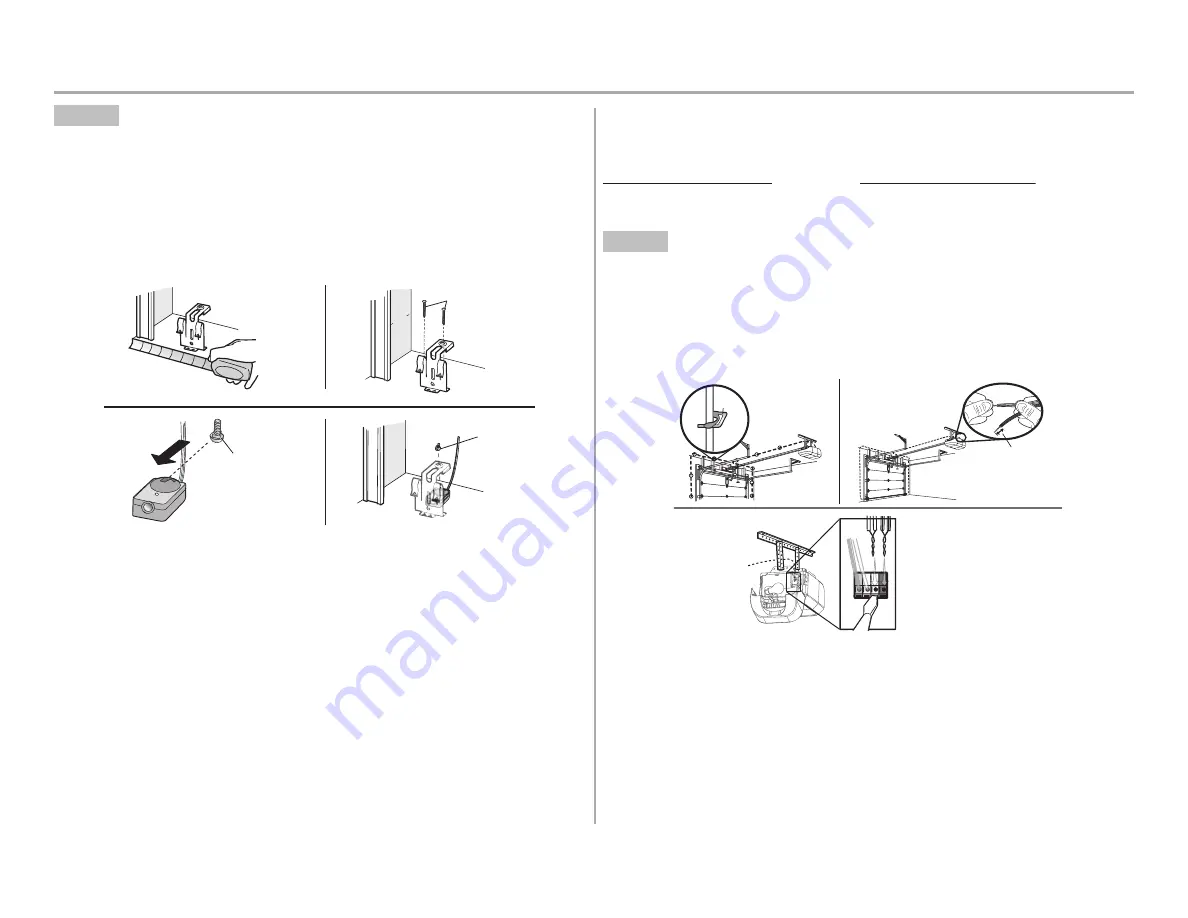
FLOOR INSTALLATION

Use an extension bracket (not provided) or wood block to raise the sensor bracket if
needed.

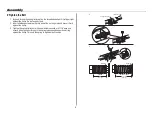
1. Carefully measure the position of both sensor brackets so they will be the same

distance from the wall and unobstructed.

2. Attach the sensor brackets to the floor using concrete anchors (not provided).
3. Slide the carriage bolt into the slot on each sensor.
4. Insert the bolt through the hole in the sensor bracket and attach with the wing

nut. The lenses on both sensors should point toward each other. Make sure the
lens is not obstructed by the sensor bracket.

Insid

e

Garage

Wa

ll

(Not provided)

1

2

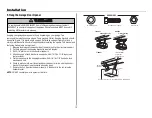
Carriage Bolt
1/4"-20 x 1/2" 

Wing Nut
1/4"-20 

3

4

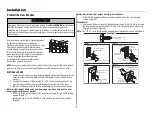
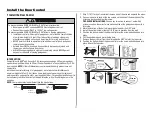
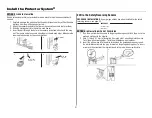
2 Wire the Safety Reversing Sensors

PRE-WIRED INSTALLATIONS:

If your garage already has wires installed for the safety

reversing sensors, see page 22.

HARDWARE

Insulated Staple
(Not Shown)

OPTION A

INSTALLATION WITHOUT PRE-WIRING

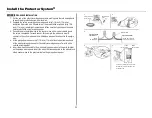
1. Run the wire from both sensors to the garage door opener. Attach the wire to the

wall and ceiling with the staples.

2. Strip 7/16 inch (11 mm) of insulation from each set of wires. Separate the wires.

Twist the white wires together. Twist the white/black wires together.

3. Insert the white wires into the white terminal on the garage door opener. Insert

the white/black wires into the grey terminal on the garage door opener. To insert
or remove the wires from the terminal, push in the tab with a screwdriver tip.

Staple

1

2

3

7/16" (11 mm) 

RED

WHITE

WHITE

GREY

D

RED

W

RE

WHITE

WHITE

GREY

GREY

Содержание MyQ 8550W

Страница 1: ...This garage door opener is ONLY compatible with MyQ and Security 2 0 accessories DO NOT install on a one piece door if using devices or features providing unattended close Unattended devices and features are to be used ONLY with sectional doors Attach warning labels to the location indicated on label FOR RESIDENTIAL USE ONLY Register your garage door opener to receive updates and offers from LiftM...
Страница 2: ...on 3 Assembly 7 Installation 9 Install the Door Control 17 Install the Protector System 19 Power 23 Adjustments 25 Battery Backup 28 Operation 30 Maintenance 37 Troubleshooting 38 Accessories 40 Warranty 41 Repair Parts 42 ...

Страница 3: ...l Electrical When you see this Signal Word on the following pages it will alert you to the possibility of damage to your garage door and or the garage door opener if you do not comply with the cautionary statements that accompany it Read them carefully WARNING This product can expose you to chemicals including lead which are known to the State of California to cause cancer or birth defects or othe...

Страница 4: ...is out of balance An unbalanced garage door may NOT reverse when required l NEVER try to loosen move or adjust garage door door springs cables pulleys brackets or their hardware ALL of which are under EXTREME tension l Disable ALL locks and remove ALL ropes connected to garage door BEFORE installation and operating garage door opener to avoid entanglement l DO NOT install on a one piece door if us...

Страница 5: ...5 Preparation Tools Needed 3 16 5 32 5 16 7 16 1 2 5 8 9 16 1 4 7 16 ...

Страница 6: ...r J Sprocket cover with hex screws K Belt L Door control Smart Control Panel 880LMW M White and red white wire N The Protector System Safety reversing sensors with white and white black wire attached Sending senor 1 receiving sensor 1 and safety sensor brackets 2 O Safety labels and literature P Rail grease Q 3 Button Remote Control 893MAX Installation Hex Bolt 5 16 18 x 7 8 4 Lock Washer 5 16 4 L...

Страница 7: ... lock nut from the top of the garage door opener 2 Align the rail and the styrofoam over the sprocket Cut the tape from the rail belt and styrofoam 3 Models 8550W and 8550WL Fasten the rail with the previously removed bolts Model 8557W Fasten the rail with the previously removed washered bolt and lock nut 4 Position the belt around the garage door opener sprocket 5 Attach the sprocket cover over t...

Страница 8: ...one of the nut ring slots and brace it firmly against the trolley 3 Tighten the spring trolley nut with an adjustable wrench or a 7 16 open end wrench about a quarter turn until the spring releases and snaps the nut ring against the trolley This sets the spring to optimum belt tension Spring Trolley Nut To motor unit Nut ring slot Nut Ring Nut Ring AFTER RELEASE 1 1 4 3 18 cm BEFORE 1 2 5 cm 1 2 3...

Страница 9: ...e until instructed to do so 8 NEVER wear watches rings or loose clothing while installing or servicing opener They could be caught in garage door or opener mechanisms 9 Install wall mounted garage door control l within sight of the garage door l out of reach of small children at a minimum height of 5 feet 1 5 m above floors landings steps or any other adjacent walking surface l away from ALL movin...

Страница 10: ... line onto the header wall above the door You can fasten the header bracket within 4 feet 1 22 m of the left or right of the door center only if a torsion spring or center bearing plate is in the way or you can attach it to the ceiling when clearance is minimal It may be mounted on the wall upside down if necessary to gain approximately 1 2 1 cm If you need to install the header bracket on a 2x4 o...

Страница 11: ...en the bracket securely to a structural support with lag screws Wall Mount Optional Mounting Holes Vertical Centerline of Garage Door Header Wall Header Bracket 2x4 Structural Support Door Spring Garage Door Highest Point of Garage Door Travel Horizontal Line Lag Screw 5 16 9 x 1 5 8 OPTION B CEILING INSTALLATION 1 Extend the vertical centerline onto the ceiling as shown 2 Center the bracket on th...

Страница 12: ...ge to garage door rest garage door opener rail on 2x4 placed on top section of door 1 Remove the packing material and lift the garage door opener onto a ladder 2 Fully open the door and place a 2x4 laid flat under the rail A 2x4 is ideal for setting the distance between the rail and the door If the ladder is not tall enough you will need help at this point If the door hits the trolley when it is r...

Страница 13: ...tor unit to the structural support 2 Cut both pieces of the hanging bracket to required lengths 3 Drill 3 16 pilot holes in the structural supports 4 Attach one end of each bracket to a support with 5 16 18 x 1 7 8 lag screws not provided 5 Fasten the opener to the hanging brackets with 5 16 18 x 7 8 hex bolts lock washers and nuts 6 Check to make sure the rail is centered over the door or in line...

Страница 14: ...m a falling garage door l If possible use emergency release handle to disengage trolley ONLY when garage door is CLOSED Weak or broken springs or unbalanced door could result in an open door falling rapidly and or unexpectedly l NEVER use emergency release handle unless garage doorway is clear of persons and obstructions l NEVER use handle to pull door open or closed If rope knot becomes untied yo...

Страница 15: ...2 4 5 10 cm below the top edge of the door OR directly below any structural support across the top of the door 3 Mark drill holes and install as follows depending on your door s construction Metal or light weight doors using a vertical angle iron brace between the door panel support and the door bracket l Drill 3 16 fastening holes Secure the door bracket using the two self threading screws Figure...

Страница 16: ...es as far apart as possible and attach using the bolts nuts and lock washers NOTE If the holes do not line up reverse the straight door arm Select two aligned holes as far apart as possible and attach using the bolts nuts and lock washers 5 Pull the emergency release handle toward the garage door opener until the trolley release arm is horizontal The trolley will re engage automatically when the g...

Страница 17: ...e door out of reach of small children at a minimum height of 5 feet 1 5 m above floors landings steps or any other adjacent walking surface and away from ALL moving parts of door For gang box installations it is not necessary to drill holes or install the drywall anchors Use the existing holes in the gang box NOTE Your product may look different than the illustrations HARDWARE Screw 6AB x 1 2 Dryw...

Страница 18: ...or pre wired installations Do not pierce the wire with the staple as this may cause a short or an open circuit 2 Strip 7 16 inch 11 mm of insulation from the end of the wire near the garage door opener 3 Connect the wire to the red and white terminals on the garage door opener To insert or release wires from the terminal push in the tab with screwdriver tip 7 16 11 mm 2 3 1 Staple RED WHITE WHITE ...

Страница 19: ...n and the garage door opener lights will flash 10 times NOTE For energy efficiency the garage door opener will enter sleep mode when the door is fully closed The sleep mode shuts the garage door opener down until activated The sleep mode is sequenced with the garage door opener light bulb as the light bulb turns off the sensor LEDs will turn off and whenever the garage door opener lights turn on t...

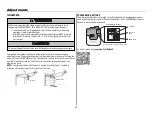
Страница 20: ...or bracket No more than 6 inches 15 cm Carriage Bolt 1 4 20 x 1 2 Wing Nut 1 4 20 1 2 3 OPTION B WALL INSTALLATION If additional clearance is needed an extension bracket not provided or wood blocks can be used Make sure each bracket has the same amount of clearance so they will align correctly 1 Position the sensor bracket against the wall with the curved arms facing the door Make sure there is en...

Страница 21: ...iage Bolt 1 4 20 x 1 2 Wing Nut 1 4 20 3 4 2 Wire the Safety Reversing Sensors PRE WIRED INSTALLATIONS If your garage already has wires installed for the safety reversing sensors see page 22 HARDWARE Insulated Staple Not Shown OPTION A INSTALLATION WITHOUT PRE WIRING 1 Run the wire from both sensors to the garage door opener Attach the wire to the wall and ceiling with the staples 2 Strip 7 16 inc...

Страница 22: ...ite black wire would connect to the purple wire 4 At the garage door opener strip 7 16 inch 11 mm of insulation from each end of the wires previously chosen for the safety reversing sensors Twist the like colored wires together 5 Insert the wires connected to the white safety sensor wires to the white terminal on the garage door opener Insert the wires that are connected to the white black safety ...

Страница 23: ...tlet If the plug doesn t fit into your outlet contact a qualified electrician to install the proper outlet THERE ARE TWO OPTIONS FOR CONNECTING POWER OPTION A TYPICAL WIRING 1 Plug in the garage door opener into a grounded outlet 2 DO NOT run garage door opener at this time TYPICAL WIRING OPTION B PERMANENT WIRING If permanent wiring is required by your local code refer to the following procedure ...

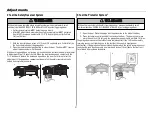
Страница 24: ...correctly Green LED Amber LED If the receiving sensor is in direct sunlight switch it with sending sensor so it is on the opposite side of the door invisible light beam SENDING SENSOR RECEIVING SENSOR IF THE AMBER LED ON THE SENDING SENSOR IS NOT GLOWING 1 Make sure there is power to the garage door opener 2 Make sure the sensor wire is not shorted broken 3 Make sure the sensor has been wired corr...

Страница 25: ...setup and adjustments easy The adjustments allow you to program where the door will stop in the open UP and close DOWN position The electronic controls sense the amount of force required to open and close the door The force is adjusted automatically when you program the travel NOTE If anything interferes with the door s upward travel it will stop If anything interferes with the door s downward tra...

Страница 26: ... the door is in the desired DOWN position 5 Once the door is in the desired DOWN position press and release the Adjustment Button The garage door opener lights will flash twice and the UP Button will begin to flash 6 Press and release the UP Button When the door travels to the programmed UP position the DOWN Button will begin to flash 7 Press and release the DOWN Button The door will travel to the...

Страница 27: ...act with the 1 1 2 inch board remove the board and open close the door 3 or 4 times to test the adjustment If the garage door opener continues to fail the safety reversal test call a trained door systems technician 1 2 3 Test the Protector System Without a properly installed safety reversing sensor persons particularly small children could be SERIOUSLY INJURED or KILLED by a closing garage door 1 ...

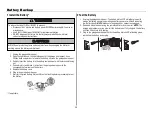
Страница 28: ...compartment with the terminals facing out 4 Connect red and black wires from the garage door opener to the corresponding terminals on the battery 5 Replace the battery cover 6 Plug in the garage door opener 7 Wait for the green Battery Status LED to start flashing before proceeding to test the battery Battery Status LED If applicable 2 Test the Battery 1 Unplug the garage door opener The battery s...

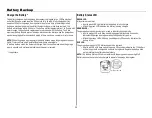
Страница 29: ...ckup mode the Automatic Garage Door Lock will unlock when the garage door is opened and will remain disabled until power is restored If applicable Battery Status LED GREEN LED All systems are normal l A solid green LED light indicates the battery is fully charged l A flashing green LED indicates the battery is being charged ORANGE LED The garage door opener has lost power and is in battery backup ...

Страница 30: ...VER use handle to pull garage door open or closed If rope knot becomes untied you could fall 9 After ANY adjustments are made the safety reversal system MUST be tested 10 Safety reversal system MUST be tested every month Garage door MUST reverse on contact with 1 1 2 3 8 cm high object or a 2x4 laid flat on the floor Failure to adjust the garage door opener properly increases the risk of SEVERE IN...

Страница 31: ...pener will not go into the sleep mode until the garage door opener has completed 5 cycles upon power up LIGHTS The garage door opener light bulbs will turn on when the opener is initially plugged in power is restored after interruption or when the garage door opener is activated The lights will turn off automatically after 4 1 2 minutes An incandescent A19 light bulb 100 watt maximum or for maximu...

Страница 32: ...rage door opener will beep once You have 20 minutes to complete the connection process 2 On your mobile device go to Settings Wi Fi and select the network with the MyQ prefix 3 Launch the web browser on your smartphone or tablet Enter setup myqdevice com into the browser address bar Follow the on screen prompts to connect the garage door opener to your Wi Fi network The MyQ serial number will disp...

Страница 33: ... and keyless entry This feature is useful for added peace of mind when the home is empty i e vacation TIMER TO CLOSE TTC DO NOT enable TTC if operating a one piece door TTC is to be used ONLY with sectional doors Factory default is set to off TTC can be set to automatically close your garage door from the fully open position after a specified period of time 1 5 10 minute intervals or a custom sett...

Страница 34: ...ust run through a complete cycle before it will activate Wi Fi programming For help related to Wi Fi visit WiFiHelp LiftMaster com SETTINGS Press the navigation button below the down arrow till you see TEMPERATURE to view the Settings menu Display the temperature in Fahrenheit or Celsius and show hide the temperature Select a language Set duration for garage door opener light to stay on after oper...

Страница 35: ...Repeat the steps above for programming additional remote controls or keyless entry devices If programming is unsuccessful program the remote using the learn button 1 2 3 OR PIN 4 Press to continue Press to continue TO ADD REPROGRAM OR CHANGE A REMOTE CONTROL USING THE LEARN BUTTON 1 Press and release the LEARN Button on the garage door opener 2 Press and hold the button on the remote control that ...

Страница 36: ...ally 1 Pull the emergency release handle down and back toward the opener The door can then be raised and lowered manually as often as necessary 2 To disengage the lockout feature pull the handle straight down The trolley will reconnect on the next UP or DOWN operation either manually or by using the door control or remote control NOTICE NOTICE TO MANUALLY DISENGAGE AUTOMATIC GARAGE DOOR LOCK MODEL...

Страница 37: ... from that to which the receiver is connected l Consult the dealer or an experienced radio TV technician for help AVIS Cet appareil est conforme aux dispositions de la partie 15 du règlement de la FCC et de l exemption de licence IC Industrie Canada RSS L utilisation est assujettie aux deux conditions suivantes 1 ce dispositif ne peut causer d interférences nuisibles et 2 ce dispositif doit accept...

Страница 38: ...sensors to ensure both LEDs are steady and not flickering Make sure nothing is hanging or mounted on the door that would interrupt the sensor s path while closing 1 5 Door moves 6 8 15 20 cm stops or reverses Manually open and close the door Check for binding or obstructions such as a broken spring or door lock correct as needed Check wiring connections at travel module and at the logic board Repl...

Страница 39: ...activated See page 32 to activate Wi Fi LEARN mode Cannot connect garage door opener to home Wi Fi network l Ensure the MyQ Serial number was entered correctly and try again The MyQ characters are between A F and 0 9 only l Weak Wi Fi signal in the garage Ensure the Wi Fi signal is reaching the garage see page 4 or visit WiFiHelp LiftMaster com for more information My door will not close and the l...

Страница 40: ...e Remote Light Control Automatically control your lights using your garage door opener a Security 2 0 remote control or a LiftMaster Internet Gateway Plugs into any interior outlet Motion Detecting Control Panel Multi function door control with motion sensor that automatically turns opener lights on when it detects a person entering the garage Security 2 0 and Wi Fi compatible MAX Wireless Keyless...

Страница 41: ...UDING BUT NOT LIMITED TO ANY IMPLIED WARRANTIES OF MERCHANTABILITY AND FITNESS FOR A PARTICULAR PURPOSE ARE LIMITED IN DURATION TO THE APPLICABLE LIMITED WARRANTY PERIOD SET FORTH ABOVE FOR THE RELATED COMPONENT S AND NO IMPLIED WARRANTIES WILL EXIST OR APPLY AFTER SUCH PERIOD Some States and Provinces do not allow limitations on how long an implied warranty lasts so the above limitation may not a...

Страница 42: ...Trolley Threaded Shaft 109B48 Description Part Number 1 Curved Door Arm 178B35 2 Door Bracket with Clevis Pin and Fastener 41A5047 1 3 Emergency Release Rope and Handle 41A2828 4 Header Bracket with Clevis Pin and Fastener 41A4353 1 5 Remote Control Visor Clip 29C151 6 Safety Sensor Bracket 41A5266 1 7 Safety Sensor Kit with receiving and sending sensors with 3 feet 9 m 2 conductor wire 041A5034 8...

Страница 43: ... Lens 041A7562 4 Light Socket 041C0279 5 Transformer 041D0277 1 6 Cover 8550W 8550WL 041D8257 041D8859 7 Motor with Travel Module 041D8006 1 8 Travel Module 041D8071 4 9 End Panel and light socket 8550W 8550WL 041D8198 041D0216 2 10 Receiver Logic Board 8550W 8550WL 050DCTWF 050DCTWFLK 11 Backup Battery 485LM Repair Parts Garage Door Opener Parts Models 8550W and 8550WL ...

Страница 44: ... 9 Motor with Travel Module 041A7667 10 Travel Module 041D7742 5 11 Cover 041D8258 12 Logic Board 050ACTWF 13 Logic Board End Panel 041D8198 Repair Parts Garage Door Opener Parts Model 8557W Contact Information Visit us online at LiftMaster com or myLiftMaster com Or for installation and service information call 1 800 528 9131 Before calling please have the model number of the garage door opener I...

Отзывы: