1
3
4
5
6
2
7
1
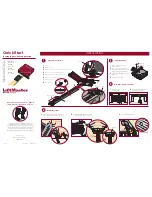
Open the cover.
2
Remove the chain guard.
3
Align the key holes on the end of the rail with the cap screws on the chassis.
4
Attach the rail to the chassis with the hardware provided.
5
Move trolley to within 3 feet (.9 m) of the end of the rail.
6
Wrap the chain around the output sprocket.
7
Adjust the chain tension.
8
Replace chain guard.
This QuickStart is intended to highlight a single gate/door
application. Each application is unique and it is the
responsibility of the purchaser, installer and end user to ensure
that the total gate/door system is installed and operated
properly. Refer to the installation manual for complete
information regarding installation, testing, and programming.
QuickStart
for single gate/door application
Model HCTDCU
INSTALLATION
01-38474
© 2016, LiftMaster – All Rights Reserved
845 Larch Avenue
Elmhurst, Illinois 60126-1196
LiftMaster.com
Connect rail to operator.
Install vented plug.
Determine location for operator.
Mount the operator.
2016 UL 325 Gate Operators require use of LiftMaster
external monitored entrapment protection devices.
HCTDCU
Motor Unit
HCT08
8 Foot Rail
HCT10
10 Foot Rail
HCT12
12 Foot Rail
Temporary
Support Post
Header Bracket
Vented Plug
Header Bracket
OR
Concrete Anchor
1/2" x 3 1/2"
Brackets (not provided)
Flush Mount
Arm
Door Arm
DOOR INSTALLATION
Cap Screw
Chain Guard
Trolley
Within 3 feet (.9 m)
Top of Rail
1/4" (.64 cm) Max.
Turnbuckle
Hex Nut
Carriage Bolt
Nut
Washer
1
Center the header bracket in the opening and
bolt or weld the header bracket to the wall.
2
Lift the operator and align with center mark
on ceiling. Bolt the operator to the ceiling.
3
Bolt or weld arm to gate/door.
1
With the gate/door closed,
mark the center.
1
Remove the dome plug from the
operator chassis.
2
Remove the solid plug in the gear
reducer and replace it with the vented
plug (provided in bag with manual).
3
Tighten the vented plug with a socket or
Allen wrench.
4
Re-insert the dome plug.
2
Open the gate/door and mark the
center point on the ceiling.
Dome Plug


