20’ x 20’ / 6m x 6m Bexley Series Frame Canopy
www.GetTent.com / www.CelinaTent.com
PG.8
© 2013 Celina Tent Inc.
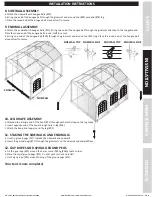
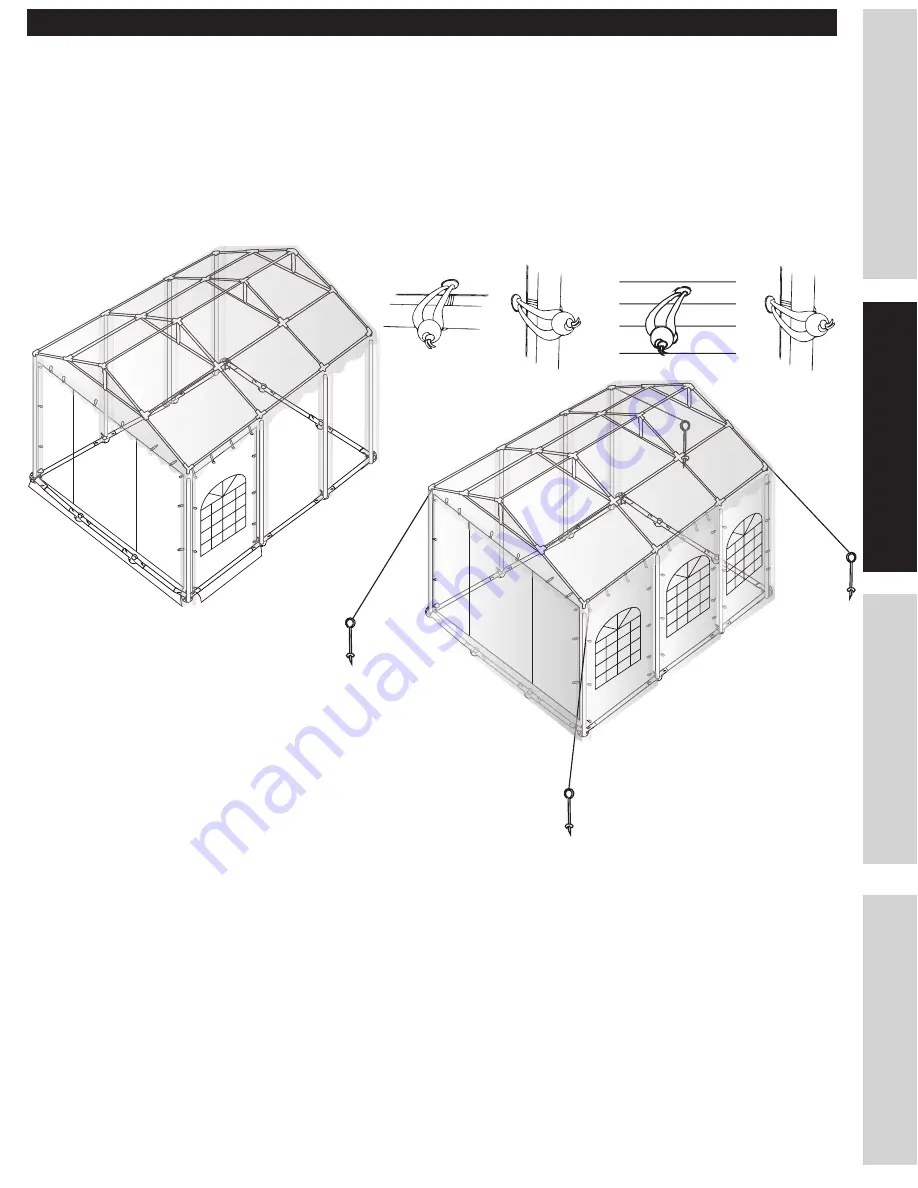
8. SIDEWALL ASSEMBLY
a. Attach the sidewalls with bungee balls (#20).
b. String one end of the bungee ball through the grommet and around the (#02) pole and (#03) leg.
c. Place the round end of the bungee ball around itself to secure.
9. ENDWALL ASSEMBLY
a. Attach the endwall with bungee balls (#21). String one end of the bungee ball through the grommet attached to the top gable end.
Place the round end of the bungee ball around itself to secure.
b. String one end of the bungee ball (#20) through the grommet and around the (#03) leg. Place the round end of the bungee ball
around itself to secure.
INSTALLATION INSTRUCTIONS
SAFETY
MAINTENANCE
INS
TALLA
TION
CONT
AC
TS
10. LEG DRAPE ASSEMBLY
a. Attached the triangle end of the hook (#23) through each elastic loop on the leg drape.
b. Insert opposite end of the hook through hole in leg (#03)
c. Attach the hoop and loop around the leg (#03)
11. STAKING THE SIDEWALLS AND ENDWALLS
a. Use the ground pegs (#17) to stake the sidewalls and endwalls.
b. Insert the ground pegs (#17) through the grommets on the sidewall and endwall flaps.
12. GUY ROPES AND SPIRAL GROUND PEGS
a. Tie the guy rope (#22) around the 3 way corner fitting (#06) at each corner.
b. Place the spiral ground pegs (#15) 5’ out at each corner and install.
c. Tie the guy rope (#22) around the top of the ground pegs (#15).
Your tent is now complete!
ENDWALL
SIDEWALL
SIDEWALL TOP SIDEWALL SIDE
ENDWALL TOP
ENDWALL SIDE

