www.usaprocom.com
15
200125-01A
INSTALLATION
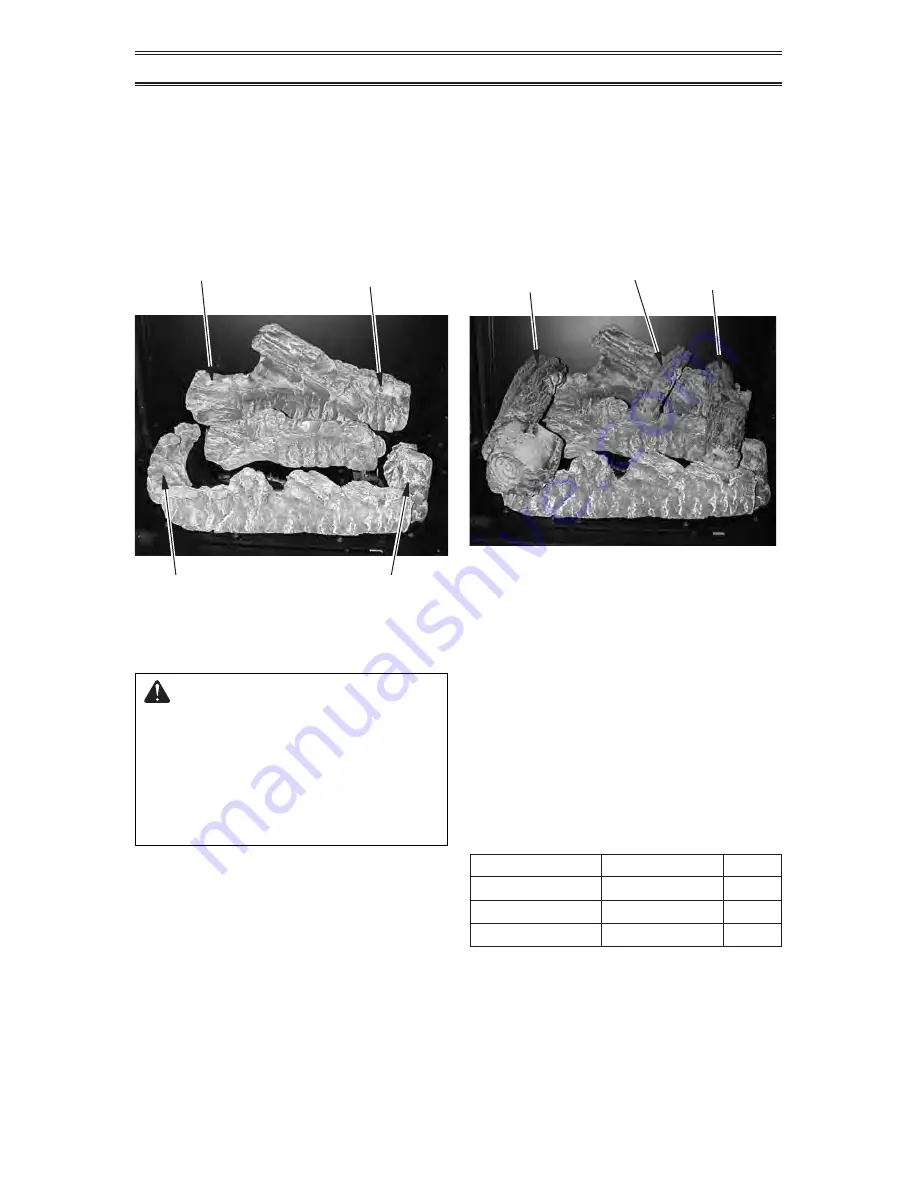
4. Place pins on log #4 into holes to the left
of the burner as shown in Figure 13, page
14 and Figure 15.
5. Place pins on log #8 into holes to the right
of the burner as shown in Figure 13, page
14 and Figure 15.
6. Place pin on log #5 into hole in the left side
of log #1 as shown in Figures 15 and 16.
Log #4
Hole for Log #5
Log #5
Log #7
Log #6
Hole for Log #7
Log #8
Figure 15 - Logs #4 and #8
Figure 16 - Logs #5, #6 and #7
7. Place log #6 into cutouts in log #1 and log
#2 as shown in Figure 16.
8. Place pin on log #7 into hole in the right side
of log #1 as shown in Figures 15 and 16.
IMPORTANT:
Make sure logs do not cover
any burner ports. It is very important to install
the logs exactly as instructed. Do not modify
logs. Use only logs supplied with heater.
INSTALLING BATTERIES
CAUTION: Do not mix old and
new batteries. Do not mix alka
-
line, standard (carbon - zinc), or
rechargeable (nickel - cadmium)
batteries. Do not dispose of
batteries in fire, batteries may
explode or leak.
• Batteries are included.
• Remove batteries when depleted.
• Install/replace the batteries according to the
type and quantity stated in table below.
• Do not mix old and new batteries. New bat-
teries should be the same brand for best
results.
• Be sure to observe proper polarity (+/-)
when installing or replacing the batteries.
Damage due to improper battery installation
may void the warranty on the product.
• For remote control systems, maximize bat-
tery life by turning off the receiver when it
is not in use.
• For long periods of non-operation, remove
batteries from all components for safety.
Component
Type of Battery
Qty.
Ignitor
AAA
1
Remote Control
AAA
2 or 3*
Remote Receiver
AA
4
*
Note: Quantity depends on model of remote
control.


