background image

TOTALPURE 2500 / 5000 / 7500 CONNECTED

35

ENGLISH

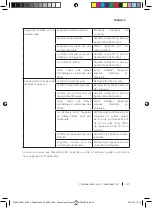
Replace the filter when its lifespan is over.
After the replacement of the filter, if you notice that the lifespan of the new filter is shortened, 
change it every six months.
Normally, the filter should be changed once every 12 months.
Make sure the device is unplugged when changing the filter.

5. CONNECTIVITY

1. 

Downloading the App

Browse the EnergySilence app in Google Play or in the APP Store. 
Fig. 27

2. 

Register

Register in the App by pressing “Create new account”, accept the Privacy policy and enter your 
e-mail account in the next display. After entering the verification code that was sent to the 
registered e-mail account, enter the password.
Fig. 28
Fig. 29
Fig. 30
Fig. 31

3. 

Login

To log in press on ‘Log in with an existing account’ and enter your e-mail account and the 
registered password. 
Fig. 32
Fig. 33

4. 

Linking the App

Make sure the phone is connected to the Wi-Fi network and the device is on.

To link the App, follow these steps:
Choose the product that you want to link.
Fig. 34
Press the mode button (three horizontal bars) for 5 seconds. The Wi-Fi symbol will flicker in 
the frontal display.  
Enter the Wi-Fi password or change the Wi-Fi network to another one that suits you better.
Note: This device only works with 2.4-GHz networks.
Fig. 35
The linking process will start automatically.  
Fig. 36

05620_05621_05622_TotalPure 2500_5000_7500_ Connected_Manual_YV_01200320.indd   35

05620_05621_05622_TotalPure 2500_5000_7500_ Connected_Manual_YV_01200320.indd   35

20/3/20   15:18

20/3/20   15:18

Содержание TOTALPURE 7500 CONNECTED

Страница 1: ...al Manuel d instructions Bedienungsanleitung Manuale di istruzioni Manual de instruções Instrukcja obsługi Návod k použití 05620_05621_05622_TotalPure 2500_5000_7500_ Connected_Manual_YV_01200320 indd 1 05620_05621_05622_TotalPure 2500_5000_7500_ Connected_Manual_YV_01200320 indd 1 20 3 20 15 18 20 3 20 15 18 ...

Страница 2: ...05620_05621_05622_TotalPure 2500_5000_7500_ Connected_Manual_YV_01200320 indd 2 05620_05621_05622_TotalPure 2500_5000_7500_ Connected_Manual_YV_01200320 indd 2 20 3 20 15 18 20 3 20 15 18 ...

Страница 3: ...artung 53 5 Konnektivität 56 6 Problembehebung 58 7 Technische Spezifikationen 59 8 Entsorgung von alten Elektrogeräten 60 9 Garantie und Kundendienst 60 INDICE 1 Parti e componenti 61 2 Prima dell uso 61 3 Funzionamento 63 4 Pulizia e manutenzione 64 5 Connessione 67 6 Risoluzione dei problemi 68 7 Specifiche tecniche 69 8 Riciclaggio di elettrodomestici 70 9 Garanzia e SAT 70 ÍNDICE 2 Antes de u...

Страница 4: ...nchufe o encender el producto En caso de defecto o malfuncionamiento apague y desconecte el dispositivo inmediatamente No utilice el dispositivo si su cable o alguna de sus partes están dañadas En este caso contacte con el Servicio de Atención Técnica oficial de Cecotec No utilice el aparato en lugares donde las partículas de aire sean más densas como en cocinas ya que esto puede reducir la vida ú...

Страница 5: ...a prevenir la acumulación de polvo Este producto no puede ser usado por niños as ni personas con capacidades físicas sensoriales o mentales reducidas o con falta de experiencia y conocimiento No permita que los niños jueguen con el dispositivo No utilice el dispositivo en interiores si se han rociado insecticidas No utilice detergentes esponjas abrasivas paños tratados químicamente gasolina bencen...

Страница 6: ...mmediately in the event of defects or malfunctions Do not use the device if its cord or any other part is damaged In this case contact the official Technical Support Service of Cecotec Do not use the device in places where air particles are dense such as kitchens as this can reduce its service life Do not install the device near heat generating appliances flammable dangerous materials or in places...

Страница 7: ...the surface Regularly clean the plug with a dry cloth to prevent dust from building up and to avoid product damage This appliance cannot be used by children or persons with reduced physical sensory or mental capabilities or lack of experience and knowledge Children shall not play with the appliance 05620_05621_05622_TotalPure 2500_5000_7500_ Connected_Manual_YV_01200320 indd 7 05620_05621_05622_To...

Страница 8: ...reil En cas de défaut ou de mauvais fonctionnement éteignez et débranchez l appareil immédiatement N utilisez pas l appareil si son câble ou une autre de ses parties sont abîmés Dans ce cas veuillez contacter le Service Après Vente Officiel de Cecotec N utilisez pas l appareil dans des endroits où les particules d air soient plus denses comme dans la cuisine Cela pourrait réduire la vie utile de l...

Страница 9: ...iondepoussière Utilisezunchiffonpourlenettoyer Cet appareil ne convient pas aux enfants ni aux personnes aux capacités physiques mentales ou sensorielles réduites ou sans expérience ni connaissance Ne laissez pas les enfants jouer avec l appareil N utilisez pas l appareil à l intérieur de la maison si vous avez aspergé des insecticides N utilisez pas détergents éponges abrasives chiffons traités c...

Страница 10: ...her dass Ihre Hände völlig trocken sind bevor Sie die Steckdose berühren oder das Gerät einschalten Bei Beschädigung oder Fehlfunktion schalten Sie das Gerät aus und trennen Sie es sofort von der Stromversorgung Betreiben Sie das Gerät nicht wenn das Kabel oder Teile Schäden aufweisen In diesem Fall kontaktieren Sie dem technischen Kundendienst von Cecotec Verwenden Sie das Gerät nicht an Orten an...

Страница 11: ...ischen Sie die Buchsenleiste regelmäßig mit einemtrockenen Tuch ab um eine Staubansammlung zu vermeiden Dieses Gerät darf nicht von Kindern Personen mit eingeschränkten körperlichen sensorischen oder geistigen Fähigkeiten oder fehlender Erfahrung bzw fehlenden Kenntnissen verwendet werden Lassen Sie Kinder nicht mit dem Gerät spielen Verwenden Sie das Gerät nicht in Innenräumen wenn Insektizide ge...

Страница 12: ... la presa o accendere il prodotto In caso di difetto o mal funzionamento spegnere e scollegare immediatamente il dispositivo Non utilizzare il dispositivo se il suo cavo o una delle sue parti risultasse danneggiata In tal caso contattare il Servizio di Assistenza Tecnica ufficiale di Cecotec Non utilizzare l apparato in luoghi in cui le particelle d aria siano più dense come in cucina dato che pot...

Страница 13: ...to per prevenire l accumulo di polvere Questoprodottononpuòessereusatodabambiniepersonecon capacità fisiche sensoriali o mentali ridotte o con mancanza di esperienza e conoscenza Non permettere l utilizzo del dispositivo ai bambini Non utilizzare il dispositivo in spazi in cui è stato usato insetticida Non utilizzare detergenti spugne abrasive panni trattati con sostanze chimiche benzina benzene o...

Страница 14: ...da ou ligar o produto Em caso de defeito ou mau funcionamento desligue e desconecte o dispositivo imediatamente Não utilize o dispositivo se o cabo ou alguma das partes estiver danificada Em caso de danos contacte com o Serviço de Assistência Técnica oficial de Cecotec Não utilize o aparelho em lugares onde as partículas de ar sejam mais densas como cozinhas já que isso pode reduzir a vida útil do...

Страница 15: ...mulação de pó Este aparelho não pode ser usado por crianças nem pessoas com capacidades físicas sensoriais ou mentais reduzidas ou com falta de experiência e conhecimento Não permita que as crianças brinquem com o dispositivo Não utilize o dispositivo em interiores se foram usados insecticidas Não utilize detergentes esponjas abrasivas panos tratados com químicos gasolina ou outros dissolventes já...

Страница 16: ...adku usterki lub nieprawidłowego działania należy natychmiast wyłączyć i odłączyć urządzenie Nie używaj urządzenia jeśli jego kabel lub którakolwiek z jego części jest uszkodzona Skontaktuj się z Serwisem Pomocy Technicznej Cecotec Nie używaj urządzenia w miejscach w których cząsteczki powietrza są gęstsze np W kuchni ponieważ może to skrócić żywotność urządzenia Nie instaluj urządzenia w pobliżu ...

Страница 17: ...nię moga korzystać dzieci osoby o niepełnosprawne fizycznie psychicznie bądź umysłowo jak i osoby bez odpowiedniej wiedzy i doświadczenia Nie można pozwolić dzieciom na zabawę urządzeniem Nie używaj urządzenia w pomieszczeniu jeśli rozpylono środki owadobójcze Nie używaj detergentów gąbek ściernych ściereczek poddanych obróbce chemicznej benzyny benzenu lub innych rozpuszczalników ponieważ mogą on...

Страница 18: ...ungování Pokud jsou některá část přístroje nebo kabel poškozené přístroj nepoužívejte Vtakovém případě kontaktujte Asistenční technický servis Cecotec Nepoužívejte v místech kde je vzduch hustější jako jsou kuchyně protože by to mohlo zkrátit životnost přístroje Neinstalujte přístroj v blízkosti přístrojů které generují teplo ani v blízkosti hořlavých nebo nebezpečných materiálů nebo na místech kd...

Страница 19: ...omezenými mentálními fyzickými anebo senzorickými schopnostmi nebo kterým chybí zkušenost a znalost Nedovolte aby si s přístrojem hrály děti Nepoužívejte přístrojvinteriérech kde se nastříkalyinsekticidy Nepoužívejte detergenty abrazivní houby chemicky upravené ubrousky benzín benzen nebo další rozpouštědla protože by mohly poškrábat nebo jinak poškodit přístroj a mohlo by dojít k uniku vody Odstr...

Страница 20: ...TES DE USAR Saque el producto de la caja Retire todo el material de embalaje Guarde la caja original Asegúrese de que todas las piezas y componentes están incluidas y en buen estado Si se observara algún daño visible contacte de forma inmediata con el Servicio de Atención Técnica oficial de Cecotec Fig 4 Escriba la fecha del primer uso en la etiqueta antes del primer uso para que sea más fácil lle...

Страница 21: ...iltro 1 Retire los embalajes y coloque el aparato en una superficie estable y seca Fig 8 2 Para desmontar el filtro presione las pestañas a ambos lados del panel y tire hacia arriba con delicadeza Fig 9 3 Retire los filtros del purificador Fig 10 4 Retire el embalaje Fig 11 5 Vuelva a colocar los filtros otra vez en su lugar Fig 12 6 Vuelva a colocar el pre filtro como aparece en la imagen Fig 13 ...

Страница 22: ...o parpadearán 3 veces continuadas Entonces se apagarán todas menos la del indicador de funcionamiento que quedará en rojo y entrará en modo Standby PulseelbotónOn Off elaparatocomenzaráafuncionarenmodoAutoconlaslucesencendidas y detectará la calidad de aire automáticamente Tras encender el dispositivo la luz del indicador de calidad del aire comenzará a parpadear Eso significa que está detectando ...

Страница 23: ... Esta función solamente estará disponible tras el recordatorio de reemplazo del filtro Botón On Off Pulse este botón para activar y desactivar el indicador de calidad de aire encender y apagar el equipo 4 LIMPIEZA Y MANTENIMIENTO Apague y desconecte el dispositivo de la toma de corriente antes de limpiarlo o repararlo Utilice un paño suave y seco o ligeramente húmedo con un poco de producto de lim...

Страница 24: ...tro que puede limpiarse Utilice un aspirador a baja potencia evitando que el filtro se dañe Antes de poner cada filtro en la máquina asegúrese de retirar el embalaje de plástico y de que las etiquetas de los filtros estén hacia fuera Pasos a seguir 1 Apague el dispositivo para detener el filtro de aire 2 Retire el enchufe 3 Sujetar las pestañas a ambos lados del panel de entrada de aire y tire de ...

Страница 25: ...tivo ya que esto puede evitar fallos de funcionamiento Guarde el dispositivo en un lugar seco y ventilado Tiempo de referencia para reemplazar los filtros Cuando el dispositivo alcance las 1600 horas de funcionamiento el indicador luminoso de funcionamiento parpadeará a un ritmo aproximado de un parpadeo por segundo La luz indicadora estará de color rojo cuando el aparato esté en modo Standby y en...

Страница 26: ...el botón de modo tres líneas horizontales durante 5 segundos En la pantalla frontal aparecerá el símbolo del Wi Fi parpadeando Introduce la contraseña de la red Wi Fi detectada o cámbiala a la red Wi Fi a la que quieres conectar el producto Recuerda este dispositivo solo funciona con redes de 2 4GHz Fig 35 El proceso de vinculación comenzará automáticamente Fig 36 Fig 37 Al pulsar Finalizado apare...

Страница 27: ...o y vuelva a enchufarlo El cable de alimentación está dañado Contacte el servicio de atención al cliente de Cecotec El dispositivo se para o no se enciende El aparato no está encendido Vuelva a enchufar el aparato La dinamo está dañada Contacte el servicio de atención al cliente de Cecotec El aparato está colocado en una superficie inestable Coloque el aparato en una superficie estable Hay partícu...

Страница 28: ...ededor es de 50 cm a ambos lados del aparato y de 10 cm por la parte trasera El filtro del aparato no está instalado Asegúrese de que los filtros están instalados correctamente El aparato ocupa más área de la adecuada Asegúrese de que el aparato ocupa un espacio adecuado Si no puede resolver la incidencia o esta persiste por favor póngase en contacto con el SAT de Cecotec 7 ESPECIFICACIONES TÉCNIC...

Страница 29: ...mpra siempre y cuando se conserve y envíe la factura de compra el producto esté en perfecto estado físico y se le dé un uso adecuado tal y como se indica en este manual de instrucciones La garantía no cubrirá Si el producto ha sido usado fuera de su capacidad o utilidad maltratado golpeado expuesto a la humedad sumergido en algún líquido o substancia corrosiva así como cualquier otra falta atribui...

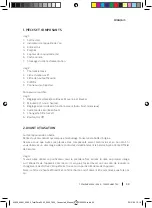
Страница 30: ... the box Remove all packaging material Save the original box Make sure all parts and components are included and in good conditions If any visible signs of damage are observed contact the Technical Support Service immediately Fig 4 Record the first use date in the label before the first use in order to ensure the filters are replaced on time Write it down on the nameplate s bottom part Note The hi...

Страница 31: ...ry and stable surface Fig 8 2 For disassembling the filter press the tabs at both sides of the air inlet panel and pull it up gently Fig 9 3 Take out the filters from this purifier Fig 10 4 Remove all packages Fig 11 5 Install the filters back to its place in order Fig 12 6 Install the pre filter back as seen in the image Fig 13 7 Install the air inlet panel back to its place Fix the filter into t...

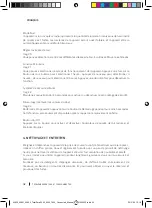
Страница 32: ...and detect the air quality automatically When the device is switched on the air quality indicator light will flash slowly It will detect the air quality and start pre heating after 5 seconds Air quality indicator Fig 18 Blue PM2 5 0 50 Perfect Green PM2 5 50 100 Good Yellow PM2 5 100 150 Normal Red PM2 5 150 Bad Auto mode Fig 19 Auto mode will detect the air quality automatically and will operate ...

Страница 33: ...vent the accumulation of dust and dirt If the product is not going to be used for a long time store it in a safe and well ventilated place Do not use detergent scouring pads chemically treated cloths gasoline benzene alcohol thinner or other solvents as these can scratch and damage the tank and cause water leakage Do not immerse the product in water or any other liquid The only filter that can be ...

Страница 34: ...ticles Use water or soap to clean the filter then place it into the machine when it is completely dry 6 Install the pre filter back into the air purifier 7 Reinstall the air inlet panel 8 Plug the device in 9 9 Turn on the power and start the air purifier Replacing filters After 1600 hours of usage the power indicator light will flash slowly in red colour when the device is on standby mode and in ...

Страница 35: ...ccount enter the password Fig 28 Fig 29 Fig 30 Fig 31 3 Login To log in press on Log in with an existing account and enter your e mail account and the registered password Fig 32 Fig 33 4 Linking the App Make sure the phone is connected to the Wi Fi network and the device is on To link the App follow these steps Choose the product that you want to link Fig 34 Press the mode button three horizontal ...

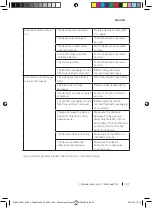
Страница 36: ...n you can manage the user profile your home see the notifications on the message center find about the frequent questions and problems Go to app settings Fig 45 6 TROUBLESHOOTING Problem Possible reason Possible solution The device does not turn on The front panel may not be installed Remove the front panel and reinstall it again The device is not plugged in Unplug the device and pulg it back agai...

Страница 37: ...f new filters The device s air inlet or outlet is blocked Contact Cecotec s customer service The plastic packaging of each filter has not been removed Before using the device remove the plastic packaging of each filter The gap between the device and other objects is not the adequate one Make sure the distance between the device and other objects is 50 cm from both sides of the air inlet and outlet...

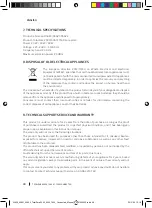
Страница 38: ...ECHNICAL SUPPORT SERVICE AND WARRANTY This product is under warranty for 2 years from the date of purchase as long as the proof of purchase is submitted the product is in perfect physical condition and it has been given proper use as explained in this instruction manual The warranty will not cover the following situations The product has been used for purposes other than those intended for it misu...

Страница 39: ...etirez tout le matériel qui compose l emballage Conservez la boîte d origine Assurez vous que toutes les pièces et les composants soient bien inclus et en bon état Si vous observez un dommage visible contactez immédiatement le Service Après Vente Officiel de Cecotec Img 4 Si vous allez utiliser le purificateur pour la première fois écrivez la date du premier usage sur l étiquette de l appareil Com...

Страница 40: ...ller le filtre 1 Retirez tous les emballages et placez l appareil sur une surface stable et sèche Img 8 2 Pour démonter le filtre appuyez sur les languettes des deux côtés du panneau et tirez soigneusement vers le haut Img 9 3 Retirez les filtres du purificateur Img 10 4 Retierz l emballage Img 11 5 Remettez les filtres dans sa place Img 12 6 Placez de nouveau le préfiltre comme indiqué sur l imag...

Страница 41: ...te Alors toutes les lumières sauf celle du fonctionnement s éteindront Celle ci restera en rouge et entrera en mode Standby Appuyez sur le bouton On Off et l appareil commencera à fonctionner en mode Auto avec les lumières allumés et détectera automatiquement la qualité de l air Après avoir allumé l appareil la lumière qui indique la qualité de l air commencera à clignoter Cela veut dire que l app...

Страница 42: ... Redémarrez l appareil en appuyant sur le bouton de Démarrage pendant au moins 5 secondes Cette fonction sera seulement disponible après le rappel du remplacement du filtre Bouton On Off Appuyez sur ce bouton pour activer et désactiver l indicateur de qualité de l air allumer et éteindre l équipe 4 NETTOYAGE ET ENTRETIEN Éteignez et débranchez l appareil de la prise de courant avant de le nettoyer...

Страница 43: ...eux mois ou toutes les 480 heures Nettoyez le préfiltre avec un chiffon humide ou une solution savonneuse neutre pour prévenir l accumulation de poussière L appareil doit être éteint et débranché pendant le nettoyage du filtre Ceci est le seul filtre qui peut être nettoyé Utilisez un aspirateur avec une faible puissance en évitant que le filtre s abîme Avant de remettre le filtre à sa place vérifi...

Страница 44: ... bouton de reset pendant 5 secondes pour redémarrer l appareil L appareil ne va pas être utilisé pendant une longue période Débranchez l appareil puisqu il consomme de l énergie même s il se trouve en mode Standby Séchez l intérieur de l appareil pour éviter un mauvais fonctionnement Gardez l appareil dans un endroit sec et aéré Temps de référence pour changer les filtres Lorsque l appareil ait at...

Страница 45: ... trouve connecté au réseau Wi Fi et si l appareil est allumée 5 Suivez les étapes suivantes pour connecter l appareil Sélectionnez le produit que vous voulez connecter Img 34 Appuyez pendant 5 secondes sur le bouton du MODE trois lignes horizontales L écran principal affichera l icône du Wi Fi Celui ci clignotera Saisissez le mot de passe du réseau Wi Fi détecté ou changez le réseau Wi Fi auquel v...

Страница 46: ...s notifications du centre de messagerie accéder aux foires aux questions FAQ vous informer sur tout type de problème et voir les réglages de l application Img 45 6 RÉSOLUTION DE PROBLÈMES Problème Cause possible Possible solution L appareil s arrête ou ne s allume pas Le panneau frontal n est pas installé Retirez le panneau frontal et remettez le à sa place Le produit n est pas branché Débranchez ...

Страница 47: ...es usés par de nouveaux L entrée ou la sortie d air de l appareil est bloquée Veuillez contacter le Service Après Vente de Cecotec Vous n avez pas enlevé l emballage en plastique des filtres Avant d utiliser l appareil enlevez l emballe en plastique La distance entre l appareil et autres objets n est pas l adéquate Vérifiez que la distance entre l appareil et autres objets de la zone environnante ...

Страница 48: ...e la plus adéquate de vous défaire de vos électroménagers et ou des batteries correspondantes vous devez contacter les autorités locales 9 GARANTIE ET SAV Ce produit possède une garantie de 2 ans à partir de la date d achat à condition de toujours présenter la facture d achat que le produit soit en parfait état et ait été utilisé correctement comme indiqué dans ce manuel d instructions La garantie...

Страница 49: ...ion Si vous détectez un incident ou un problème avec le produit vous devez contacter le Service Après Vente Officiel de Cecotec au 34 9 63 21 07 28 05620_05621_05622_TotalPure 2500_5000_7500_ Connected_Manual_YV_01200320 indd 49 05620_05621_05622_TotalPure 2500_5000_7500_ Connected_Manual_YV_01200320 indd 49 20 3 20 15 18 20 3 20 15 18 ...

Страница 50: ... aus der Verpackung Entfernen Sie alles Verpackungsmaterialien Bewahren Sie die originelle Verpackung auf Prüfen Sie ob die Lieferung vollständig und in gutem Zustand ist Falls Sie sichtbare Schäden bemerken kontaktieren Sie sofort mit dem technischen Kundendienst von Cecotec Abb 4 Schreiben Sie das Datum der ersten Verwendung vor der ersten Verwendung auf das Etikett um den Filterwechsels zu erle...

Страница 51: ...werden Abb 7 Installation des Filters 1 Entfernen Sie die Verpackung und stellen Sie das Gerät auf eine stabile trockene Oberfläche Abb 8 2 Um den Filter zu entfernen drücken Sie die Laschen auf beiden Seiten des Paneel und ziehen Sie sie vorsichtig nach oben Abb 9 3 Entfernen Sie die Filter aus dem Luftreiniger Abb 10 4 Entfernen Sie die Verpackung Abb 11 5 Setzen Sie die Filter wieder ein Abb 12...

Страница 52: ...G Kochfeld Abb 17 Schließen Sie das Gerät an Es ertönt ein Ton und alle Lichter am Gerät blinken 3 Mal ununterbrochen Alle außer der Betriebsanzeige werden dann ausgeschaltet und gehen in den Bereitschaftsmodus Drücken Sie die Ein Aus Taste das Gerät beginnt im Auto Modus mit eingeschalteter Beleuchtung zu arbeiten und erkennt die Luftqualität automatisch Nach dem Einschalten des Geräts beginnt di...

Страница 53: ...5 Sekunden lang gedrückt um die Sicherheitssperre zu aktivieren oder zu deaktivieren Neustart Wiederherstellung der Anfangswerte Abb 23 Starten Sie das Gerät neu indem Sie die Reset Taste mindestens 5 Sekunden lang drücken Diese Funktion steht erst nach der Erinnerung an den Filterwechsel zur Verfügung On Off Taste Drücken Sie diese Taste um die Luftqualitätsanzeige ein und auszuschalten Ein und A...

Страница 54: ...chen Abb 26 4 Trocknen Sie ihn mit trockenen Wattestäbchen 5 Setzen Sie die Schutzkappe auf den Qualitätssensor auf Reinigung des Vorfilters Um die bestmögliche Leistung des Filters zu gewährleisten reinigen Sie ihn alle zwei Monate oder 480 Stunden Reinigen Sie den Vorfilter mit einem feuchten Tuch oder einer neutralen Seifenlösung um Staubablagerungen zu vermeiden Das Gerät muss ausgeschaltet un...

Страница 55: ...ie die Plastikverpackungen von den Filtern und legen Sie sie wieder in den Reiniger 6 Setzen Sie den Vorfilter in den Reiniger ein 7 Setzen Sie das Lufteinlass Paneel wieder ein 8 Nachdem Sie den Filter ausgewechselt haben schließen Sie das Gerät an die Stromversorgung an und halten Sie die Reset Taste 5 Sekunden lang gedrückt um das Gerät zurückzusetzen Das Gerät wird für eine lange Zeit nicht be...

Страница 56: ...gistrierte E Mail gesendet wurde geben Sie das Passwort ein Abb 28 Abb 29 Abb 30 Abb 31 3 Anmeldung Um sich einzuloggen klicken Sie auf Mit bestehendem Account einloggen und geben Sie Ihre registrierte E Mail und Ihr Passwort ein Abb 32 Abb 33 4 Gerät verbinden Stellen Sie sicher dass Ihr Telefon mit dem Wi Fi Netzwerk verbunden und das Gerät eingeschaltet ist 5 Befolgen Sie die folgenden Schritte...

Страница 57: ... anzuzeigen klicken Sie auf das Produkt und dann auf den Bleistift oben rechts Abb 40 Abb 41 7 Intelligenz Von der Intelligenzabteilung aus können Sie die Programmierung Ihres Geräts verwalten Abb 42 Abb 43 Abb 44 8 Ich Von diesem Abschnitt aus können Sie Ihr Benutzerprofil verwalten Ihr Heim verwalten Benachrichtigungen im Nachrichtenzentrum einsehen auf FAQs zugreifen und Probleme melden und sch...

Страница 58: ...geschaltet Schließen Sie das Gerät wieder an Der Dynamo ist beschädigt Wenden Sie sich an den Cecotec Kundendienst Das Gerät wird auf eine instabile Oberfläche gestellt Stellen Sie das Gerät auf eine stabile Oberfläche Im Inneren des Geräts befinden sich externe Partikel Wenden Sie sich an den Cecotec Kundendienst Der Motor ist locker Wenden Sie sich an den Cecotec Kundendienst Die Plastikverpacku...

Страница 59: ...ebenden Objekten 50 cm auf beiden Seiten des Geräts und 10 cm auf der Rückseite beträgt El filtro del aparato no está instalado Stellen Sie sicher dass die Filter korrekt installiert sind Das Gerät nimmt mehr Fläche als geeignet ist Stellen Sie sicher dass das Gerät ausreichend Platz einnimmt Wenn Sie den Vorfall nicht lösen können oder er andauert wenden Sie sich bitte an den Kundendienst von Cec...

Страница 60: ...Zustand und wird ordnungsgemäß verwendet wie in dieser Bedienungsanleitung angegeben Die Garantie deckt keine Schäden bei denen Das Produkt über seine Kapazität oder Anwendbarkeit hinaus missbraucht geschlagen nicht ordnungsgemäß behandelt wurde oder mit ätzenden bzw Korrosiven Substanzen oder Flüssigkeiten in Kontakt geraten ist oder die jeweilige Störung Fehler Schaden bzw Defekt dem Verbraucher...

Страница 61: ...N OFF 2 PRIMA DELL USO Ritirare il prodotto dalla scatola Rimuovere tutto il materiale dall imballaggio Conservare la scatola originale Verificare che tutte le parti e componenti siano incluse e in buono stato Se si osservano danni visibili contattare immediatamente il Servizio di Assistenza Tecnica ufficiale di Cecotec Fig 4 Scrivere la freccia del primo uso sull etichetta prima del primo uso per...

Страница 62: ...gi e collocare l apparato su di una superficie stabile e asciutta Fig 8 2 Per smontare il filtro premere le linguette su entrambi i lati del pannello e tirare verso l alto con delicatezza Fig 9 3 Ritirare i filtri del purificatore Fig 10 4 Ritirare l imballaggio Fig 11 5 Collocare di nuovo i filtri al suo posto Fig 12 6 Collocare di nuovo il pre filtro come indicato nell immagine Fig 13 7 Ricolloc...

Страница 63: ... continuative Si spegneranno tutte le luci eccetto l indicatore del funzionamento che rimarrà in rosso ed entrerà in modalità Standby Premere il tasto On Off l apparato comincerà a funzionare in modalità Auto con le luci accese e localizzerà automaticamente la qualità dell aria Dopo aver acceso il dispositivo la luce dell indicatore della qualità dell aria comincerà a lampeggiare Ciò significa che...

Страница 64: ...one sarà disponibile solamente dopo il promemoria di sostituzione del filtro Tasto On Off Premere questo tasto per attivare la modalità di purificazione dell aria accendere e spegnere il prodotto 4 PULIZIA E MANUTENZIONE Spegnere e scollegare il dispositivo dalla presa della corrente prima di pulirlo o ripararlo Utilizzare un panno morbido e asciutto o leggermente umido con un po di detergente neu...

Страница 65: ...nire l accumulo di polvere L apparato deve essere spento e scollegato quando viene pulito il filtro Tale filtro è l unico che può essere pulito Utilizzare un aspirapolvere a bassa potenza evitando di danneggiare il filtro Prima di inserire ogni filtro all interno della macchina verificare di ritirare l imballaggio in plastica e che le etichette dei filtri indichino l esterno Passaggi da seguire 1 ...

Страница 66: ...r resettare l apparato Il dispositivo non viene usato per molto tempo Scollegare il dispositivo dato che consuma energia in modalità Standby Asciugare l interno del dispositivo evita possibili errori di funzionamento Conservare il dispositivo in luogo asciutto e ventilato Tempistiche di riferimento per la sostituzione dei filtri Dopo 1600 ore di funzionamento l indicatore luminoso di funzionamento...

Страница 67: ...lla rete Wi Fi e il dispositivo sia acceso 5 Per effettuare il collegamento seguire questi passaggi Selezionare il prodotto che si desidera collegare Fig 34 Premere il tasto della modalità tre linee orizzontali per 5 secondi Sul fronte del display comparirà il simbolo del Wi Fi lampeggiando Introdurre la password della rete Wi Fi localizzata o cambiarla alla rete Wi Fi a cui si desidera collegare ...

Страница 68: ...fine vedere le impostazioni della App 9 Fig 45 6 RISOLUZIONE DEI PROBLEMI Problema Possibile causa Possibile soluzione Il dispositivo si ferma o non si accende Il pannello frontale non è stato installato Ritirare il pannello frontale e collocarlo di nuovo Il prodotto non è collegato alla corrente Scollegare l apparato e collegarlo di nuovo L alimentatore è danneggiato Contattare il Servizio di Ass...

Страница 69: ...ntrata o uscita ell apparato è bloccata Contattare il Servizio di Assistenza Tecnica di Cecotec Non sono state ritirate le pellicole in plastica dei filtri Prima di usare l apparato ritirare le pellicole in plastica Non vi è sufficiente spazio libero tra il dispositivo e altri oggetti Verificare che la distanza tra apparato e altri oggetti sia di 50 cm su entrambi i lati e di 10 cm dalla parte pos...

Страница 70: ... 2 anni a partire dalla data di acquisto sempre e quando viene conservata e inviata la fattura di acquisto il prodotto stia in perfetto stato fisico e si utilizzi in modo adeguato così come indicato nel manuale di istruzioni La garanzia non coprirà Se il prodotto è stato utilizzato al di fuori della sua capacità o di utilizzo maltrattato colpito esposto ad umidità sommerso da qualche liquido o sos...

Страница 71: ... DE USAR Tire o produto da caixa Retire todo o material da embalagem Guarde a caixa original Certifique se de que todas as peças e componentes estão incluídas e em bom estado Se observar algum dano visível entre em contacto imediatamente com o Serviço de Assistência Técnica oficial de Cecotec Fig 4 Quando utilizar o dispositivo pela primeira vez escreva a data na etiqueta para que seja mais fácil ...

Страница 72: ...dispositivo sobre uma superfície estável e seca Fig 8 2 Para desmontarofiltro pressione as abas em ambos os lados do painele puxe suavemente para cima Fig 9 3 Retire os filtros do purificador Fig 10 4 Retire a embalagem Fig 11 5 Volte a colocar os filtros no seu lugar Fig 12 6 Volte a colocar o pré filtro como aparece na imagem Fig 13 7 Volte a colocar o painel de entrada de ar no seu sítio Volte ...

Страница 73: ...entrará em modo Standby Pressione o botão On Off o aparelho começará a funcionar em modo Auto com as luzes acesas e detetará a qualidade do ar automaticamente Depois de ligar o dispositivo a luz do indicador de qualidade do ar começará a piscar Isto significa que está a detetar a qualidade do ar Indicador de qualidade do ar Fig 18 Azul PM2 5 0 50 Perfeito Verde PM2 5 50 100 Bom Amarelo PM2 5 100 1...

Страница 74: ...ANUTENÇÃO Desligue e desconecte o dispositivo da corrente elétrica antes de o limpar o reparar Utilize um pano suave e seco ou ligeiramente húmido com um bocado de produto de limpeza neutro para limpar o exterior do produto e evitar acumulação de pó e sujidade Si não usaro produto num longo período detempo guarde o num lugarseguro e bemventilado Não utilize detergentes esponjas abrasivas panos tra...

Страница 75: ...as para fora Passos a seguir 1 Desligue o dispositivo para parar o filtro de ar 2 Remova a ficha da tomada 3 Segure as abas em ambos os lados do painel de entrada do ar e puxe o para fora e depois para cima 4 Remova a parte saliente do filtro de gaze antes de limpá lo 5 Utilize uma escova suave ou um aspirador para eliminar as partículas Utilize água ou sabão para limpar o filtro Coloque o no apar...

Страница 76: ...para substituir os filtros Quando o dispositivo atingir 1600 horas de operação o indicador luminoso de funcionamento piscará a uma frequência de aproximadamente uma piscada por segundo A luz indicadora estará de cor vermelho quando o aparelho estiver em modo Standby e em azum quando estiver em funcionamento A máquina pode continuar a funcionar mesmo que dê o aviso de subsituição do filtro Por favo...

Страница 77: ... botão de modo três linhas horizontais durante 5 segundos No ecrã principal aparecerá o símbolo do Wi Fi a piscar Introduza a senha da rede Wi Fi detetada ou escolha a rede Wi Fi à que quer conectar o produto Lembre se este dispositivo funciona apenas com redes de 2 4GHz Fig 35 O processo de vinculação começará automaticamente Fig 36 Fig 37 Ao pressionar Finalizado aparecerá o ecrã que lhe permite...

Страница 78: ... 45 6 RESOLUÇÃO DE PROBLEMAS Problema Possível causa Possível solução O dispositivo para ou não liga O painel frontal não está instalado Remova o painel frontal e volte a colocá lo O produto não está conectado à corrente Desconecte o aparelho da corrente e volte a conectá lo O cabo de alimentação está danificado Contacte com o serviço de assistência ao cliente de Cecotec 05620_05621_05622_TotalPur...

Страница 79: ...de malha do aparelho O filtro não foi substituído Substitua os filtros usados por filtros novos A saída ou entrada do aparelho está bloqueada Contacte com o serviço de assistência ao cliente de Cecotec Não retirou o invólucro de plástico dos filtros Antes de usar o aparelho retire os invólucros de plástico A distancia entre o aparelho e outros objetos não é adequada Certifique se de que a distânci...

Страница 80: ...ou pilha para a sua autonomia elétrica esta deverá extrair se antes de ser eliminado e ser tratada à parte como um resíduo de diferente categoria Para obter informação detalhada acerca da forma mais adequada de eliminar os seus eletrodomésticos e ou as correspondentes baterias o consumidor deverá contactar com as autoridades locais 9 GARANTIA E SAT Este produto tem uma garantia de 2 anos desde a d...

Страница 81: ... por parte do usuário o serviço de garantia não se fará responsável pela reparação Se em alguma ocasião deteta uma ocorrência com o produto ou tem alguma consulta entre em contacto com o Serviço de Assistência Técnica oficial de Cecotec através do número de telefone 34 96 321 07 28 05620_05621_05622_TotalPure 2500_5000_7500_ Connected_Manual_YV_01200320 indd 81 05620_05621_05622_TotalPure 2500_500...

Страница 82: ...o Noc Cicho 6 Przycisk On Off 2 PRZED URUCHOMIENIEM Wyciągnij produkt z opakowania Rozpakuj produkt Zachowaj oryginalne pudełko Upewnij się czy w zestawie znajdują się wszystkie części i sprawdź ich stan Jeśli zauważyłeś jakieś uszkodzenia natychmiast skontaktuj się z oficjalnym Serwisem Pomocy Technicznej firmy Cecotec Rys 4 Wpisz datę pierwszego użycia na etykiecie przed pierwszym użyciem aby uł...

Страница 83: ...kowanie i umieść urządzenie na stabilnej i suchej powierzchni Rys 8 2 Aby usunąć filtr naciśnij zaczepy po obu stronach panelu i delikatnie pociągnij w górę Rys 9 3 Wyjmij filtry z oczyszczacza Rys 10 4 Usuń opakowanie Rys 11 5 Umieść filtry z powrotem na miejscu Rys 12 6 Wymień filtr wstępny jak pokazano na obrazie Rys 13 7 Umieść panel wlotu powietrza z powrotem na miejscu Włóż filtr z powrotem ...

Страница 84: ... czerwony i przejdzie w tryb gotowości Naciśnij przyciskWł Wył Urządzenie rozpocznie pracęwtrybieAuto zwłączonymi światłami i automatycznie wykryje jakość powietrza Po włączeniu urządzenia kontrolka jakości powietrza zacznie migać Oznacza to że wykrywa jakość powietrza Wskaźnik jakości powietrza Rys 18 Niebieski PM2 5 0 50 Idealny Zielony PM2 5 50 100 Dobrze Żółty PM2 5 100 150 Normalny Czerwony P...

Страница 85: ...rawy urządzenia wyłącz je i rozłącz z gniazdka Użyj miękkiej suchej lub lekko wilgotnej szmatki z niewielką ilością neutralnego środka czyszczącego aby wyczyścić obudowę produktu i zapobiec gromadzeniu się kurzu i brudu Jeśli nie będziesz używać produktu przez dłuższy czas przechowuj go w bezpiecznym i dobrze wentylowanym miejscu Nie używaj detergentów gąbek ściernych ściereczek poddanych obróbce ...

Страница 86: ...owe opakowanie i etykiety filtrów skierowane na zewnątrz Instrukcje 1 Wyłącz urządzenie aby zatrzymać filtr powietrza 2 Wyjmij wtyczkę 3 Przytrzymaj zaczepy po obu stronach panelu wlotu powietrza i wyciągnij go a następnie do góry 4 Przed czyszczeniem usuń wystającą część filtra z gazy 5 Użyj miękkiej szczotki lub odkurzacza aby usunąć cząsteczki Do czyszczenia filtra użyj mydła lub wody Umieść go...

Страница 87: ...ścią około jednego mrugnięcia na sekundę La luz indicadora estará de color rojo cuando el aparato esté en modo Standby y en azul cuando esté en funcionamiento Maszyna może kontynuować pracę nawet jeśli wysyła sygnał wymiany filtra Wymień filtr po upływie okresu użytkowania Wymień filtr po upływie okresu użytkowania Jeśli po wymianie filtra skraca się czas użytkowania urządzenia zaleca się jego wym...

Страница 88: ...ją na sieć Wi Fi z którą chcesz podłączyć urządzenie Pamiętaj to urządzenie działa tylko z sieciami 2 4 GHz Rys 35 Proces parowania rozpocznie się automatycznie Rys 36 Rys 37 Po naciśnięciu przycisku Zakończono pojawi się ekran w którym możesz zacząć korzystać z produktu Rys 38 6 Mój dom Z zakładki Mój dom możesz zarządzać wszystkimi urządzeniami podłączonymi do aplikacji Rys 39 Aby zobaczyć ustaw...

Страница 89: ...wnie Kabel zasilający jest uszkodzony Skontaktuj się z obsługą klienta Cecotec Urządzenie zatrzymuje się lub nie chce się włączyć Urządzenie nie jest włączone Podłącz ponownie urządzenie Dynamo jest uszkodzone Skontaktuj się z obsługą klienta Cecotec Urządzenie stoi na niestabilnej powierzchni Umieść urządzenie na płaskiej i stabilnej powierzchni Wewnątrz urządzenia znajdują się cząsteczki zewnętr...

Страница 90: ...jsca niż wystarczające Upewnij się że urządzenie zajmuje odpowiednią przestrzeń Jeśli nie możesz rozwiązać problemu lub problem nadal występuje skontaktuj się z Cecotec SAT 7 DANE TECHNICZNE Referencja produktu 05620 05621 05622 Produkt TotalPure 2500 5000 7500 Connected Moc 20 W 30 W 60 WVoltaje 220 240 V 50 60 Hz Banda de Frecuencia 2 4 GHz Maksymalna moc emisji 20 dBm 8 RECYKLING SPRZĘTU Dyrekt...

Страница 91: ...dlega gwarancji jeśli byłużywany niezgodnie ze swoim przeznaczeniem wystawiony na działanie wody lub wilgoci mechanicznie uszkodzony przez użytkownika wystawiony na działanie substancji żrących czy nosi jakiekolwiek inne znamiona uszkodzeń wynikających z winy użytkownika urządzenie było naprawiane lub modyfikowane przez osoby nieautoryzowane przez firmę Cecotec odnosi się do przypadków spowodowany...

Страница 92: ...Off 2 PŘED POUŽITÍM Vyjměte přístroj z krabice Odstraňte všechny obaly Uchovejte originální krabici Ujistěte se že jsou obsaženy všechny části a díly a že jsou v dobrém stavu Pokud najdete nějaké viditelné poškození okamžitě kontaktujte oficiální Technický servis Cecotec Obr 4 Napište datum prvního použití na etiketu aby bylo jednodušší sledovat kdy je nutné filtry vyměnit Napište ho na spodní čás...

Страница 93: ... umístěte přístroj vždy na povrchy stabilní a suché Obr 8 2 Pro odmontování filtru stiskněte příruby na obou stranách a opatrně zatáhněte směrem nahoru Obr 9 3 Vyjměte z čističe filtry Obr 10 4 Odstraňte obaly Obr 11 5 Vraťte filtry znovu na své místo Obr 12 6 Znovu vložte před filtr tak jak je ukázáno na obrázku Obr 13 7 Znovu vložte vstupní panel vzduchu na své místo Umístěte filtr znovu na své ...

Страница 94: ...ítit červeně a vstoupí do modu standby Stiskněte tlačítko On Off přístroj začne fungovat v programu Auto s rozsvícenými světly a automaticky detekuje kvalitu vzduchu Poté co jste zapnuli přístroj světelný indikátor kvality vzduchu začne blikat To znamená že přístroj začal detekovat kvalitu vzduchu Indikátor kvality vzduchu Obr 18 Modrá PM2 5 0 50 Skvělá Zelená PM2 5 50 100 Dobrá Žlutá PM2 5 100 15...

Страница 95: ... vzduchu zapnout a vypnout přístroj 4 ČIŠTĚNÍ A ÚDRŽBA Vypněte přístroj odpojte ho z elektrické sítě než ho začnete čistit nebo opravovat Použijte jemný lehce vlhký hadřík s troškou jemného detergentu pro čištění venkovní části přístroje aby se nenahromadil prach a nečistoty Skladujte přístroj na bezpečném suchém a dobře ventilovaném místě pokud přístroj po nějaký čas nebudete používat Nepoužívejt...

Страница 96: ...baly a také zkontrolujte že etikety na filtrech směřují směrem ven Následujte tyto kroky 1 Vypněte přístroj abyste zastavili fingování filtrů 2 Vypojte zástrčku 3 Pro odmontování vstupního panelu vzduchu stiskněte příruby na obou stranách a opatrně zatáhněte směrem ven a nahoru 4 Vyjměte část přesahujícího filtru z gázy než ho začnete čistit 5 Použijte jemný kartáček nebo vysavač abyste odstranili...

Страница 97: ...řístroj dosáhne 1600 hodin fungování světelný indikátor fungování bude blikat asi 1x za vteřinu Světelný indikátor fungování blikat pomalu červeným světlem v programu Standby a s modrým když bude fungovat Přístroj může dále fungovat i když bude dávat signál k výměně filtrů Vyměňte prosím filtry jakmile skončila jejich životnost Pokud po výměně filtrů došlo ke snížení účinnosti filtrů doporučujeme ...

Страница 98: ...teré chcete přístroj připojit Pamatujte tento přístroj funguje pouze se sítěmi 2 4GHz Obr 35 Proces připojení přístroje začne automaticky Obr 36 Obr 37 Po kliknutí na Dokončeno se objeví obrazovka na které budete moct začít přístroj používat Obr 38 6 Moje domácnost Ze stránky Moje domácnost budete moct používat všechny přístroje připojení k aplikaci Obr 39 Abyste viděli nastavení přístroje kliknět...

Страница 99: ...jte Přívodový kabel je poškozen Kontaktujte Zákaznický servis Cecotec Přístroj se nezapne nebo nevypne Přístroj není zapnutý Znovu přístroj zapojte Dynamo je poškozené Kontaktujte Zákaznický servis Cecotec Přístroj je umístěn na nestabilním povrchu Umístěte přístroj vždy na stabilní povrch V přístroji jsou externí částice Kontaktujte Zákaznický servis Cecotec Motor je uvolněný Kontaktujte Zákaznic...

Страница 100: ...pro který je navržen Ujistěte se že přístroj je používán ve vhodné místnosti Pokud nemůžete problém vyřešit nebo pokud trvá prosím spojte se Zákaznickým servisem Cecotec 7 TECHNICKÉ SPECIFIKACE Reference produktu 05620 05621 05622 Produkt Total Pure 2500 5000 7500 Connected Výkon 20 W 30 W 60 W Voltaje 220 240 V 50 60 Hz Kmitočtová pásma 2 4 GHz Maximální emisní výkon 20 dBm 8 RECYKLACE ELEKTROSPO...

Страница 101: ...ití Záruka nezahrnuje Pokud byl produkt používán nad svoji kapacitu anebo užitnost byl špatně používán utrpěl náraz byl vystaven vlhkosti ponořen do tekutiny nebo jiné korozivní substance a jakoukoli vinu připsatelnou spotřebiteli Pokud byl produkt rozmontován modifikován anebo opravován servisem neautorizovaným oficiálním servisem Cecotec Pokud byl problém zaviněn normálním používáním a opotřeben...

Страница 102: ... Abb Afb Rys Obr 1 1 1 2 2 3 3 4 4 5 5 6 7 05620_05621_05622_TotalPure 2500_5000_7500_ Connected_Manual_YV_01200320 indd 102 05620_05621_05622_TotalPure 2500_5000_7500_ Connected_Manual_YV_01200320 indd 102 20 3 20 15 18 20 3 20 15 18 ...

Страница 103: ...ig Img Abb Afb Rys Obr 4 1 2 3 4 5 6 05620_05621_05622_TotalPure 2500_5000_7500_ Connected_Manual_YV_01200320 indd 103 05620_05621_05622_TotalPure 2500_5000_7500_ Connected_Manual_YV_01200320 indd 103 20 3 20 15 18 20 3 20 15 18 ...

Страница 104: ...Abb Afb Rys Obr 6 Fig Img Abb Afb Rys Obr 7 05620_05621_05622_TotalPure 2500_5000_7500_ Connected_Manual_YV_01200320 indd 104 05620_05621_05622_TotalPure 2500_5000_7500_ Connected_Manual_YV_01200320 indd 104 20 3 20 15 18 20 3 20 15 18 ...

Страница 105: ...br 8 Fig Img Abb Afb Rys Obr 9 05620_05621_05622_TotalPure 2500_5000_7500_ Connected_Manual_YV_01200320 indd 105 05620_05621_05622_TotalPure 2500_5000_7500_ Connected_Manual_YV_01200320 indd 105 20 3 20 15 18 20 3 20 15 18 ...

Страница 106: ...Abb Afb Rys Obr 11 Fig Img Abb Afb Rys Obr 12 05620_05621_05622_TotalPure 2500_5000_7500_ Connected_Manual_YV_01200320 indd 106 05620_05621_05622_TotalPure 2500_5000_7500_ Connected_Manual_YV_01200320 indd 106 20 3 20 15 18 20 3 20 15 18 ...

Страница 107: ...Afb Rys Obr 14 Fig Img Abb Afb Rys Obr 15 2 2 3 4 05620_05621_05622_TotalPure 2500_5000_7500_ Connected_Manual_YV_01200320 indd 107 05620_05621_05622_TotalPure 2500_5000_7500_ Connected_Manual_YV_01200320 indd 107 20 3 20 15 18 20 3 20 15 18 ...

Страница 108: ...Abb Afb Rys Obr 17 Fig Img Abb Afb Rys Obr 18 05620_05621_05622_TotalPure 2500_5000_7500_ Connected_Manual_YV_01200320 indd 108 05620_05621_05622_TotalPure 2500_5000_7500_ Connected_Manual_YV_01200320 indd 108 20 3 20 15 18 20 3 20 15 18 ...

Страница 109: ...r 23 Fig Img Abb Afb Rys Obr 20 Fig Img Abb Afb Rys Obr 22 Fig Img Abb Afb Rys Obr 24 05620_05621_05622_TotalPure 2500_5000_7500_ Connected_Manual_YV_01200320 indd 109 05620_05621_05622_TotalPure 2500_5000_7500_ Connected_Manual_YV_01200320 indd 109 20 3 20 15 18 20 3 20 15 18 ...

Страница 110: ...r 25 Fig Img Abb Afb Rys Obr 26 05620_05621_05622_TotalPure 2500_5000_7500_ Connected_Manual_YV_01200320 indd 110 05620_05621_05622_TotalPure 2500_5000_7500_ Connected_Manual_YV_01200320 indd 110 20 3 20 15 18 20 3 20 15 18 ...

Страница 111: ...Abb Afb Rys Obr 29 Fig Img Abb Afb Rys Obr 27 05620_05621_05622_TotalPure 2500_5000_7500_ Connected_Manual_YV_01200320 indd 111 05620_05621_05622_TotalPure 2500_5000_7500_ Connected_Manual_YV_01200320 indd 111 20 3 20 15 18 20 3 20 15 18 ...

Страница 112: ...r 32 Fig Img Abb Afb Rys Obr 31 Fig Img Abb Afb Rys Obr 33 05620_05621_05622_TotalPure 2500_5000_7500_ Connected_Manual_YV_01200320 indd 112 05620_05621_05622_TotalPure 2500_5000_7500_ Connected_Manual_YV_01200320 indd 112 20 3 20 15 18 20 3 20 15 18 ...

Страница 113: ...r 36 Fig Img Abb Afb Rys Obr 35 Fig Img Abb Afb Rys Obr 37 05620_05621_05622_TotalPure 2500_5000_7500_ Connected_Manual_YV_01200320 indd 113 05620_05621_05622_TotalPure 2500_5000_7500_ Connected_Manual_YV_01200320 indd 113 20 3 20 15 18 20 3 20 15 18 ...

Страница 114: ...r 40 Fig Img Abb Afb Rys Obr 39 Fig Img Abb Afb Rys Obr 41 05620_05621_05622_TotalPure 2500_5000_7500_ Connected_Manual_YV_01200320 indd 114 05620_05621_05622_TotalPure 2500_5000_7500_ Connected_Manual_YV_01200320 indd 114 20 3 20 15 18 20 3 20 15 18 ...

Страница 115: ...r 44 Fig Img Abb Afb Rys Obr 43 Fig Img Abb Afb Rys Obr 45 05620_05621_05622_TotalPure 2500_5000_7500_ Connected_Manual_YV_01200320 indd 115 05620_05621_05622_TotalPure 2500_5000_7500_ Connected_Manual_YV_01200320 indd 115 20 3 20 15 18 20 3 20 15 18 ...

Страница 116: ...a Pinadeta s n 46930 Quart de Poblet Valencia Spain YV01200320 05620_05621_05622_TotalPure 2500_5000_7500_ Connected_Manual_YV_01200320 indd 116 05620_05621_05622_TotalPure 2500_5000_7500_ Connected_Manual_YV_01200320 indd 116 20 3 20 15 18 20 3 20 15 18 ...

Отзывы: