


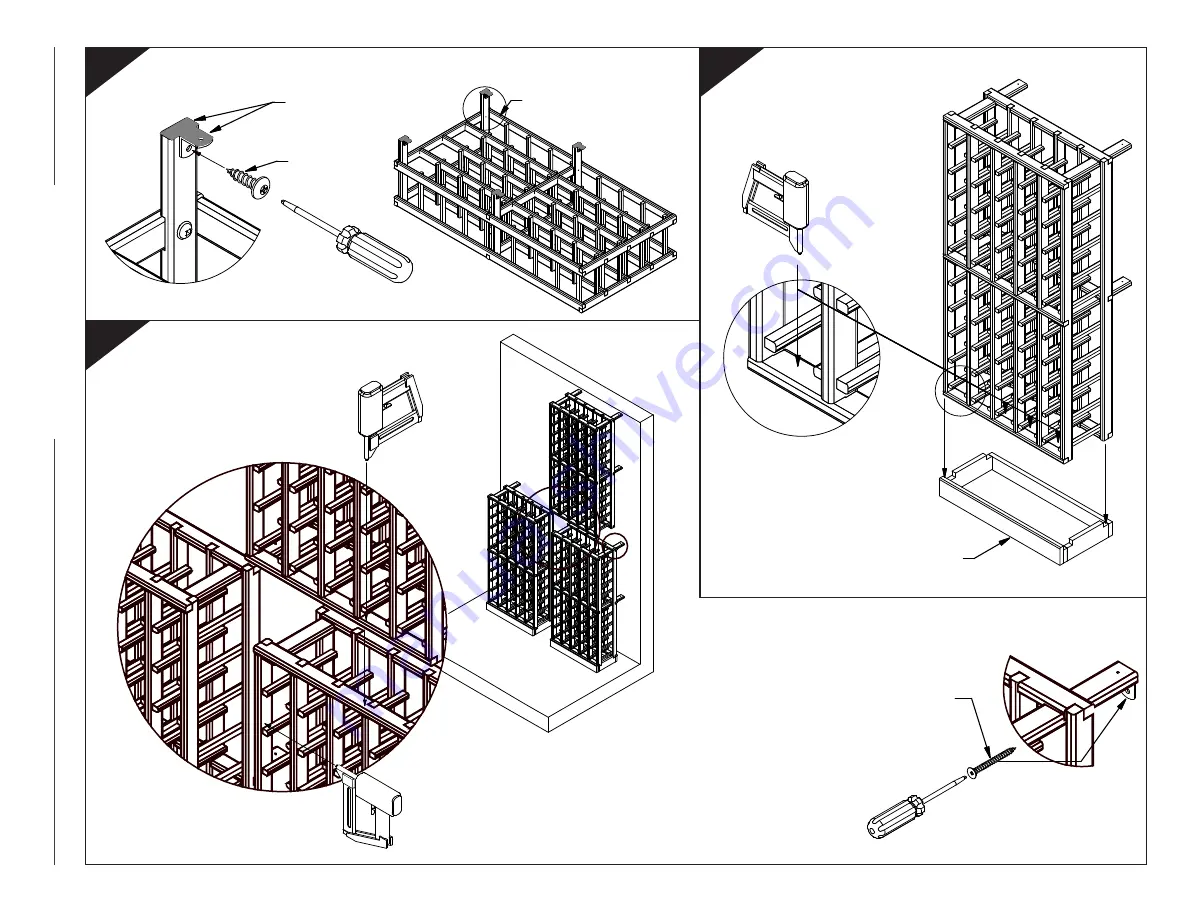
SCREW ANGLED BRACKETS TO EACH CLEAT
STEP
9
ATTACHING COMPLETED UNIT
TO WALL AND OTHER RACK UNITS
STEP
11
Flush these
2 faces
Repeat for each cleat
Philips
Panhead
v5/8"
Use nail gun to attach units
to each other
Using nail gun attach rack
to base along the bottom
spacer bars on front and
back of unit
Use #8 robertson screws
to secure the unit to wall
Philips
Flathead
1 1/2"
BASE MOULD 16
(sold separately)
www.distributioncav.com
04
ATTACHING COMPLETED
RACK TO BASE ASSEMBLY
(IF RACK IS PLACED ON
THE FLOOR)
STEP
10
E
E
G
F
F
G
IMPORTANT
1 - Prior to attaching units to
the wall, pre-mount the units
in their desired positions
2 - Use a pencil to mark the
locations of where the angled
brackets will be fixed to the wall
3 - Pre-drill holes at these markings
and install the drywall anchors
provided with the kit
ASSEMBL
Y