background image


688210 nl ma 2014

7

COUNTERTOP INSTALLATION.

Remove all packing material and accessories. Examine the oven for any damage such as dents or broken 

door. Do not install if oven is damaged.

Cabinet:

 Remove any protective film found on the microwave oven cabinet surface.

Do not remove the light brown Mica cover that is attached to the oven cavity to protect the magnetron.

INSTALLATION

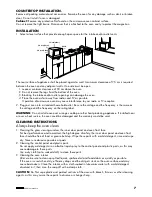
1.  Select a level surface that provide enough open space for the intake and/or outlet vents.

3.0 inch(7.5cm) 

3.0 inch(7.5cm) 

OPEN 

12 inch(30cm) 

The rear surface of appliance shall be placed against a wall. A minimum clearance of 7,5 cm is required 

between the oven and any adjacent walls. One side must be open.

1.  Leave a minimum clearance of 30 cm above the oven.

2. Do not remove the legs from the bottom of the oven.

3. Blocking the intake and/or outlet openings can damage the oven.

4. Place the oven as far away from radios and TV as possible.  

Operation of microwave oven may cause interference to your radio or TV reception. 

2. Plug your oven into a standard household outlet. Be sure the voltage and the  frequency is the same as 

the voltage and the frequency on the rating label.

WARNING: 

Do not install oven over a range cooktop or other heat-producing  appliance. If installed near 

or over a heat source, the oven could be damaged and the warranty would be void.

CLEANING INSTRUCTIONS

Always keep the oven clean

1.  Cleaning the glass viewing window, the inner door panel and oven front face.  

For best performance and to maintain the high degree of safety, the inner door panel and oven front 

face should be free of food or grease build-up. Wipe these parts with a mild detergent, rinse and wipe 

dry. Never use abrasive  powders or pads.

2. Cleaning the control panel and plastic parts.  

Do not apply a detergent or an alkaline liquid spray to the control panel and plastic parts, as this may 

cause damage to these parts.  

Use a dry cloth (not a soaked cloth) to clean these parts.

3. Cleaning the oven interior 

After use be sure to clean up spilled liquids, spattered oil and food debris as quickly as possible.  

If the oven is used when dirty, efficiency drops and the dirt gets stuck on the oven surface and may 

 cause bad odours. Clean the interior with a cloth soaked in luke-warm water with a mild detergent 

 dissolved in it, then rinse the soap off with a damp cloth.

CAUTION: 

Do Not wipe plastic and painted sections of the oven with bleach, thinners or other cleaning 

agents, as this ma y cause these parts to dissolve or change sharp.

Содержание *688.210

Страница 1: ...UAL Read these instructions carefully before using your microwave oven and keep it carefully If you follow the instructions your oven will provide you with many years of good service Professional Supp...

Страница 2: ...low soil or cleaner residue to accumulate on sealing surfaces 3 WARNING If the door or door seals are damaged the oven must not be operated until it has been repaired by a competent person ADDENDUM If...

Страница 3: ...wave ovens since they may explode even after microwave heating has ended 15 Use this appliance only for its intended uses as described in manual Do not use corrosive chemicals or vapors in this applia...

Страница 4: ...sks resulting from becoming entangled in or trip ping over a longer cord 2 If a long cord set or extension cord is used 1 The marked electrical rating of the cord set or extension cord should be at le...

Страница 5: ...for reheating and absorbing fat Use with supervision for a short term cooking only Parchment paper Use as a cover to prevent splattering or a wrap for steaming Plastic Microwave safe only Follow the m...

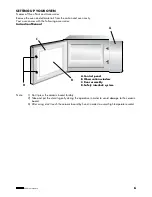
Страница 6: ...following accessories Instruction Manual Note 1 Don t press the ceramic board forcibly 2 Take and put the utensils gently during the operation in order to avoid damage to the ceramic board 3 After usi...

Страница 7: ...g label WARNING Do not install oven over a range cooktop or other heat producing appliance If installed near or over a heat source the oven could be damaged and the warranty would be void CLEANING INS...

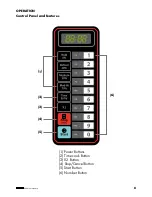
Страница 8: ...688210 nl ma 2014 8 OPERATION Control Panel and Features 1 2 6 3 4 5 1 Power Buttons 2 Time cook Button 3 X2 Button 4 Stop Cancel Button 5 Start Button 6 Number Button...

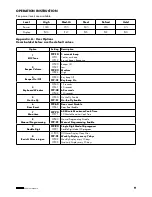
Страница 9: ...ey beep On 4 Keyboard Window OP 40 OP 41 OP 42 OP 43 15 seconds 30 seconds 60 seconds 120 seconds 5 On the Fly OP 50 OP 51 On the Fly Disable On the Fly Enable 6 Door Reset OP 60 OP 61 Door reset Disa...

Страница 10: ...ven activity 3 Opening and then closing the oven door the oven will exit the idle mode and into ready mode 3 READY MODE 1 In this mode the oven is ready to either begin a manual or preset cook cycle 2...

Страница 11: ...D will display the related power If the same button pressed twice the power will change to PL10 If no power chosen PL0 is default 5 During setting process press to enter Manual Cook Mode Press to ente...

Страница 12: ...This mode allows the user to assign cook times and power levels to the once touch button 1 Open the door and press 1 for 5 seconds the buzzer will sound once and enter to Programming Mode 2 prog displ...

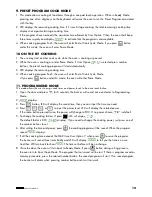
Страница 13: ...s number buttons LED will display the quantity preset time For example number button 5 and its preset time is 1 minute Then press then time will change to 1 00 1 0 8 1 48 4 When cooking program finish...

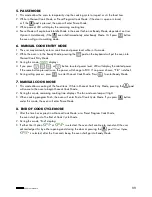
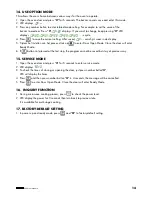
Страница 14: ...en Mode Close the door will enter Ready Mode 6 If button not pressed at the last step the program cannot be saved but stay at previous way 15 SERVICE MODE 1 Open the oven door and press 3 for 5 second...

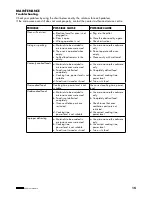
Страница 15: ...crowave oven were used b Food is not defrosted completely c Cooking time power level is not suitable d Food is not turned or stirred a Use microwave safe cookware only b Completely defrost food c Use...

Отзывы: