3
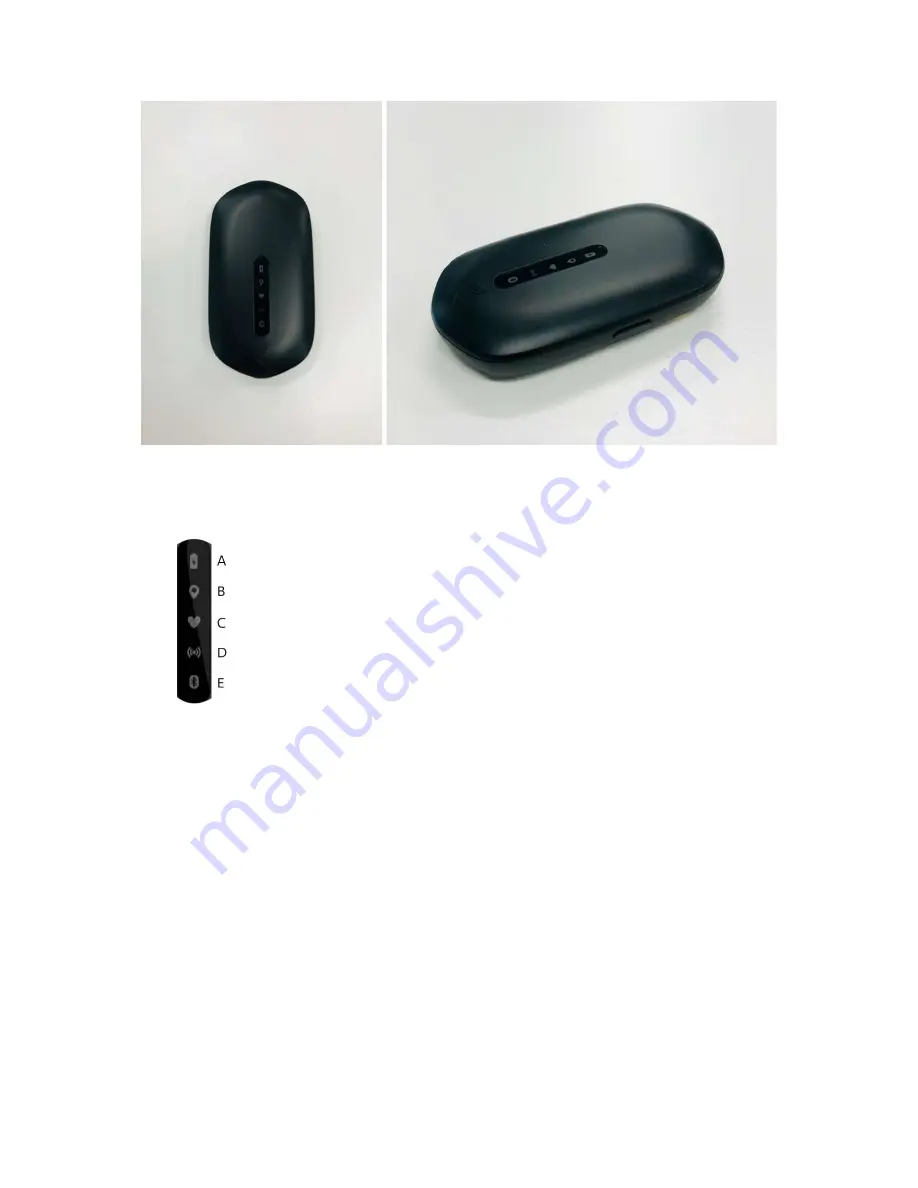
Figure 1. – Vector S7 wearable Device
DEVICE ICON/LED FUNCTIONALITY
A: Indicates the state of the battery (charging, low battery, ect)
B: Indicates a connection to the sateliete (GNSS) or ClearSky RTLS system.
C: Indicates a connection to Heart Rate
D: Indicates use of ultra-wide band.
E: Indicates a connection to Bluetooth.
Vector S7 Device Operation Overview:
1.
Charging: Each Vector S7 device is charged and configured, prior to use, using the specifically
designed Vector Dock. This is a 24-device tray that connects to mains supply mains supply for the
purpose of Vector S7 charging.
2.
Configuration: Configuration of the Vector S7 occurs via USB serial connection from the dock to
the desktop software (OpenField) where athlete and device settings are transferred and stored on
the Vector S7 device. This process occurs automatically as the devices are recognized by the
system and as each device is assigned to an athlete.
3.
Assigning Athletes to Devices: after logging in and pressing start, navigating to the settings menu
will show athletes. Pressing ‘
auto-assign
’ will assign device ID’s to players and will then transfer
this configuration to the devices as described above
4.
Starting a live session: Connect the Vector Anchor via USB. In the software from the main screen,
press the ‘quick start’ icon to start a live session. Vector S7 devices will show in ‘active players’
once they obtain GNSS lock and data transmission will begin. You can check if data is incoming by
checking the orange and black bar in the top right corner of the interface. Press ‘All’ in active


