27
DME-9724HM
② Setting screen of Network
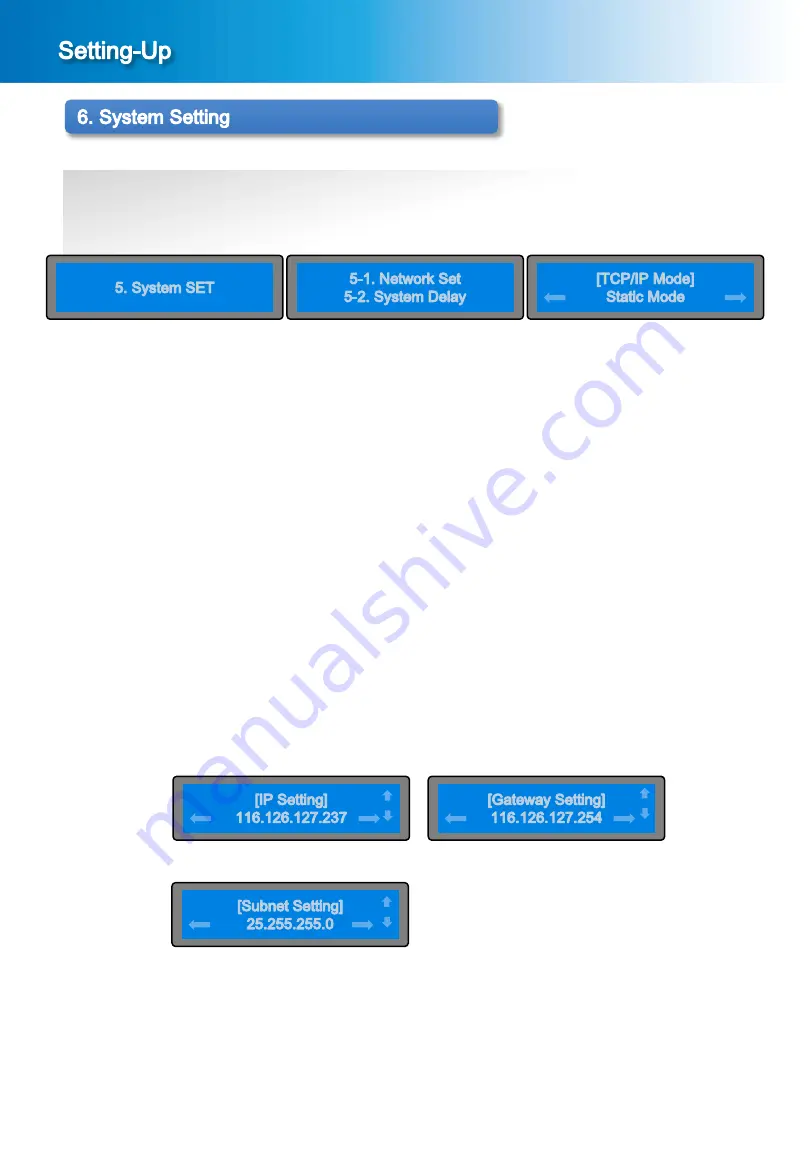
In the menu screen of the [Picture 6-1], press the ∨ button or ∧ button to bring it on “5. System SET” and press
the ENTER button, then the sub menu screen will be displayed as shown in the [Picture 6-2].
In the sub menu screen of the [Picture 6-2], to bring it on “5-1. Network Set” and press the ENTER button, then
the setting screen will be displayed as shown in the [Picture 6-3] “DHCP Mode” or “Static Mode”.
③ Setting of Static Mode
In the screen of the [Picture 6-4], set up IP setting using the ∨ ∧ < > button and then press ENTER button, then
the setting screen will be displayed as shown in the [Picture 6-5].
In the screen of the [Picture 6-5], set up Gateway setting using the ∨ ∧ < > button and then press ENTER
button, then the setting screen will be displayed as shown in the [Picture 6-6].
In the screen of the [Picture 6-6], set up Subnet setting using the ∨ ∧ < > button and then press ENTER button
to save set value.
In the screen of the DHCP, press the ENTER button, then the device gets IP and Network data from DHCP
server.
Press the ESC button to cancel the Network setting.
※ Caution : Set as DHCP, normally boots only after getting IP from DHCP through IP STREAM Port.
① When the MENU button and the ESC button is pressed simultaneously in the main screen [Picture 1-2],
the menu screen shown in the [Picture 6-1] will be displayed.
[Picture 6-1] Menu Screen
[Picture 6-2] Sub Menu Screen
6-1. Network Setting
[Picture 6-3] Setting of TCP/IP Mode
[Picture 6-4] Setting of IP Setting Mode
[Picture 6-5] Setting of IP Setting Mode
[Picture 6-6] Setting of IP Setting Mode


