
E-9
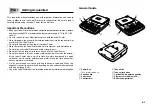
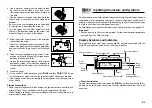
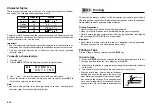
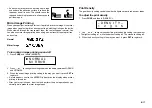
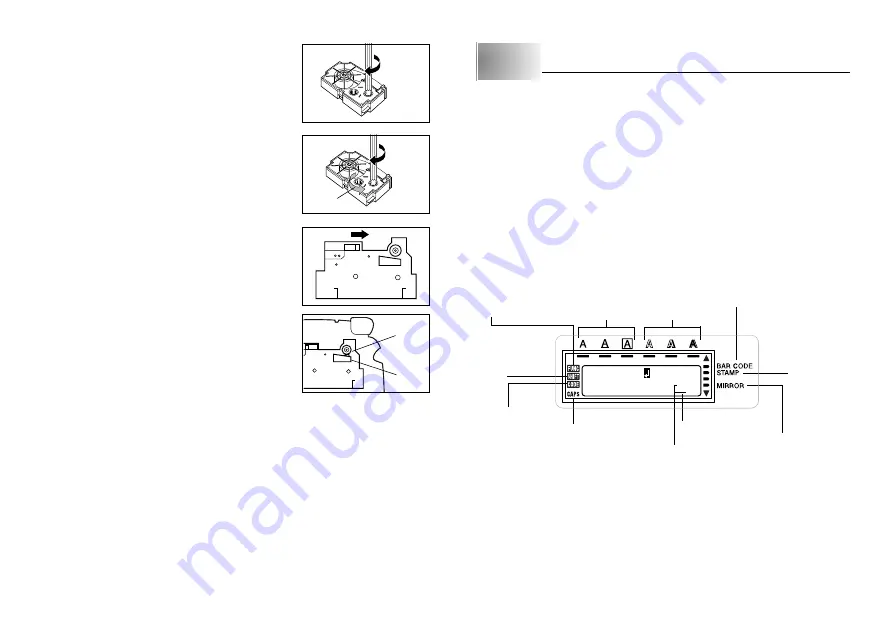
Shift
indicator
Mirror image
printing indicator
Cursor
Caps indicator
Effect indicators
Function indicator
Character position marks
Style indicators
Stamp
printing
indicator
Code
indicator
Bar code indicator
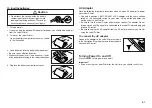
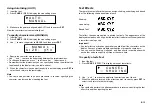
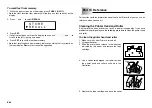
4. Use a pencil or some other thin object to take
up slack in the ink ribbon as shown in the
illustration. Note that the tape does not move at
this time.
•
If the ink ribbon is slack when you load it into the
Label Printer, it can break or cause some other
problem.
•
Be sure to turn the ink ribbon take up spool only
in the direction indicated by the arrow (a).
•
Turn the spool until the other spool (b) starts
turning in the direction noted by the arrow. This
indicates there is no slack in the ribbon.
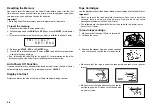
5. Slide the printer head release in the direction
indicated by the arrow.
•
If there is a cartridge already in the Label Printer,
remove it by grasping the cartridge on both sides
with your thumb and forefinger, and lift straight
up.
6. Load the tape cartridge into the Label Printer,
making sure that the tape and ink ribbon pass
between the head and roller.
7. Return the printer head release to its original
position by sliding in the direction opposite to
that indicated by the arrow in the illustration in
step 5.
8. Close the cover.
9. Turn on Label Printer power and press
FUNC
and then
(FEED) two
or three times to make sure that the tape comes out without any problem.
•
If the tape does not come out normally, turn off power and start again from
step 1 above.
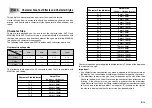
Storage Precautions
•
Keep tape cartridges out of areas subject to high temperature, humidity, and
direct sunlight. These conditions can cause discoloration of the tape.
•
When storing a cartridge, re-attach its stopper, and insert the cartridge in its
original plastic bag and box.
(a)
(b)
Roller
Head
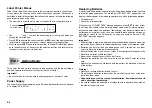
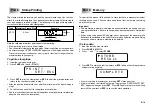
Part 3
Inputting Characters and Symbols
This part of the manual tells you how to input characters. To make things easier to
understand, we call everything you input a character, regardless of whether it is
actually a letter, number, or symbol. Explanations here all use the default settings
that are in effect from the initial power-on screen.
For information on using other character styles, effects and sizes, see page E-13.
Important!
•
You can input up to 95 characters per label. Further input becomes impossible
after you input the 95th character.
Display Symbols and Indicators
Before getting into actual input, you should first become acquainted with the
symbols and indicators used on the Label Printer display.
C
C
A
O
S
M
I
P
O
U T E R • •
•
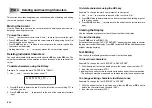
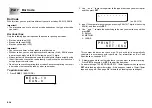
Function indicator
This indicator appears when you press the
FUNC
key. Pressing a key while this
indicator is on the display causes the function marked above that key to be
executed.
Содержание KL-780
Страница 1: ...KL 780 User s Guide E...
Страница 26: ...E 25 Alpha Characters Symbols...
Страница 28: ...CASIO COMPUTER CO LTD 6 2 Hon machi 1 chome Shibuya ku Tokyo 151 8543 Japan MO0306 B...


