background image

OTHER SETTINGS

140

To set the current time and date

1.

Press [MENU].

2.

Select the “Set Up” tab, select “Adjust”, and
then press [

].

3.

Set the current date and the time.

Do this:

Press [

] or [

].

Press [

] or [

].

Press [DISP].

To do this:

Change the setting at the current
cursor location

Move the cursor between settings

Toggle between 12-hour and 24-
hour timekeeping

4.

When all the settings are the way you want,
press [SET] to register them and exit the
setting screen.

Changing the Date Format

You can select from among three different formats for
display of the date.

1.

Press [MENU].

2.

Select the “Set Up” tab, select “Date Style”,
and then press [

].

3.

Use [

] and [

] to change the setting, and

then press [SET].

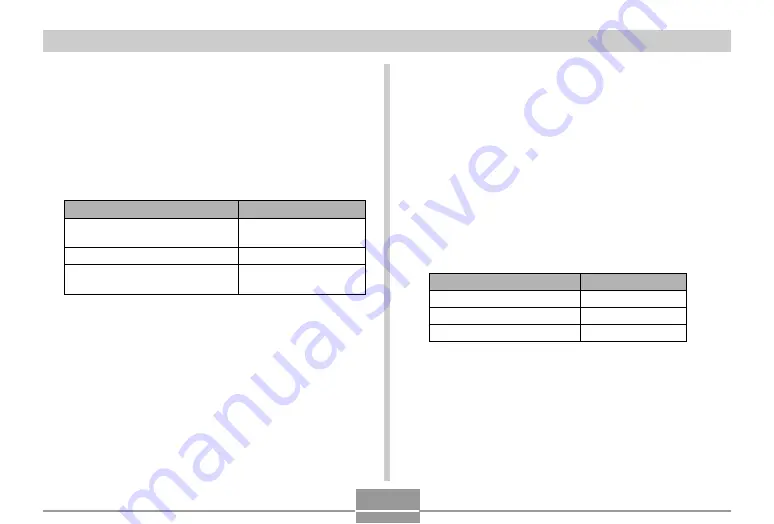
Example: December 24, 2004

Select this format:

YY/MM/DD

DD/MM/YY

MM/DD/YY

To display the date like this:

04/12/24

24/12/04

12/24/04

Содержание Exilim EX-Z50

Страница 1: ...ng this CASIO product Before using it be sure to read the precautions contained in this User s Guide Keep the User s Guide in a safe place for future reference For the most up to date information abou...

Страница 2: ...possible Rechargeable Lithium Ion Battery NP 40 USB Cradle CA 24 USB Cable Basic Reference Camera Strap Special AC Adaptor Inlet Type AD C51G AC Power Cord The shape of the AC power cord plug varies...

Страница 3: ...s Manual 20 General Guide 21 Camera 21 USB Cradle 23 Monitor Screen Contents 24 Changing the Contents of the Monitor Screen 26 Attaching the Strap 28 Power Requirements 29 Loading and Removing the Rec...

Страница 4: ...Configuring the White Balance Setting Manually 79 Using the BESTSHOT Mode 81 Creating Your Own BESTSHOT Setup 83 To delete a BESTSHOT user setup 84 Combining Shots of Two People into a Single Image C...

Страница 5: ...ILE MANAGEMENT Folders 127 Memory Folders and Files 127 Protecting Files 128 To protect a single file 128 To protect all files in memory 129 Using the FAVORITE Folder 129 To copy a file to the FAVORIT...

Страница 6: ...e files in built in memory to a memory card 150 To copy a specific file from a memory card to built in memory 151 152 PRINTING IMAGES DPOF 153 To configure print settings for a single image 154 To con...

Страница 7: ...185 Installing Software from the CD ROM in Windows 186 Getting Started 187 Selecting a Language 187 Viewing the Contents of the Read me File 187 Installing an Application 188 Viewing User Documentati...

Страница 8: ...against its loss Note that the example screens and product illustrations shown in this User s Guide may differ somewhat by the screens and configuration of the actual camera The SD logo is a registere...

Страница 9: ...C or PLAY to turn on the camera and enter the mode you want to use Multi Auto Focus page 70 When Multi is selected for the Auto Focus area the camera takes simultaneous meter readings at seven differe...

Страница 10: ...automatically corrects rectangular shapes when recording the image of a business card document whiteboard or similar subjects from an angle Coupling Shot and Pre shot pages 85 87 Coupling Shot lets yo...

Страница 11: ...to add audio to snapshots after you record them Selectable Sound Settings page 133 You can configure different sounds to play whenever you turn on the camera press the shutter button half way or all...

Страница 12: ...ight light through the camera s viewfinder Doing so can damage your eyesight Keep the small parts and accessories of this camera out of the reach of small children If swallowed accidentally contact yo...

Страница 13: ...smoke coming from the camera take it to your nearest CASIO authorized service center for repair Never attempt your own maintenance Never use the AC adaptor to power any other device besides this camer...

Страница 14: ...to record important images make sure you first record a number of test images and check the results to ensure that the camera is configured correctly and operating properly page 16 Data Error Precaut...

Страница 15: ...g wipe it with a soft dry cloth Condensation When you bring the camera indoors on a cold day or otherwise expose it to a sudden change of temperature there is the possibility that condensation can for...

Страница 16: ...ce the camera onto the USB cradle to charge the battery page 31 Note that the shape of the AC adaptor depends on the area where you purchased the camera It takes about 190 minutes to achieve a full ch...

Страница 17: ...you want and then press SET 6 Use and to select the summer time DST setting you want and then press SET 7 Use and to select the date format setting you want and then press SET 8 Set the date and the...

Страница 18: ...n 6 Point the camera at the subject use the monitor screen or viewfinder to compose the image and then press the shutter button half way When proper focus is achieved the focus frame turns green and t...

Страница 19: ...Use and to select Delete To exit the image delete operation without deleting anything select Cancel 5 Press SET to delete the image To delete an image See page 125 for details 1 Press PLAY 2 Use and...

Страница 20: ...0 Rechargeable Lithium Ion Battery The optionally available CASIO BC 30L rapid charger Button Operations Button operations are indicated by the button name inside of brackets On screen Text On screen...

Страница 21: ...ee locations The camera s built in flash memory An SD memory card loaded in the camera A MultiMediaCard loaded in the camera For more information about how the camera stores images see page 172 7 5 1...

Страница 22: ...de button A REC mode button B MENU button C Zoom button D Strap ring E SET button F G DISP button H Monitor Screen I Speaker Bottom J Stopper K Memory card slot L Battery compartment M Battery cover N...

Страница 23: ...charging page 31 Automatic transfer of images to a computer page 160 Direct connection to a printer for printing page 156 Viewing of images using the Photo Stand slideshow feature page 119 1 Camera co...

Страница 24: ...le self timer 5 6 7 C D E F 34 2 1 1 Flash mode indicator page 59 None Auto Flash Off Flash On Red eye reduction If the camera detects that flash is required while auto flash is selected the flash on...

Страница 25: ...xels 2560 1712 3 2 pixels 2048 1536 pixels 1600 1200 pixels 1280 960 pixels 640 480 pixels Movie Playback Elapsed play time 5 Quality page 66 FINE NORMAL ECONOMY 6 Built in memory selected for data st...

Страница 26: ...Each press of the DISP button changes the contents of the monitor screen as shown below REC Modes IMPORTANT Some information may not display properly if you display an image that was recorded using a...

Страница 27: ...s the monitor screen on indicators on and off While a Voice Recording file is displayed in the PLAY mode pressing DISP toggles between indicators on and indicators off When playing back the contents o...

Страница 28: ...e illustration IMPORTANT Be sure to keep the strap around your wrist when using the camera to protect against accidentally dropping it The supplied strap is intended for use with this camera only Do n...

Страница 29: ...ry into the camera marks NP 40 Stopper Push the bottom of the battery and make sure that the stopper securely locks the battery in place mark Power Requirements Your camera is powered by a rechargeabl...

Страница 30: ...is not supported The battery is not charged when you purchase the camera You need to charge the battery before using the camera for the first time page 31 To remove the battery 1 Open the battery cov...

Страница 31: ...or is designed for operation with any power supply in the range of 100V to 240V AC Note however that the shape of the AC power cord plug varies according to country or geographic area If you plan to u...

Страница 32: ...r cord plug varies according to country or geographic area It is up to you to find out if the shape of the AC adaptor power cord plug is compatible with local power outlets when traveling abroad 4 Aft...

Страница 33: ...the camera or a problem with the battery or how it is loaded Remove the camera from the USB cradle and see if it works normally The following are the only operations that can be performed while the c...

Страница 34: ...ull telephoto every 30 seconds during which two images are recorded one image with flash power turned off and back on every time 10 images are recorded 2 Continuous Recording Conditions Temperature 23...

Страница 35: ...Enable the Auto Power Off and the Sleep features page 41 to protect against wasting battery power when you forget to turn off the camera You can also conserve battery power by using the DISP button to...

Страница 36: ...precautions while using the battery creates the risk of overheating fire and explosion Never use any other type of charger except the optional charger specified for the battery Never try to use the b...

Страница 37: ...nstructions and make sure that they handle the battery correctly Should fluid from the battery accidentally get onto clothing or your skin immediately rinse it off with clean tap water Prolonged conta...

Страница 38: ...hose voltage is outside the rating marked on the AC adaptor Doing so can create the risk of fire or electric shock Use only the AC adaptor bundled with this camera Do not allow the AC adaptor cord to...

Страница 39: ...AC adaptor to become warm This is normal and does not indicate malfunction Unplug the AC power cord from the power outlet whenever you are not using it Never place a blanket or any other cover on the...

Страница 40: ...r button REC or PLAY to turn it back on again Pressing the power button or REC to turn on the camera also causes the lens to extend Take care to avoid any interference with the lens operation or allow...

Страница 41: ...Use and to change the currently selected setting and then press SET Available Sleep settings are 30 sec 1 min 2 min and Off Available Auto Power Off settings are 2 min and 5 min Note that the Sleep f...

Страница 42: ...tions The menu that appears depends on whether you are in a REC mode or the PLAY mode The following shows an example menu procedure in a REC mode 1 Press the power button or REC If you want to enter t...

Страница 43: ...the setting and return to tab selection Exit the menu screen Do this Press and Press Press Press and Press or press SET Press and Press SET Press Press MENU 3 Press or to select the tab you want and t...

Страница 44: ...this key operation Press SET Press 1 Press 2 Use to move back up to tab selection See Menu Reference on page 192 for more information about menus Configuring Display Language and Clock Settings Be su...

Страница 45: ...he cradle while the rechargeable battery is dead or removed from the camera The date and time setting screen will appear on the monitor screen the next time you turn on the camera after the date and t...

Страница 46: ...the summer time DST setting you want and then press SET When you want to do this Keep time using summer time Daylight Saving Time Keep time using standard time Select this setting On Off 6 Use and to...

Страница 47: ...ings and exit the setting screen To do this Change the setting at the current cursor location Move the cursor between settings Toggle between 12 hour and 24 hour timekeeping Do this Press and Press an...

Страница 48: ...recording page 50 BESTSHOT mode This mode makes camera setup as easy as selecting the applicable sample scene Simply select one of 23 sample scenes and the camera will automatically be configured wit...

Страница 49: ...12 12 58 58 IN Recording mode icon Horizontal Hold the camera still in both hands with your arms firmly against your sides Vertical When holding the camera vertically make sure that the flash is abov...

Страница 50: ...able lighting is low which slows down the shutter speed Flash Microphone Lens N OFF Recording an Image Your camera automatically adjusts shutter speed in accordance with the brightness of the subject...

Страница 51: ...changed whenever you press the or key page 104 1200 1200 1600 1600 NORMAL NORMAL 10 10 04 04 12 12 24 24 12 12 58 58 IN Focus frame Snapshot mode icon 3 Compose the image on the monitor screen so the...

Страница 52: ...ing sure that the image is focused properly press the shutter button the rest of the way down to record The number of images you can record depends on the image size and the image quality setting you...

Страница 53: ...o is selected for the ISO sensitivity setting page 100 the camera increases sensitivity and uses a slower shutter speed Because of this you need to guard against camera movement if you have flash turn...

Страница 54: ...vertical smear and does not indicate malfunction of the camera Note that vertical smear is not recorded with the image in the case of a snapshot but it is recorded in the case of a movie page 91 Usin...

Страница 55: ...al zoom and digital zoom Normally the camera automatically switches over to digital zoom after you reach the maximum limit for optical zoom You can however configure the camera to disable digital zoom...

Страница 56: ...he telephoto setting zoom in You can change the digital zoom setting during movie recording but not the optical zoom setting Make sure you select the optical zoom setting you want to use before you pr...

Страница 57: ...image enlarged with digital zoom appears coarser than the original 1X 3X 12X Optical Zoom range Digital Zoom range Zoom pointer Optical digital zoom switch over point To record an image using digital...

Страница 58: ...then hold down its wide angle side again to move into the digital zoom range 4 Compose the image and then press the shutter button Select this setting On Off To do this Turn on digital zoom Turn off d...

Страница 59: ...the monitor screen 3 Record the image IMPORTANT The flash unit of this camera fires a number of times when you record an image The initial flashes are pre flashes which the camera uses to obtain infor...

Страница 60: ...tant points when using red eye reduction Red eye reduction does not work unless the people in the image are looking directly at the camera during the pre flash Before pressing the shutter button call...

Страница 61: ...he subject to appear dark in the resulting image because not enough of the flash reaches the subject When this happens you can use flash assist to correct the brightness of the recorded subject so it...

Страница 62: ...the subject is too close or too far away The flash takes anywhere from a few seconds to as long as 10 seconds to attain full charge after being fired The actual time required depends on the battery le...

Страница 63: ...mal image colors Using the Self timer The self timer lets you select either a 2 second or 10 second delay of the shutter release after you press the shutter button A Triple Self timer feature lets you...

Страница 64: ...mount of time required for preparation depends on the camera s current Size and Quality settings the type of memory built in or card you are using for image storage and whether or not the flash is cha...

Страница 65: ...r Coupling Shot page 85 Pre shot page 87 Business Shot page 89 Specifying Image Size Image size is the size of the image expressed as the number of vertical and horizontal pixels A pixel is one of the...

Страница 66: ...ize print Selecting the 2560 1712 3 2 image size will record images with a 3 2 horizontal vertical aspect ratio which is optimal for printing on paper with an aspect ratio of 3 2 Specifying Image Qual...

Страница 67: ...ans that the remaining image capacity noted on the monitor screen may not be exactly accurate pages 24 204 Fine Normal Economy To get this Higher Quality Lower Quality Select this setting High image q...

Страница 68: ...Infinity and Manual 1 In a REC mode press Each press of cycles thorough the focus mode settings in the sequence shown below Focus mode indicator To set up the camera to do this Focus automatically Au...

Страница 69: ...een operation lamp Red focus frame Flashing green operation lamp It means this The image is focused The image is not focused 3 Press the shutter button the rest of the way to record the image NOTE Whe...

Страница 70: ...atically selects the focus point where the subject closest to the camera is located and a focus frame appears at that point This setting avoids the loss of focus of foreground images that occurs when...

Страница 71: ...icator 2 Record the image The focus and image recording operations are identical to those in the Auto Focus mode NOTE When the Macro mode cannot focus properly because the subject is too far away the...

Страница 72: ...bles Auto Focus so the shutter is released as soon as you press the shutter button This mode is best for basic snapshots The focus range depends on the zoom setting the amount of light available when...

Страница 73: ...e setting The focus range during darker lighting is narrower than the focus range of brighter lighting Using the Infinity Mode The Infinity mode fixes focus at infinity Use this mode when recording sc...

Страница 74: ...Zoom Factor 1X 3X Approximate Focus Range 6cm 2 4 to infinity 18cm 7 1 to infinity Boundary 2 While watching the image on the monitor screen use and to focus Pressing or causes the area inside of the...

Страница 75: ...o the main subject is within the focus frame and then press the shutter button half way This locks the focus on the subject that is currently within the focus frame 1200 1200 1600 1600 NORMAL NORMAL 1...

Страница 76: ...00 1600 1600 NORMAL NORMAL 10 10 04 04 12 12 24 24 12 12 58 58 IN 1 1000 1 1000 F2 6 F2 6 Exposure Compensation EV Shift Exposure compensation lets you change the exposure setting EV value manually to...

Страница 77: ...rd the image IMPORTANT When shooting under very dark or very bright conditions you may not be able to obtain satisfactory results even after performing exposure compensation NOTE Performing an EV shif...

Страница 78: ...press 3 Use and to select the setting you want and then press SET When shooting under these conditions Normal conditions Outdoor daylight on a clear day Outdoor daylight on an overcast or rainy day i...

Страница 79: ...04 to configure the camera so the white balance setting changes whenever you press or while in a REC mode Configuring the White Balance Setting Manually Certain complex light sources or other environm...

Страница 80: ...e white balance and then press the shutter button This starts the white balance adjustment procedure The message Complete appears on the monitor screen after white balance adjustment is complete Dim l...

Страница 81: ...tion feature page 104 to configure the camera to enter the BESTSHOT mode whenever you press or while in a REC mode 2 Use and to select the sample scene you want and then press SET If you want to check...

Страница 82: ...gital noise reduction processing is performed automatically when you are recording a night scene fireworks or other image that requires slow shutter speeds Because of this it takes longer to record im...

Страница 83: ...e it 1 Press REC and then select BESTSHOT as the recording mode page 48 This enters the BESTSHOT mode and displays a sample scene 2 Use and to display Register User Scene 3 Press SET 4 Use and to disp...

Страница 84: ...with this camera only can be used to create a BESTSHOT user setup You can have up to 999 BESTSHOT user setups in the camera s built in memory at one time You can check the current setup of a scene by...

Страница 85: ...se around to record the image for you Coupling Shot is available in the BESTSHOT mode page 81 First Image This is the part of the image that does not include the person who is recording the first imag...

Страница 86: ...balance zoom and flash settings are fixed for this type of image Focus frame 5 Next align the focus frame with the subject you want in the right side of the image taking care to align the actual back...

Страница 87: ...nitor screen 2 Ask someone else to record a shot of you against your original background telling them to compose the image by using the semi transparent monitor screen image as a guide The camera stor...

Страница 88: ...ge 4 Now you can stand in front of the background and ask someone else to snap your picture using the semi transparent background on the monitor screen as a composition guide Semi transparent backgrou...

Страница 89: ...them Before keystone correction After keystone correction White board etc Business cards and documents Setup Sample Images IMPORTANT Before recording compose the image so outline of the item you want...

Страница 90: ...r keystone correction An error message will appear page 202 if the camera is unable to find any suitable keystone correction candidate in the image After a short while the original image will be store...

Страница 91: ...ong as available memory capacity allows NOTE You can play back movies recorded in the Movie mode on your computer using Windows Media Player 4 Use and to select the candidate you want to correct 5 Use...

Страница 92: ...another focus mode before starting a recording 3 When movie recording is complete the movie file is stored in file memory 1 Press REC and then select Movie as the recording mode page 48 This enters th...

Страница 93: ...io Note the following points when recording a movie Take care that you do not block the microphone with your fingers Good recording results are not possible when the camera is too far from the subject...

Страница 94: ...Snapshot mode whenever you press or while in a REC mode 2 Press the shutter button to record the image After the image is recorded the camera enters audio recording standby with the image you just re...

Страница 95: ...ely 4KB per second NOTE You can play back files recorded in the Voice Recording mode on your computer using Windows Media Player You can cancel audio recording standby by pressing MENU 3 Press the shu...

Страница 96: ...cording mode without extending the lens 1 Press REC and then select Voice as the recording mode page 48 This enters the Voice Recording mode and causes to appear on the monitor screen You can use the...

Страница 97: ...out sufficient image detail If the histogram appears too lopsided for some reason you can use EV shift exposure compensation to move it left or right in order to achieve better balance Optimum exposu...

Страница 98: ...e distribution of R red G green and B blue components is also displayed This histogram can be used to determine whether there is too much or too little of each of the color components in an image NOTE...

Страница 99: ...wn for illustrative purposes only You may not be able to achieve exactly the same shapes for particular subjects A centered histogram does not necessarily guarantee optimum exposure The recorded image...

Страница 100: ...setting changes whenever you press and while in a REC mode Specifying ISO Sensitivity You can change the ISO sensitivity setting for better images in places where lighting is dim or when you are usin...

Страница 101: ...ess SET To get this High color saturation intensity Normal color saturation intensity Low color saturation intensity Select this setting 2 1 0 1 2 Specifying Outline Sharpness Use the following proced...

Страница 102: ...ess MENU 2 Select the REC tab select Grid and then press 3 Use and to select the setting you want and then press SET Specifying Contrast Use this procedure to adjust the relative difference between th...

Страница 103: ...select Icon Help and then press 3 Use and to select the setting you want and then press SET Select this setting On Off To do this Display guidance text when you select an icon on the monitor screen Tu...

Страница 104: ...ect L R Key and then press 3 Use and to select the setting you want and then press SET After you assign a function you can change its setting simply by pressing the and keys REC Mode page 48 EV Shift...

Страница 105: ...camera back on When mode memory is turned off the camera automatically restores the initial factory default setting for the applicable mode The following table shows what happens when you turn mode m...

Страница 106: ...power on Select this setting On Off IMPORTANT Note that BESTSHOT mode settings take priority over mode memory settings If you turn the camera off while in the BESTSHOT mode all settings except for RE...

Страница 107: ...reset all of the camera s settings to their initial defaults as shown under Menu Reference on page 192 1 Press MENU 2 Select the Set Up tab select Reset and then press 3 Use and to select Reset and th...

Страница 108: ...The actual display image appears a short while after the preview image This does not apply to images copied from another digital camera You can use the camera s built in monitor screen to view images...

Страница 109: ...ss SET This plays back the audio that accompanies the displayed image You can perform the following operations while audio is playing IMPORTANT Audio volume can be adjusted only when playback is being...

Страница 110: ...The histogram or any other display information you had displayed is cleared automatically whenever you flip the image While an image is flipped you can use and to scroll to another image if you want...

Страница 111: ...2 Press the zoom button to enlarge the image You can toggle display of the zoom factor on and off by pressing DISP 3 Use and to shift the image up down left or right 4 Press MENU to return the image...

Страница 112: ...you want and then press SET To cancel the resize operation select Cancel IMPORTANT Resizing an image creates a new file that contains the image in the size you select The file with the original image...

Страница 113: ...te that this operation is possible only when a snapshot image is on the monitor screen 4 Use the zoom button to make the cropping boundary larger or smaller The smaller the image the more limited is t...

Страница 114: ...he date and time that appear when the image is displayed indicate when the image was originally recorded not when the image was cropped Playing a Movie Use the following procedure to play back a movie...

Страница 115: ...ress the zoom button This displays the 9 image screen with the image that was on the monitor screen in step 2 in the center with a selection boundary around it On the 9 image screen indicates a voice...

Страница 116: ...d first Month Year Date selection cursor Displaying the Calendar Screen Use the following procedure to display a 1 month calendar Each day shows the first image recorded on that day which makes it eas...

Страница 117: ...equence at a fixed interval 1 In the PLAY mode press MENU 2 Select the PLAY tab select Slideshow and then press 2 Use and to move the selection boundary to the date whose image you want to view and th...

Страница 118: ...in progress Wait until an image is stopped on the monitor screen before performing a button operation or hold down the button until the image stops Pressing during a slideshow will scroll to the previ...

Страница 119: ...1 Turn off the camera 2 Set the camera onto the USB cradle Do not place the camera onto the USB cradle while it is turned on 3 Press the USB cradle s PHOTO button This starts the Photo Stand slidesho...

Страница 120: ...e of digital camera You cannot rotate movie images or the voice recording file icon Rotating the Display Image Use the following procedure to rotate the image 90 degrees and register the rotation info...

Страница 121: ...he currently selected recording mode or press the power button to turn off the camera IMPORTANT Image Roulette does not play movie files or display the voice recording file icon Image Roulette is disa...

Страница 122: ...ng The file extension of a WAVE ADPCM file is WAV Recording Time Up to about 30 seconds per image Audio File Size Approximately 120KB 30 second recording of approximately 4KB per second 1 In the PLAY...

Страница 123: ...he existing audio and replaces it with the new one IMPORTANT Keep the microphone on the front of the camera pointed at the subject Take care that you do not block the microphone with your fingers Good...

Страница 124: ...g operations while audio is playing To do this Fast forward or fast reverse the audio Pause and unpause audio playback Adjust audio volume Cancel playback Do this Hold down or Press SET Press or Press...

Страница 125: ...performed when all files in memory are protected page 129 Deleting an audio snapshot deletes both the image file and the audio file attached to it You cannot use the procedures in this section to dele...

Страница 126: ...and to select All Files Delete and then press SET 3 Use and to select Yes To exit the file delete operation without deleting anything select No 4 Press SET to delete all the files The message There a...

Страница 127: ...s shown below Example Name of the 100th folder Each folder can hold files numbered up to 9 999 Trying to store the 10 000th file in a folder causes the next serially numbered folder to be created File...

Страница 128: ...MENU to exit the menu screen Protecting Files Once you protect a file it cannot be deleted page 125 You can protect files individually or you can protect all files in memory with a single operation T...

Страница 129: ...u can copy scenery shots photos of your family or other special images from a file storage folder page 173 to the FAVORITE folder in built in memory page 173 Images in the FAVORITE folder are not disp...

Страница 130: ...above procedure creates a 320 240 pixel QVGA size image in the FAVORITE folder A file copied into the FAVORITE folder is automatically assigned a file name that is a serial number Though the serial n...

Страница 131: ...in the FAVORITE folder 5 After you are finished viewing files press MENU twice to exit File Name IMPORTANT Note that a FAVORITE folder is created in the camera s built in memory only No FAVORITE fold...

Страница 132: ...t deleting anything select Cancel 7 After deleting all of the files you want use and to select Cancel and then press SET to exit To delete all files from the FAVORITE folder 1 In the PLAY mode press M...

Страница 133: ...or all the way or perform a key operation To configure sound settings 1 Press MENU 2 Select the Set Up tab select Sounds and then press 3 Use and to select the sound whose setting you want to configur...

Страница 134: ...MENU 2 Select the Set Up tab select Startup and then press 3 Use and to display the image you want to use as the startup image 4 Use and to change the setting and then press SET Select this setting On...

Страница 135: ...ormat built in memory page 145 If you store an audio snapshot to startup image memory the image s audio is not played when the image is displayed at startup Configuring Power Down Image Settings With...

Страница 136: ...NT Formatting the camera s flash memory deletes the power down image page 145 When both a still image and a movie are present for the power down image only the movie is used Note that a power down ima...

Страница 137: ...ment it Using the Alarm You can configure up to three alarms that cause the camera to beep and display a specified image at the time you specify Specifying a movie or an audio snapshot plays back the...

Страница 138: ...l sound for about one minute or until you stop it and then the camera will turn on To stop the alarm after it starts to sound press any button If the camera is on the USB cradle when an alarm sounds y...

Страница 139: ...time and date settings Otherwise the time and date setting will change automatically when you select another time zone To select your Home Time zone 1 Press MENU 2 Select the Set Up tab select World...

Страница 140: ...e between 12 hour and 24 hour timekeeping 4 When all the settings are the way you want press SET to register them and exit the setting screen Changing the Date Format You can select from among three d...

Страница 141: ...this Display the time in your home time zone Display the time in the zone currently selected on the World Time screen To configure World Time settings 1 Press MENU 2 Select the Set Up tab select World...

Страница 142: ...ress SET 7 When the setting is the way you want press SET to apply it and exit the setting screen Changing the Display Language You can use the following procedure to select one of ten languages as th...

Страница 143: ...ing you want and then press SET Select this setting Mass Storage USB DIRECT PRINT PTP PictBridge When connecting to this type of device Computer or USB DIRECT PRINT compatible printer page 156 PictBri...

Страница 144: ...ing Power On Power On Off Disable To configure this operation Power turns on when REC or PLAY is pressed but does not turn off Power turns on or off when REC or PLAY is pressed Power does not turn on...

Страница 145: ...Formatting built in memory deletes the following Protected images FAVORITE folder images BESTSHOT mode user setups Startup screen image Power down image 1 Check to make sure there is no memory card l...

Страница 146: ...SD memory card or a MultiMediaCard with this camera Proper operation is not guaranteed when any other type of card is used See the instructions that come with the memory card for information about how...

Страница 147: ...battery cover closed and then slide it in the direction indicated by the arrow Using a Memory Card IMPORTANT Make sure you turn off the camera before inserting or removing a memory card Be sure to ori...

Страница 148: ...it Formatting a memory card that contains files deletes all the files even those that are protected page 128 To remove a memory card from the camera 1 Press the memory card into the camera and then r...

Страница 149: ...ord data to and delete data from an SD memory card a number of times it loses its ability to retain data Because of this periodic re formatting of an SD memory card is recommended Before starting a fo...

Страница 150: ...ilt in memory and a memory card IMPORTANT Only snapshot movie files audio snapshot and voice recording files recorded with this camera can be copied Other files cannot be copied Files in the FAVORITE...

Страница 151: ...press SET 3 Use and to select the file you want to copy 4 Use and to select Copy and then press SET This starts the copy operation and displays the message Busy Please wait The file reappears on the m...

Страница 152: ...t support DPOF or may support different printing protocols In this case use the protocol supported by your print service to specify the images you want to have printed Printing Directly on a Printer E...

Страница 153: ...are for printing with a Macintosh For more information see Viewing Images on a Computer page 160 and Installing the Software from the CD ROM page 183 DPOF The letters DPOF stand for Digital Print Orde...

Страница 154: ...f copies You can specify up to 99 for the number of copies Specify 00 if you do not want to have the image printed 6 To turn on date stamping for the prints press DISP so 12 12 1 is displayed 12 12 1...

Страница 155: ...or the prints press DISP so 12 12 1 is not displayed 6 After all the settings are the way you want press SET to apply them IMPORTANT If you take a memory card to a professional print service be sure t...

Страница 156: ...each should be printed PictBridge is a standard established by the Camera and Imaging Products Association CIPA USB DIRECT PRINT is a standard proposed by Seiko Epson Corporation Select this setting...

Страница 157: ...aper for printing the images into the printer USB 8 Press the USB cradle s USB button This displays the print menu on the camera s monitor screen 9 Use and to select Paper Size and then press 10 Use a...

Страница 158: ...ting is still being performed Pressing any of the camera s buttons while printing is in progress will cause the message to reappear The print menu will appear when printing is complete If you selected...

Страница 159: ...tion holds the copyright for PRINT Image Matching and PRINT Image Matching III Exif Print Exif Print is an internationally supported open standard file format that makes it possible to capture and dis...

Страница 160: ...ows see below or a Macintosh see page 166 Using the Camera with a Windows Computer The following are the general steps for viewing and copying files from a computer running under Windows You can find...

Страница 161: ...use the camera to power down suddenly during data communication Use of the special AC adaptor is recommended to power the camera during data communication If you are using battery power without the AC...

Страница 162: ...ould leave the bundled CD ROM in your computer s CD ROM drive when you restart 6 Connect the bundled AC adaptor to the DC IN 5 3V connector of the USB cradle and then plug it in to a household power o...

Страница 163: ...correct 8 Press the camera s power button to turn it on and then press its MENU button 9 Select the Set Up tab select USB and then press 10 Use and to select Mass Storage USB DIRECT PRINT and then pre...

Страница 164: ...on your operating system perform one of the following procedures to save the files if you want 13 Press the USB cradle s USB button This will cause the Add New Hardware dialog box to appear on the co...

Страница 165: ...the camera from the USB cradle Windows 2000 Users Click card services in the task tray on your computer screen and disable the drive number assigned to the camera After pressing the USB cradle s USB b...

Страница 166: ...image displayed on your computer screen for a long time Doing so can cause the image to burn in on the screen Never disconnect the USB cable or perform any camera or USB cradle operation while data co...

Страница 167: ...before you place it onto the USB cradle 1 Connect the bundled AC adaptor to the DC IN 5 3V connector of the USB cradle and then plug it in to a household power outlet If you are using battery power wi...

Страница 168: ...for proper positioning Plug the USB cable plugs into the ports securely as far as they will go Proper operation is not possible if connections are not correct 3 Press the camera s power button to tur...

Страница 169: ...t to view For information about file names see Memory Folder Structure on page 172 12 To copy all the files in file memory to your Macintosh hard disk drag the DCIM folder to the folder to which you w...

Страница 170: ...The following are the operations you can perform while there is a USB connection between your camera and computer See the referenced pages for more information about each operation View images in albu...

Страница 171: ...ommercially available PC card adaptor for an SD memory card or MMC For full details see the user documentation that comes with the PC card adaptor and your computer Using a Commercially Available SD M...

Страница 172: ...o images can be viewed using another manufacturer s DCF camera or printed on a DCF printer Memory Folder Structure Folder Structure DCIM DCIM Folder 100CASIO Storage folder CIMG0001 JPG Image file CIM...

Страница 173: ...WAV Audio snapshot image file File that contains the image part of an audio snapshot File Name Extension JPG Audio snapshot audio file File that contains the audio part of an audio snapshot File Name...

Страница 174: ...der on your computer Changing the name to a date is a good way to keep track of multiple DCIM folders However if you even want to copy the folders back to the camera s file memory be sure you change t...

Страница 175: ...um feature of the camera creates files that make it possible for you to view images on your computer in a photo album layout You can also use the applications contained on the CD ROM that comes bundle...

Страница 176: ...ANT Never open the battery cover or remove the memory card from the camera while an album is being created Doing so not only runs the risk of certain album files being skipped it can also result in im...

Страница 177: ...e of the screen IMPORTANT The sample layout shows the arrangement of items and the background color only It does not reflect any of the detailed album settings you configure in the following section C...

Страница 178: ...plan to use the image Select this setting View WEB Print For this purpose Smaller images for album browsing Website thumbnails or archiving on a CD R or other media with the full size image displayed...

Страница 179: ...ff the camera while auto album creation is turned on the monitor screen turns off but the green operation lamp continues to flash for a few seconds to indicate that the album creation process is being...

Страница 180: ...ter s Web browser to open the file named INDEX HTM This displays a list of folders in built in memory or on the memory card Index Info Album Type File Name Image 4 If you created the album after selec...

Страница 181: ...ering Metering mode Shutter speed Shutter speed Aperture stop Aperture stop Exposure comp EV shift Focusing mode Focusing mode AF Area Auto Focus area Flash mode Flash mode Sharpness Sharpness Saturat...

Страница 182: ...album exit your Web browser application Saving an Album To save an album copy the DCIM folder from camera memory or the memory card to your computer s hard disk a CD R an MO disk or some other storage...

Страница 183: ...uter About the bundled CD ROM CASIO Digital Camera Software The CD ROM CASIO Digital Camera Software that comes bundled with the camera contains the applications described below Installation of these...

Страница 184: ...sizing images and for changing image orientation You can also use Photohands for printing images and for adding a date stamp to printed images See the user documentation file PDF on the bundled CASIO...

Страница 185: ...n upgraded from Windows 95 or 3 1 to Windows Me or 98 or from Windows 95 or NT to Windows 2000 2 With Windows XP use the USB driver that comes with the operating system You do not need to install the...

Страница 186: ...with the camera does not support operation under Mac OS X 10 0 Installing Software from the CD ROM in Windows Use the procedures in this section to install the software from the bundled CD ROM CASIO...

Страница 187: ...rst select a language Note that some software is not available in all languages 1 On the menu screen click the tab for the language you want Viewing the Contents of the Read me File You should always...

Страница 188: ...ry information and HTML files that are created automatically by Photo Loader In some cases image files may be lost When using an operating system other than Windows XP never connect the camera to your...

Страница 189: ...er and accesses the user registration website Follow the instructions that appear on your computer screen to register Exiting the Menu Application 1 On the menu screen click Exit to exit the menu Inst...

Страница 190: ...e Important file in the Photo Loader folder Follow the instructions in the file to use your existing library management files Failure to follow this procedure correctly can result in loss or corruptio...

Страница 191: ...On the CD ROM open the Manual folder 2 Open the Photo Loader folder and then open the English folder 3 Open PhotoLoader_english To register as a camera user Internet registration only is supported Vi...

Страница 192: ...0 1280 960 640 480 Fine Normal Economy 2 0 1 7 1 3 1 0 0 7 0 3 0 0 0 3 0 7 1 0 1 3 1 7 2 0 Auto Daylight Cloudy Shade 1 Fluorescent 1 2 Fluorescent 2 Tungsten Manual Auto ISO 50 ISO 100 ISO 200 ISO 40...

Страница 193: ...Time Date Style Adjust Language Sleep Auto Power Off REC PLAY USB Format Reset Startup Half Shutter Shutter Operation Volume On Selectable image Off Continue Reset Home World Home Time setup city DST...

Страница 194: ...d Card Built in Cancel Set Up Tab Menu Sounds Startup File No World Time Date Style Adjust Language Sleep Auto Power Off REC PLAY USB Format Reset Startup Half Shutter Shutter Operation Volume On Sele...

Страница 195: ...peration lamp Red operation lamp REC Modes Operation Lamp Self timer Lamp Green Lit Lit Pattern 3 Lit Pattern 2 Pattern 1 Red Pattern 3 Lit Pattern 1 Pattern 2 Lit Red Pattern 1 Pattern 2 Operational...

Страница 196: ...tion lamp is flashing Doing so will cause recorded images to be lost PLAY Mode Operation Lamp Self timer Lamp Green Lit Pattern 3 Red Pattern 2 Lit Pattern 3 Red Operational Power on recording enabled...

Страница 197: ...s light and flash to indicate the current operational status of the USB cradle and camera CHARGE lamp USB lamp Color Red Green Amber Red Status Lit Lit Lit Flashing Color Green Green Status Lit Flashi...

Страница 198: ...mera 1 Orient the battery correctly page 29 2 Charge the battery page 31 If the battery goes dead soon after being charged it means the battery has reached the end of its life and needs to be replaced...

Страница 199: ...erly 1 flash off is selected as the flash mode 2 The battery is dead 3 The camera is in the Movie mode 4 A scene that selects flash off as the flash mode is selected in the BESTSHOT mode The battery i...

Страница 200: ...e 160 4 Press the USB button on the USB cradle Color of the playback image is different from the image on the monitor screen during recording Images are not displayed All buttons and switches are disa...

Страница 201: ...om the bundled CD ROM CASIO Digital Camera Software or if you have another type of driver installed This will make it impossible for the computer to recognize the digital camera when it is connected I...

Страница 202: ...files on the memory card Before formatting try transferring recoverable files to a computer or some other storage device Check connections File could not be saved because battery is low Folder cannot...

Страница 203: ...153 You are trying to save an invalid image as a BESTSHOT user setup or as an original startup image The memory card loaded in the camera is not formatted Format the memory card page 148 The image fi...

Страница 204: ...my Fine Normal Economy Fine Normal Economy Fine Normal Economy Fine Normal Economy Approximate Image File Size 2 2MB 1 8MB 1 3MB 2 0MB 1 6MB 1 1MB 1 6MB 1 2MB 630KB 1 05MB 710KB 370KB 680KB 460KB 250K...

Страница 205: ...rol Light Metering Multi pattern by CCD Exposure Program AE Exposure Compensation 2EV to 2EV 1 3EV units Shutter CCD electronic shutter mechanical shutter 1 8 to 1 2000 second Shutter speed is differe...

Страница 206: ...hots CIPA Standard Temperature 23 C 73 F Monitor Screen On Zoom operation between full wide to full telephoto every 30 seconds during which two images are recorded one image with flash power turned of...

Страница 207: ...Weight Approximately 121 g 4 3 oz excluding battery and accessories Bundled Accessories Rechargeable lithium ion battery NP 40 USB cradle CA 24 Special AC adaptor AC power cord USB cable Strap CD ROM...

Страница 208: ...of any other type of battery is not supported This camera does not have a separate battery for the clock The date and time settings of the camera are cleared whenever power is totally cut off from bot...

Отзывы: