


2145-1
Module No. 2145
ABOUT THIS MANUAL
•
Button operations are indicated using the letters shown
in the illustration.
B
D
C
A
L
E
•
Each section of this manual provides you with the information you need to perform
operations in each mode. Further details and technical information can be found in the
“REFERENCE” section.
GENERAL GUIDE
•
Press
B
to change from mode to mode. Each mode is explained in detail on the following pages.
•
In any mode, holding down
L
turns on a micro-light that illuminates the display.
▲
▲
Timekeeping Mode
▲
Stopwatch Mode
Alarm Mode
▲
Telememo Mode
B
D
C
A
L
E
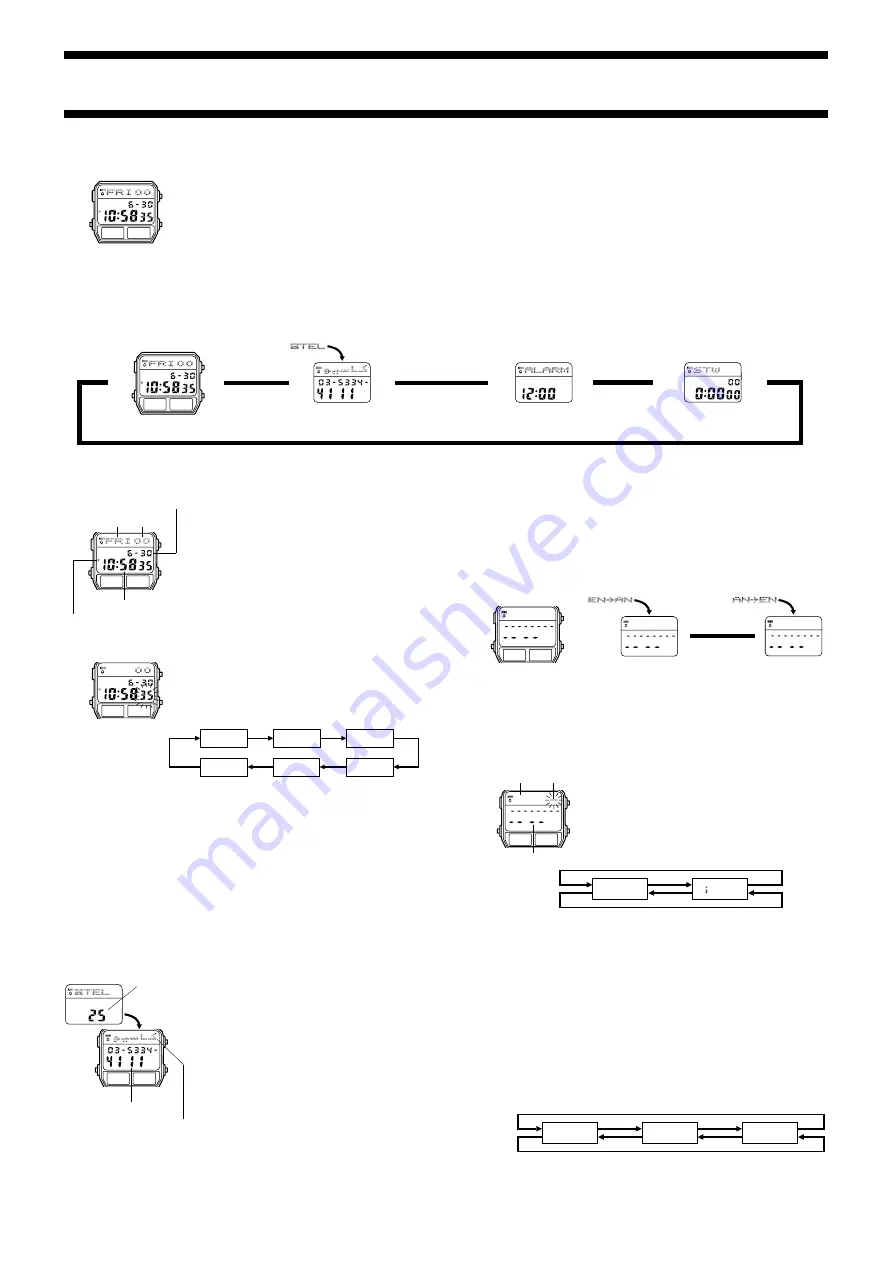
TIMEKEEPING MODE
Use the Timekeeping Mode to set and view the current
time and date.
Resetting the Seconds Count to Zero
1. In the Timekeeping Mode, press
A
.
•
The seconds digits are flashing because they are
selected.
2. Press
C
to set the seconds count to
00
.
•
Pressing
C
while the seconds count is in the range of
30 to 59 resets the seconds to
00
and add 1 to the
minutes. In the range of 00 to 29, the minutes count is
unchanged.
3. Press
A
to return to the current time screen.
B
D
C
A
L
E
Day of week
Hour : Minutes
Seconds
PM indicator
Month – Day
Year
Setting the Time and Date
1. In the Timekeeping Mode, press
A
.
•
The seconds digits are flashing because they are
selected.
•
While the seconds digits are flashing, press
E
to toggle
between 12-hour and 24-hour timekeeping.
2. Press
B
to move the flashing in the sequence shown
below to select other settings.
3. While hour, minutes, year, month, or day is flashing, press
C
to increase the setting
or
L
to decrease it.
•
While the seconds setting is selected, press
C
to reset seconds to
00
.
4. Press
A
to return to the current time screen.
•
The day of the week is automatically displayed in accordance with the date (year,
month, and day) settings.
•
The year can be set in the range of 1995 to 2039.
•
The watch’s built-in full automatic calendar automatically makes allowances for different
month lengths and leap years. Once you set the date, there should be no reason to
change it except after the replacement of the watch’s battery.
Viewing the Telememo Mode Screen
Holding down
E
in the Timekeeping Mode displays the Telememo record that was on
the display when you last exited the Telememo Mode.
B
D
C
A
L
E
Seconds
Year
Hour
Minutes
Month
Day
TELEMEMO MODE
The Telememo Mode lets you store up to 50 records, each
containing name and telephone number data. Records
are automatically sorted based on the characters of the
name. You can recall records by scrolling through them
on the display.
•
You can input the Telememo name using Arabic or
English characters, numbers, or symbols.
•
Records are sorted automatically on their names, in the
following sequence: Arabic characters
→
English
characters
→
numbers
→
symbols.
•
See the “CHARACTER LIST” at the back of this manual
for information about the types of characters you can
input.
•
The expression “Arabic Characters” in this manual refers
to Arabic, Persian, and Urdu characters.
B
D
C
A
L
E
Telephone number
Name
Number of
records
stored
Inputting Telememo Data
Use the new data screen to input new Telememo Data. The new data screen is the one
that contains no name and telephone number data.
To input or edit an existing Telememo record, you must first select either Arabic input
mode (Arabic characters) or English input mode (English characters, numbers, and
symbols).
To select the input mode
In the Telememo Mode, hold down
C
for about three seconds to toggle between the
Arabic input mode and English input mode.
New Data screen
Arabic Input
B
D
C
A
L
E
▲
▲
Hold down
C
.
English Input
•
When you switch input mode, the upper part of the display displays an indicator that
shows the mode you are entering.
ENbAN
indicates the Arabic input mode, while
ANbEN
indicates the English input mode. This indicator appears for only one second.
There is no indicator on the input screen to show which input mode you are currently in.
•
If there is no Telememo record stored in memory yet, the new data screen appears as
soon as you enter the Telememo Mode. Otherwise, the new data screen is between
the first record and last record in memory.
Inputting New Telememo Data Using Arabic Characters
1. In the Telememo Mode, press
D
or
E
until the new
data screen appears.
2. Hold down
C
to enter the Arabic input mode.
3. Press
A
and the cursor appears in the rightmost
position of the text area.
4. Use
C
and
L
to change the character at the cursor
position in the text area. The character changes in the
following sequence.
B
D
C
A
L
E
Text area
Cursor
Number area
•
Arabic characters appear in their isolated forms when you scroll through them on the
display. See the “CHARACTER LIST” at the back of this manual for information about
Arabic character forms.
5. When the character you want is at the cursor position, press
B
to move the cursor to
the left.
•
Moving the cursor automatically converts the Arabic character from its isolated form to
its initial, medial, or final form as required.
6. Repeat the steps 4 and 5 until your text is complete.
•
You can input up to eight characters for the name.
7. After you input a name, use
B
to move the cursor to the number area.
•
The text area can hold up to eight characters. When the cursor is located at the eighth
(leftmost) space of the text area, moving the cursor to the left causes it to jump down
to the first (leftmost) digit of the number area. When the cursor is at the 12th (rightmost)
digit of the number area, moving it to the right (by pressing
B
) causes it to jump back
to the first (rightmost) character in the text area.
•
Pressing
B
during Arabic input moves the cursor to the left in the text area and the
right in the number area.
8. Use
C
and
L
to change the character (hyphen, number, or space) at the cursor
position in the number area. The character changes in the following sequence.
9. When the character you want is at the cursor position, press
B
to move the cursor to
the right.
10. Repeat steps 8 and 9 until you complete number input.
•
You can input up to 12 digits for the number.
to
(space)
Press
C
.
Press
L
.
(space)
0
to
9
x
Press
C
.
Press
L
.