background image

Engine - Engine and crankcase

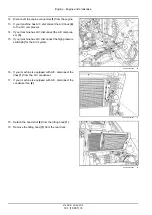
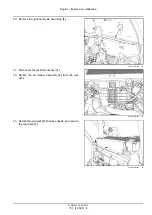
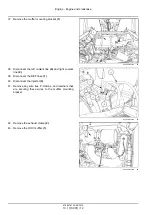
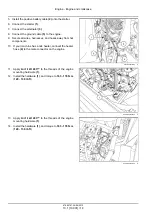
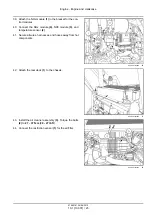
49. Support the hydrostatic drive with a suitable lifting de-

vice

(1)

.

RAPH12SSL0057AA

28

50. Remove the mounting bolts

(1)

for the hydrostatic

drive assembly.

931001928

29

51. Separate the hydrostatic drive assembly

(2)

from the

engine bell housing

(1)

.

931001936

30

52. Remove the engine mounting hardware

(1)

at the front

of the engine.

53. Repeat step

52

at the rear of the engine.

RAPH12SSL0050AA

31

47685161 24/06/2015

10.1 [10.001] / 14

Содержание Alpha Series

Страница 1: ...IN NFM470295 and above TR340 TV380 Tier 4B final Alpha Series Compact Track Loader TR340 PIN NFM482972 and above TV380 PIN NFM483044 and above Printed in U S A 2015 CNH Industrial America LLC All Rights Reserved Case is a trademark registered in the United States and many other countries owned by or licensed to CNH Industrial N V its subsidiaries or affiliates ...

Страница 2: ...SERVICE MANUAL SR270 TIER 4B FINAL NFM481941 SV300 TIER 4B FINAL NFM470295 TR340 TIER 4B FINAL NFM482972 TV380 TIER 4B FINAL NFM483044 47685161 24 06 2015 EN Find manuals at https best manuals com ...

Страница 3: ...FM482972 North America F5BFL413A B007 TV380 TIER 4B FINAL NFM483044 North America F5BFL413A B007 SR270 TIER 4B FINAL NFM481941 North America F5BFL413A B007 SV300 TIER 4B FINAL NFM470295 North America F5BFL413A B007 47685161 24 06 2015 Find manuals at https best manuals com ...

Страница 4: ...y 19 1 Front axle system 25 25 450 Chain drive system 25 1 Rear axle system 27 27 650 Chain drive system 27 1 Hydrostatic drive 29 29 200 Mechanical control 29 1 29 218 Pump and motor components 29 2 29 202 Hydrostatic transmission 29 3 29 134 Two speed assembly 29 4 Brakes and controls 33 33 110 Parking brake or parking lock 33 1 Hydraulic systems 35 35 000 Hydraulic systems 35 1 35 300 Reservoir...

Страница 5: ...cks and track suspension 48 48 130 Track frame and driving wheels 48 1 48 100 Tracks 48 2 48 134 Track tension units 48 3 48 138 Track rollers 48 4 Cab climate control 50 50 100 Heating 50 1 50 200 Air conditioning 50 2 Electrical systems 55 55 000 Electrical system 55 1 55 100 Harnesses and connectors 55 2 55 201 Engine starting system 55 3 55 302 Battery 55 4 55 011 Fuel tank system 55 5 55 988 ...

Страница 6: ...ning HVAC control system 55 12 55 518 Wiper and washer system 55 13 55 408 Warning indicators alarms and instruments 55 14 55 DTC FAULT CODES 55 15 Front loader and bucket 82 82 100 Arm 82 1 82 300 Bucket 82 2 Platform cab bodywork and decals 90 90 150 Cab 90 1 90 154 Cab doors and hatches 90 2 47685161 24 06 2015 Find manuals at https best manuals com ...

Страница 7: ...47685161 24 06 2015 Find manuals at https best manuals com ...

Страница 8: ...INTRODUCTION 47685161 24 06 2015 1 Find manuals at https best manuals com ...

Страница 9: ...vironment 6 Torque Minimum tightening torques for normal assembly 7 Torque Standard torque data for hydraulics 12 Basic instructions Shop and assembly 14 Hydraulic contamination 16 Capacities 17 Product identification 18 Product identification Machine orientation 20 See content for specific models 47685161 24 06 2015 2 Find manuals at https best manuals com ...

Страница 10: ...r damages caused by parts and or components not approved by the manu facturer including those used for the servicing or repair of the product manufactured or marketed by the manufacturer In any case no warranty is given or attributed on the product manufactured or marketed by the manufacturer in case of damages caused by parts and or components not approved by the manufacturer The manufacturer res...

Страница 11: ...that if not avoided could result in death or serious injury CAUTION indicates a hazardous situation that if not avoided could result in minor or moderate injury FAILURE TO FOLLOW DANGER WARNING AND CAUTION MESSAGES COULD RESULT IN DEATH OR SERIOUS INJURY Machine safety NOTICE Notice indicates a situation that if not avoided could result in machine or property damage Throughout this manual you will...

Страница 12: ...or safe operation 8 Under some field conditions more weight may be required at the front or rear axle for adequate stability This is especially important when operating in hilly conditions or when using heavy attachments 9 Always lower the attachment shut off the engine set the parking brake engage the transmission gears remove the key and wait for all machine movement to stop before leaving the o...

Страница 13: ...tion and available resources Do not allow coolant mixtures to get into the soil Collect and dispose of coolant mixtures properly The air conditioning system contains gases that should not be released into the atmosphere Consult an air condi tioning specialist or use a special extractor to recharge the system properly Repair any leaks or defects in the engine cooling system or hydraulic system imme...

Страница 14: ... N m 163 lb in 25 N m 217 lb in 26 N m 234 lb in 35 N m 311 lb in 17 N m 151 lb in 24 N m 212 lb in M10 37 N m 27 lb ft 49 N m 36 lb ft 52 N m 38 lb ft 70 N m 51 lb ft 33 N m 25 lb ft 48 N m 35 lb ft M12 64 N m 47 lb ft 85 N m 63 lb ft 91 N m 67 lb ft 121 N m 90 lb ft 58 N m 43 lb ft 83 N m 61 lb ft M16 158 N m 116 lb ft 210 N m 155 lb ft 225 N m 166 lb ft 301 N m 222 lb ft 143 N m 106 lb ft 205 N...

Страница 15: ...9 N m 343 lb in 18 N m 163 lb in 27 N m 240 lb in M10 40 N m 30 lb ft 54 N m 40 lb ft 57 N m 42 lb ft 77 N m 56 lb ft 37 N m 27 lb ft 53 N m 39 lb ft M12 70 N m 52 lb ft 93 N m 69 lb ft 100 N m 74 lb ft 134 N m 98 lb ft 63 N m 47 lb ft 91 N m 67 lb ft M16 174 N m 128 lb ft 231 N m 171 lb ft 248 N m 183 lb ft 331 N m 244 lb ft 158 N m 116 lb ft 226 N m 167 lb ft M20 350 N m 259 lb ft 467 N m 345 lb...

Страница 16: ... ft 7 16 48 N m 36 lb ft 65 N m 48 lb ft 68 N m 50 lb ft 91 N m 67 lb ft 50 N m 37 lb ft 71 N m 53 lb ft 1 2 74 N m 54 lb ft 98 N m 73 lb ft 104 N m 77 lb ft 139 N m 103 lb ft 76 N m 56 lb ft 108 N m 80 lb ft 9 16 107 N m 79 lb ft 142 N m 105 lb ft 150 N m 111 lb ft 201 N m 148 lb ft 111 N m 82 lb ft 156 N m 115 lb ft 5 8 147 N m 108 lb ft 196 N m 145 lb ft 208 N m 153 lb ft 277 N m 204 lb ft 153 ...

Страница 17: ...85 lb ft 153 N m 113 lb ft 74 N m 55 lb ft 104 N m 77 lb ft 9 16 117 N m 86 lb ft 156 N m 115 lb ft 165 N m 122 lb ft 221 N m 163 lb ft 106 N m 78 lb ft 157 N m 116 lb ft 5 8 162 N m 119 lb ft 216 N m 159 lb ft 228 N m 168 lb ft 304 N m 225 lb ft 147 N m 108 lb ft 207 N m 153 lb ft 3 4 287 N m 212 lb ft 383 N m 282 lb ft 405 N m 299 lb ft 541 N m 399 lb ft 261 N m 193 lb ft 369 N m 272 lb ft 7 8 4...

Страница 18: ...8 4 Grade Identification Grade Corner Marking Method 1 Flats Marking Method 2 Clock Marking Method 3 Grade A No Notches No Mark No Marks Grade B One Circumferential Notch Letter B Three Marks Grade C Two Circumferential Notches Letter C Six Marks 47685161 24 06 2015 11 ...

Страница 19: ... 2 20 16 20 N m 12 15 lb ft 14 20 N m 10 15 lb ft 6 9 5 mm 3 8 in 9 16 18 29 33 N m 21 24 lb ft 20 27 N m 15 20 lb ft 8 12 7 mm 1 2 in 3 4 16 47 54 N m 35 40 lb ft 34 41 N m 25 30 lb ft 10 15 9 mm 5 8 in 7 8 14 72 79 N m 53 58 lb ft 47 54 N m 35 40 lb ft 12 19 1 mm 3 4 in 1 1 16 12 104 111 N m 77 82 lb ft 81 95 N m 60 70 lb ft 14 22 2 mm 7 8 in 1 3 16 12 122 136 N m 90 100 lb ft 95 109 N m 70 80 l...

Страница 20: ...ACED FITTINGS When installing ORFS fittings thoroughly clean both flat surfaces of the fittings 1 and lubricate the O ring 2 with light oil Make sure both surfaces are aligned properly Torque the fitting to specified torque listed throughout the repair manual NOTICE If the fitting surfaces are not properly cleaned the O ring will not seal properly If the fitting surfaces are not properly aligned t...

Страница 21: ...n using a flat punch or seal installation tool Do not tap the seal with a hammer or mallet 6 While you insert the seal check that the seal is perpendicular to the seat When the seal settles make sure that the seal makes contact with the thrust element if required 7 To prevent damage to the seal lip on the shaft position a protective guard during installation operations O ring seals Lubricate the O...

Страница 22: ... ground cable from the machine battery The electronic monitoring system and charging system will be damaged if this is not done 5 Remove the battery ground cable Reconnect the cable when you complete welding WARNING Battery acid causes burns Batteries contain sulfuric acid Avoid contact with skin eyes or clothing Antidote external Flush with water Antidote eyes flush with water for 15 minutes and ...

Страница 23: ...mes too hot Pump gears housing and other parts that wear rapidly Relief valves or check valves held open by dirt Quick failure of components that have been repaired Slow cycle times are slow The machine does not have enough power If your machine has any of these problems check the hydraulic oil for contamination There are two types of contamination microscopic and visible Microscopic contamination...

Страница 24: ...ENGINE OIL 10W 30 Chain compartments Capacity each side SR270 SV300 22 2 L 23 5 US qt Specifications CASE AKCELA ENGINE OIL 10W 30 Grease fittings Quantity As required Specifications TUTELA MOLY GREASE GR 75 Molydisulfide Engine crank case oil Capacity with filter change 8 5 L 9 0 US qt Specifications CASE AKCELA UNITEK NO 1 SBL CJ 4 Final track drive Capacity each side TR340 TV380 1 0 L 1 06 US q...

Страница 25: ...parts or information for your machine Make a record of the numbers Keep this record and your manufacturer s statement of origin in a safe place If the machine is stolen report the numbers to your local law enforcement agency MACHINE Machine Model and Type Product Identification Number Year of Build Engine Serial Number Hydrostatic Pump Serial Number Bucket Serial Number Product Identification Numb...

Страница 26: ...ower inside cab 931007505A 3 Engine serial number plate location On the side of the Exhaust Gas Recirculation EGR cooler On top of the valve cover The serial number is also stamped on the engine front cover 23119866 4 Bucket identification plate BT04F026 01 5 47685161 24 06 2015 19 ...

Страница 27: ...ation SR270 TIER 4B FINAL NFM481941 NA SV300 TR340 TIER 4B FINAL NFM482972 NA TV380 RAPH12SSL0057BA 1 The terms front 1 right 2 rear 3 and left 4 are used in this manual to indicate the direction as seen from the operator s seat 47685161 24 06 2015 20 ...

Страница 28: ...SERVICE MANUAL Engine SR270 TIER 4B FINAL NFM481941 SV300 TIER 4B FINAL NFM470295 TR340 TIER 4B FINAL NFM482972 TV380 TIER 4B FINAL NFM483044 47685161 24 06 2015 10 ...

Страница 29: ...kcase 10 1 10 216 Fuel tanks 10 2 10 206 Fuel filters 10 3 10 500 Selective Catalytic Reduction SCR exhaust treatment 10 4 10 400 Engine cooling system 10 5 10 414 Fan and drive 10 6 10 304 Engine lubrication system 10 7 47685161 24 06 2015 10 ...

Страница 30: ...Engine 10 Engine and crankcase 001 SR270 TIER 4B FINAL NFM481941 SV300 TIER 4B FINAL NFM470295 TR340 TIER 4B FINAL NFM482972 TV380 TIER 4B FINAL NFM483044 47685161 24 06 2015 10 1 10 001 1 ...

Страница 31: ...Contents Engine 10 Engine and crankcase 001 SERVICE Engine Drain fluid 3 Remove 4 Install 17 Filling 31 See content for specific models 47685161 24 06 2015 10 1 10 001 2 ...

Страница 32: ...NA TV380 TIER 4B FINAL NFM483044 NA 1 Remove the access cover 2 by removing the mount ing bolts 1 931001637 1 2 Remove the drain plug 1 3 When the oil has drained from the engine install the drain plug 1 Torque the drain plug 1 to 68 82 N m 50 60 lb ft RAIL14SSL0709AA 2 4 Install the access cover 1 931001637 3 47685161 24 06 2015 10 1 10 001 3 ...

Страница 33: ...der pressure can penetrate the skin and cause infection or other injury To prevent personal injury Relieve all pressure before disconnecting fluid lines or per forming work on the hydraulic system Before applying pressure make sure all connections are tight and all components are in good condition Never use your hand to check for suspected leaks under pressure Use a piece of cardboard or wood for ...

Страница 34: ...r the engine oil pan RAPH12SSL0233AA 1 2 Disconnect the hose 1 for the oil drain plug from the engine oil pan RAPH12SSL0232AA 2 3 Remove the mounting bolts for the overflow bottle 4 Remove the overflow bottle RAIL14SSL0845BA 3 47685161 24 06 2015 10 1 10 001 5 ...

Страница 35: ...5 Remove the air cooler 1 RAIL14SSL0798BA 4 6 Disconnect the hoses from the radiator 1 7 Remove the radiator 2 from the shroud RAIL14SSL0797BA 5 8 Remove the fan from the engine RAPH12SSL0062AA 6 47685161 24 06 2015 10 1 10 001 6 ...

Страница 36: ...ase 9 Detach the mount 1 for the oil dip stick from the shroud RAIL14SSL0847BA 7 10 Disconnect the overflow tube from the filler neck RAIL14SSL0846BA 8 11 Remove the shroud 1 RAIL14SSL0795BA 9 47685161 24 06 2015 10 1 10 001 7 ...

Страница 37: ... your machine has A C disconnect the high pressure switch 4 for the A C system RAIL14SSL0848BA 10 16 If your machine is equipped with A C disconnect the lines 1 from the A C condenser 17 If your machine is equipped with A C disconnect the condenser fan 2 RAPH12SSL0075AA 11 18 Detach the hood strut 2 from the tilting hood 1 19 Remove the tilting hood 1 from the rear deck RAIL14SSL0850BA 12 47685161...

Страница 38: ... stop 1 RAIL14SSL0849BA 13 21 Disconnect the restriction sensor 1 22 Detach the air cleaner assembly 2 from the rear deck RAIL14SSL0851BA 14 23 Detach the rear deck 1 from the chassis and remove the rear deck 1 RAIL14SSL0852BA 15 47685161 24 06 2015 10 1 10 001 9 ...

Страница 39: ...curing these wires 26 Detach the NOx module 1 from the bracket for the control modules RAIL14SSL0792BA 16 27 Remove the exhaust clamp 1 RAIL14SSL0791BA 17 28 Detach the selective catalytic reduction SCR muffler 1 from the muffler mounting bracket Save the hard ware for reuse 29 Remove the SCR muffler 1 RAIL14SSL0853BA 18 47685161 24 06 2015 10 1 10 001 10 ...

Страница 40: ...e engine RAIL14SSL0855BA 20 33 Disconnect the control module 4 for the NOx sensor and the temperature sensor 2 34 Remove any wire ties P clamps and retainers that are securing these wires 35 Detach the control module 3 for the NOx sensor from the bracket 1 for control modules 36 Detach the bracket 1 for the control modules from the chassis RAIL14SSL0788BA 21 47685161 24 06 2015 10 1 10 001 11 ...

Страница 41: ... 4 and right coolant line 2 39 Disconnect the DEF hose 1 40 Disconnect the injector 3 41 Remove any wire ties P clamps and retainers that are securing these wires to the muffler mounting bracket RAIL14SSL0857BA 23 42 Remove the exhaust clamp 2 43 Remove the DOC muffler 1 RAIL14SSL0787BA 24 47685161 24 06 2015 10 1 10 001 12 ...

Страница 42: ...SSL0784BA 25 46 Detach the lines 1 for the remote engine oil filter from the engine 931001923 26 47 If your machine has a cab heater disconnect the heater hose from the engine 48 Disconnect the hydraulic line P clamp 2 from the bell housing RAPH12SSL0058AA 27 47685161 24 06 2015 10 1 10 001 13 ...

Страница 43: ... the mounting bolts 1 for the hydrostatic drive assembly 931001928 29 51 Separate the hydrostatic drive assembly 2 from the engine bell housing 1 931001936 30 52 Remove the engine mounting hardware 1 at the front of the engine 53 Repeat step 52 at the rear of the engine RAPH12SSL0050AA 31 47685161 24 06 2015 10 1 10 001 14 ...

Страница 44: ... Detach the ground cable 5 from the engine RAIL14SSL0778BA 32 58 Detach the positive battery cable 1 from the alterna tor 59 Disconnect the coolant line 2 for the SCR system from the engine RAIL14SSL0779BA 33 60 Disconnect the feed line 1 and return line 2 for the fuel from the injection pump RAIL14SSL0777BA 34 47685161 24 06 2015 10 1 10 001 15 ...

Страница 45: ...Engine Engine and crankcase 61 Attach adequate lifting equipment to the engine 62 Carefully lift the engine from the chassis 931001946 35 47685161 24 06 2015 10 1 10 001 16 ...

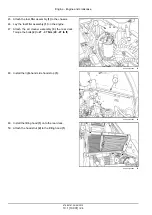
Страница 46: ...engine into the chassis 931001946 1 2 Connect the feed line 1 and return line 2 for the fuel to the injection pump RAIL14SSL0777BA 2 3 Attach the positive battery cable 1 to the alternator 4 Attach the coolant line 2 for the selective catalytic re duction SCR system to the engine RAIL14SSL0779BA 3 47685161 24 06 2015 10 1 10 001 17 ...

Страница 47: ...our machine has a cab heater connect the heater hose 4 to the male connector on the engine RAIL14SSL0778BA 4 11 Apply LOCTITE 243 to the threads of the engine mounting hardware 1 12 Install the hardware 1 and torque to 163 176 N m 120 130 lb ft RAPH12SSL0050AA 5 13 Apply LOCTITE 243 to the threads of the engine mounting hardware 1 14 Install the hardware 1 and torque to 163 176 N m 120 130 lb ft R...

Страница 48: ...7 Install the mounting bolts 1 Torque the mounting bolts 1 for the hydrostatic drive assembly to 87 117 N m 64 86 lb ft 931001928 8 18 If your machine has a cab heater connect the heater hose 1 to the engine 19 Connect the P clamp 2 for the hydraulic line to the bell housing RAPH12SSL0058AA 9 20 Connect the lines 1 for the remote engine oil filter to the engine 931001923 10 47685161 24 06 2015 10 ...

Страница 49: ...fler in position 23 Connect the injector 4 24 Connect the diesel exhaust fluid DEF hose 2 25 Connect the left coolant line 1 and right coolant line 3 RAIL14SSL0857BA 12 26 Attach the muffler mounting bracket 1 to the chassis Torque the bolts to 27 37 N m 20 27 lb ft 27 Attach the cable support bracket 2 to the muffler mounting bracket 1 RAIL14SSL0844BA 13 47685161 24 06 2015 10 1 10 001 20 ...

Страница 50: ...in RAIL14SSL0787BA 14 30 Attach the bracket 1 for the control modules to the chassis 31 Attach the control module 3 for the NOx sensor to the bracket 1 32 Connect the control module 4 for the NOx sensor and the temperature sensor 2 33 Secure all wires harnesses and hoses away from hot components RAIL14SSL0788BA 15 34 Attach the fuel filter assembly 1 to the chassis RAIL14SSL0855BA 16 47685161 24 0...

Страница 51: ...he SCR muffler 1 to the muffler mounting bracket RAIL14SSL0853BA 18 37 Attach the exhaust tube 1 to the SCR muffler Torque the clamp 2 to 11 15 N m 97 133 lb in 38 Secure the SCR muffler to the muffler bracket by using the hardware that was previously removed RAIL14SSL0791BA 19 47685161 24 06 2015 10 1 10 001 22 ...

Страница 52: ...ture sensor 2 41 Secure all wires harnesses and hoses away from hot components RAIL14SSL0792BA 20 42 Attach the rear deck 1 to the chassis RAIL14SSL0852BA 21 43 Install the air cleaner assembly 3 Torque the bolts 2 to 27 37 N m 20 27 lb ft 44 Connect the restriction sensor 1 for the air filter RAIL14SSL0851BA 22 47685161 24 06 2015 10 1 10 001 23 ...

Страница 53: ... 47 Attach the air cleaner assembly 3 the rear deck Torque the bolts 2 to 27 37 N m 20 27 lb ft RAIL14SSL0855BA 23 48 Install the right hand side hood stop 1 RAIL14SSL0849BA 24 49 Install the tilting hood 1 onto the rear deck 50 Attach the hood strut 2 to the tilting hood 1 RAIL14SSL0850BA 25 47685161 24 06 2015 10 1 10 001 24 ...

Страница 54: ...ot overtighten the adjusting screw You will not be able to install the cooling fan if the belt has been tightened to specification on the pulleys RAIL14SSL0793BA 27 56 If your machine is equipped with A C loosen the A C compressor by loosening the mounting bolts 3 57 Loosely install the serpentine belt 1 for the A C com pressor 58 Turn the adjusting screw 2 clockwise to create a little tension on ...

Страница 55: ...s 2 to the A C compressor 61 If your machine has A C connect the A C compressor 3 62 If your machine has A C connect the high pressure switch 4 for the A C system RAIL14SSL0848BA 29 63 Install the shroud 1 RAIL14SSL0795BA 30 64 Connect the overflow tube to the filler neck RAIL14SSL0846BA 31 47685161 24 06 2015 10 1 10 001 26 ...

Страница 56: ...e shroud RAIL14SSL0847BA 32 66 Apply LOCTITE 243 to the threads of the bolts 2 and install the fan 1 RAPH12SSL0062AA 33 67 Readjust the shroud if there is not 13 mm 1 2 in of clearance A between the fan blades and the shroud RAPH14SSL0776BA 34 47685161 24 06 2015 10 1 10 001 27 ...

Страница 57: ...ts 1 to 50 N m 37 lb ft RCPH11SSL038AAP 35 72 If your machine is equipped with A C adjust the belt for the A C compressor by turning the adjusting screw 1 NOTE The belt is tightened correctly when a force of 1 0 kg 2 2 lb is applied to the center of the of the span of the belt with a 3 mm 1 8 in of deflection 73 Tighten the mounting bolts 2 RAPH12SSL0064BA 36 74 Place the radiator 3 inside the shr...

Страница 58: ... bolts 1 to 27 37 N m 20 27 lb ft RAIL14SSL0797BA 38 77 Install the air cooler 1 Torque the bolts 2 to 27 37 N m 20 27 lb ft RAIL14SSL0798BA 39 78 Install the overflow container 79 Attach the overflow hose 1 to the filler neck RAIL14SSL0845BA 40 47685161 24 06 2015 10 1 10 001 29 ...

Страница 59: ...nter and attach the access plate 1 for the engine oil pan 82 Install the bolts 2 and torque to 42 58 N m 31 43 lb ft RAPH12SSL0233AA 42 Next operation Add fluids Please see Capacities Next operation If equipped with A C charge the A C system Please see Air conditioning Charging 50 200 47685161 24 06 2015 10 1 10 001 30 ...

Страница 60: ...44 NA 1 Lift the tilting hood 2 Remove the filler cap 2 3 Pour engine oil into the filler neck NOTE For fluid specifications please see Capacities 4 Check the oil level with the oil dipstick 1 5 Pour engine oil into the filler neck until engine oil is at the FULL mark on the oil dipstick 1 6 Install the filler cap 2 RAIL14SSL0708AA 1 47685161 24 06 2015 10 1 10 001 31 ...

Страница 61: ...This as a preview PDF file from best manuals com Download full PDF manual at best manuals com ...

Отзывы: