


7
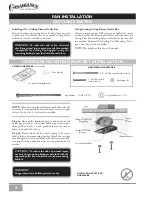
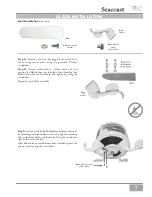
Blade Screw and
Washer
Blade
Holder
Blade Holder
Screw
(2 per blade)
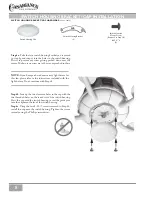
Step 5a.
Remove the five shipping blocks attached to
the rotating motor plate using the provided Phillips
screwdriver.
Step 5b.
Attach each blade to a blade holder by first
pressing the blade badge into the blade, then threading four
blade screws into the screwholes and tightening using the
screwdriver.
Repeat for each blade assembly.
Blade
BLADE INSTALLATION
Step 5c.
Attach each blade/bladeholder assembly to the motor
by threading two blade holder screws through the matching
holes in the blade holder and the motor. Using the screwdriver,
tighten the screws loosely.
After all fi ve blade assemblies have been installed, tighten the
screws securely using the screwdriver.
Blade Holder Screws
(2 per blade)
Blade
Holder
BLADE HARDWARE
(not to scale)