background image

Содержание TLM-3600

Страница 1: ... corp donated by forum members or both These manuals are NOT intended for re sale If you purchased a Carver Manuals disc on ebay or another auction site and it has this material on it you were ripped off Please report any resale of this material to us at thecarversite com thecarversite com ...

Страница 2: ...DJUSTMENTS MECHANISM 4 CD PLAYER ADJUSTMENTS AMP 6 EXPLODED VIEW CABINET CHASSIS 9 PARTS LIST 10 EXPLODED VIEW MAGAZINE 14 EXPLODED VIEW LOADING 15 EXPLODED VIEW CD MECHANISM 16 IC BLOCK DIAGRAM 17 VOLTAGE OF IC S TRANSISTORS 19 BLOCK DIAGRAM 21 SCHEMATIC DIAGRAM 22 WIRING DIAGRAM 24 OPERATION EXPLANATIONS FOR EACH MODE 28 AUTO CHANGER MECHANISM OPERATION EXPLANATION 32 TROUBLE SHOOTING GUIDE 34 ...

Страница 3: ... CONTROLS OR ADJUSTMENTS OR PERFOR MANCE OF PROCEDURES OTHER THAN THOSE SPECIFIED HEREIN MAY RESULT IN HAZARDOUS RADIATION EXPOSURE The conditions for laser beam emission from the pick up are the satisfaction of all two of the follow ing points PICK UP r I IC101 CXA1081M 1 0 mW Max CW DANGER Invisible laser radiation when open and interlock failed or defeated AVOID DIRECT EXPOSURE TO BEAM a CONDIT...

Страница 4: ...uppliedto LD from Q101 and a laserbeamis emitted Protection Operation 1 After completion of play and before the tray is stored in the magazine LDON H is reached by IC302 and the LD laseroutput is stopped 2 After item 6 of the above operation explanation IC302 reaches LDON H after severalsecondsif it is detected that there is no disc on the tray LASER BEAM DESCRIPTION AND HANDLING OF MAIN PARTS _ P...

Страница 5: ... is allowed to enter them Take the greatest care to absolutely avoid eye contact with the laser beam Never switch ON the power to a pick up if its laser out put port object lens etc is damaged Never look directly at the laser beam and do not allow the beam to contact your skin Cleaning the lens surface If dust gets on the lens surface Use an air brush such as used for cleaning a camera lens to blo...

Страница 6: ...the shaft by very carefully applying force upward at the center of the lower surface of the turntable 3 Remove the two screws PY3 and remove the spindle motor P2 4 Attach the special washer PY6 to the spindle motor 5 Apply a small amount of a mixture of the Three Bond 2001 and 2105F bonding materials to the motor s shaft 6 Install the turntable as shown in the figure 7 Secure the turntable by pres...

Страница 7: ...xceeds the value shown in the table tighten the screws PY5 so the in stallation position of the gear P6 moves slightly If the current exceeds 34 mA s ightly increase the distance between the screws PY5 and the gear P12 b RESETTING THE PICK UP TO THE HOME POSITION a The limit switch is switched ON by the projection of the rack gear secured to the returned pick up after which the sled motor continue...

Страница 8: ...equency counter 5 MHz or more 6 Screwdrivers non metalic for adjustments 7 Band pass filter b PARTS LOCATION o o C603 C604 TPB FA 11 TP10 G TP9 TA ic 201 o SVR203 PLL VCO IC402 SVR202 SVR201 T GAIN F GAIN J SVR102 _ F OFFSET SVR101 TP1 RF T BALANCE D t f K1m TP4GND o TP6 ASY o 0 TPS EFM AIC401 VOTP7 PLCK lC lC 5 IN BAND PASS FILTER o o OUT NOTE 1 All measurements are referred to TP 4 GND 2 Adjust ...

Страница 9: ...1 voltmeter SVR351 R ch 0 5dB verter BOdB g Checking the No 1 Oscilloscope TP 1 RF Eye 11 pattern eye pattern TP 4 GND a PLL veo free run adjustment 1 Connect a frequency counter to TP7 PLCK 2 Switch ON the unit s power 3 Set the player to STOP mode 4 Short TP4 GND and TP6 ASY electrically 5 Adjust SVR203 PLL until the VCO frequency on TP7 is 4 55 MHz 0 05MHz 6 Disconnect TP4 and TP6 TP7 FREQUENCY...

Страница 10: ...or DrA converter 1 Connect a automatic distortion analyzer to LINEOUT socket 2 Play the trach No 21 80 dB of the test disc 2 3 Adjust SVR352 L CH or SVR351 R CH until the AC voltage on LINE OUT is 79 5dB 1000kHz SOOJ lS o 1000kHz SOOJ lS x g Checking the eye pattern The adjustments a f complete the adjustments of the compact disc player Next check the eye pattern wavetorm 8 400Hz 500mV RMS TP8O 1 ...

Страница 11: ...I 0 I m tJ r o o m o S m E n CO Z m i 120 C t J C en ...

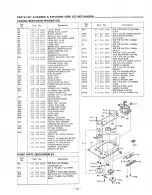
Страница 12: ... Z 3X10XIMM DTL P C BOARD 27 614 129 9136 LUG MECHANISM LEAD MTG 28 614 051 9785 LUG GROUND POWER TRANSFORMER MTG FIXING PARTS Ref Part No Description No Y01 411 021 6603 SCR S TPG BIN 3X8MM CABINET Y02 412 004 2902 SPECIAL SCREW 3X8MM BACK LID Y03 411 021 6405 SCR S TPG BIN 3X8MM DECORATION PANEL Y04 411 021 6405 SCR S TPG BIN 3X8MM FRONT PANEL BOnOM Y05 411 001 2700 SCR S TPG BIN 4X12MM HANDLE V...

Страница 13: ...r 405 082 4609 TR DTA123YS Ref Part No Description No D305 407 005 4505 DIODE DS442X or 407 013 7109 DIODE lS2473 D308 407 005 4505 DIODE DS442X or 407 013 7109 DIODE 152473 D309 407 005 4505 DIODE DS442X or 407 013 71 09 DIODE lS2473 D310 407 007 9904 DIODE GMAOI or 407 012 4406 DIODE lSS133 D311 407 007 9904 DIODE GMA01 or 407 012 4406 DIODE lSS133 D312 407 005 4505 DIODE DS442X or 407 013 7109 ...

Страница 14: ...5 CARBON lOOK JA 1 4W R 19 401 024 7400 CARBON 10K JA 1 6W R220 401 026 0607 CARBON 270 JA 1 6W R221 401 025 2305 CARBON 150K JA 1 6W RZ22 401 026 8108 CARBON 4 7 JA 1 6W 12 Ref Part No Description No R227 401 019 5909 CARBON 4 7 JB 1 4W R228 401 019 5909 CARBON 4 7 JB 1 4W R231 401 019 5909 CARBON 4 7 J8 1 4W R232 401 019 5909 CARBON 4 7 JB li4W R233 401 019 5909 CARBON 4 7 JB 1 4W R234 401 019 5...

Страница 15: ... Ref Part No Description No S702 614 024 2829 SPECIAL SWITCH REMOTE SENSOR GP1U1IS or 614 208 1198 OPTO CONNECTOR REMOTE SENSOR CN109 614 035 4935 SOCKET 4P MAIN P C BOARD CNIIO 1 614 035 4942 SOCKET 5P MAIN P C BOARD CN110 CNllO 2 614 035 4959 SOCKET 6P MAIN P C BOARD CNllO 0301 407 007 9904 DIODE GMA01 or 407 012 4406 DIODE 15S133 0302 407 007 9904 DIODE GMA01 or 407 012 4406 DIODE 15S133 0303 4...

Страница 16: ...BOARD CN359 CN363 614 020 1239 SOCKET 4P MAIN P CBOARD CN364 R39l 401 026 9600 CARBON 470 JA 1 6W R392 401 026 9600 CARBON 470 JA 1 6W DTL LED P C BOARD ASSY Ref Part No Description No 79 614 217 7242 ASSY PCB DTL LED 0351 407 027 4804 LED SLP 151B B REMOTE CONTROL RB TLM 3600 CV Ref Part No Description No 6 14 221 7771 REMOTE CONTROL ASSY UNIT 614 193 7267 INNER POLY COVER 180X200MM REMOTE CONTRO...

Страница 17: ...Ml MY2 M30 MY5 15 ...

Страница 18: ...ITCH CHUCKING COPLETION DETECT S353 M37 614 024 1600 SWITCH TRAY STORAGE COMPLECTION DETECT S352 M38 614 145 9363 SHAFT MAGAZINE ROLLER M39 614 209 2774 SPRING TENSION LOADING MECHANISM M40 614 129 9136 LUG LEAD 614 194 3541 SOCKET 3P PHOTO COUPLER CNlOl 614 194 3558 SOCKET SP MAGAZINE SWITCH DISC SELECT MOTOR CNI02 614 201 4523 SOCKET 7P CAM SWITCH LOADING MOTOR CNI03 614 125 6443 CUSHION 15X25X3...

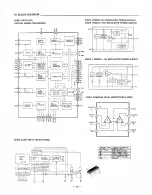
Страница 19: ...OL YKOTE X5 6020 PICKUP SLED IC304 305 LB1645N TAPE MECHANISM MOTOR DRIVER HQrrnaJ R AotO y w No YPIOI cry I L Cif c uil 1 i 6 1HZ I IC353 PD0050 DIGITAL FILTER LRCK C DATA BCLK I J Ref Part No I Description No HZGFLGR474B F GREASE FLOIL G 474B GEAR SHAFT HZCTBND2001 THREE BOND TB2001 TU RN TABLE TB2105 MIXED IN AI 1 RATIO HZCTBND210S THREE BOND TB210S TURN TABLE TB2001 MIXED IN AI 1 RATIO FIXING ...

Страница 20: ... AD JI PUT DATA BUFFER br CO l 4444 444 Ii I eo 18 IC601 L78M05 5V REGULATED POWER SUPPLY IC603 L7SM10 10V REGULATED POWER SUPPLY IC602 L79M05 5V REGULATED POWER SUPPLY LCS01 NJM4556 DUAL OPERATIONAL AMP DOTX OUTPUT A INPUT A OUTPUT B INPUT A INPUT 8 INPUT 8 TERMINAL NAME TERMINAL DESCRIPTION R NP T 1 1 AU NPUT I UTPUT P ENABLE NP T N uTP T FNA F PIIT V V POWER OUR E C ND C FlOLf D _13 i I ...

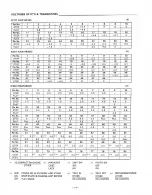
Страница 21: ...PLAY Pin No 11 12 13 14 15 16 17 18 19 20 STOP 1 7 1 8 1 8 1 8 0 2 8 4 8 4 9 4 9 0 PLAY 0 Pin No 21 22 23 24 25 26 27 28 29 30 STOP 2 4 2 4 5 0 4 9 4 9 4 9 4 9 0 4 9 PLAY 4 9 Pin No 31 32 33 34 35 36 37 38 39 40 STOP 0 0 4 9 4 9 4 9 4 9 0 2 Flue Flue Flue PLAY Flue 4 9 0 4 9 0 Pin No 41 42 43 44 45 46 47 48 49 50 STOP Flue Flue Flue Flue Flue 2 0 4 9 0 0 4 9 PLAY Flue Flue 4 9 Pin No 51 52 53 54 5...

Страница 22: ......

Страница 23: ......

Страница 24: ......

Страница 25: ......

Страница 26: ...Magazine existence detect switch 3 57 BonOM PART OF LOADING PART r 1 I S3561 IS355 Ir I ILJ o o The relation between photosensor disc selection position magazine lock and lock cancellation is shown below Bottom part of the loading part The slot position in photo sensor and the position of each disc are decided mechanically the mechanism initialization switch S351 becomes 0 F F and the position of ...

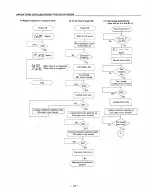
Страница 27: ...magazine status B At the time of power ON Power ON OFF S351 ON Loading mechanism assembly down Disc select motor reverse Loading mechanism assembly up Disc select motor forward ON S351 OFF Loading mechanism assembly down Disc select motor reverse OFF S351 Mechanism initialization position 29 1 1 DiSl Change during Playing from Disc No 6 to Disc No 9 Press the Disc No 9 Loading mechanism assembly u...

Страница 28: ...1at passage one time No Yes 0 Playing of disc No 5 from STOP status the isc No 5 No Disc No 5 key A No IIkey I E From STOP statusto playing with single disc magazine pstat I No 6tllk Loading mechanism assembly up Disc select motor forward No Slot passa eighttim V Yes 30 Loading mechanism assembly up Disc select motor forward NO Slot passage six times j A Focus search No Stop finished Yes TO C Tabl...

Страница 29: ...ress the STOP key No Disc revolution st OFF S353 Loading mechanism assembly down Disc select motor reverse S351 ON 31 H Magazine pull out from STOP status mechanism initialization position Power ON EJECT key On No Loading mechanism assembly up Disc select motor forward S351 ON Loading mechanism assembly up Disc select motor foraward No S351 OFF Loading mechanism assembly down Disc select motor rev...

Страница 30: ......

Страница 31: ......

Отзывы: