


43
Fig. 48 — Save Changes
System Configuration
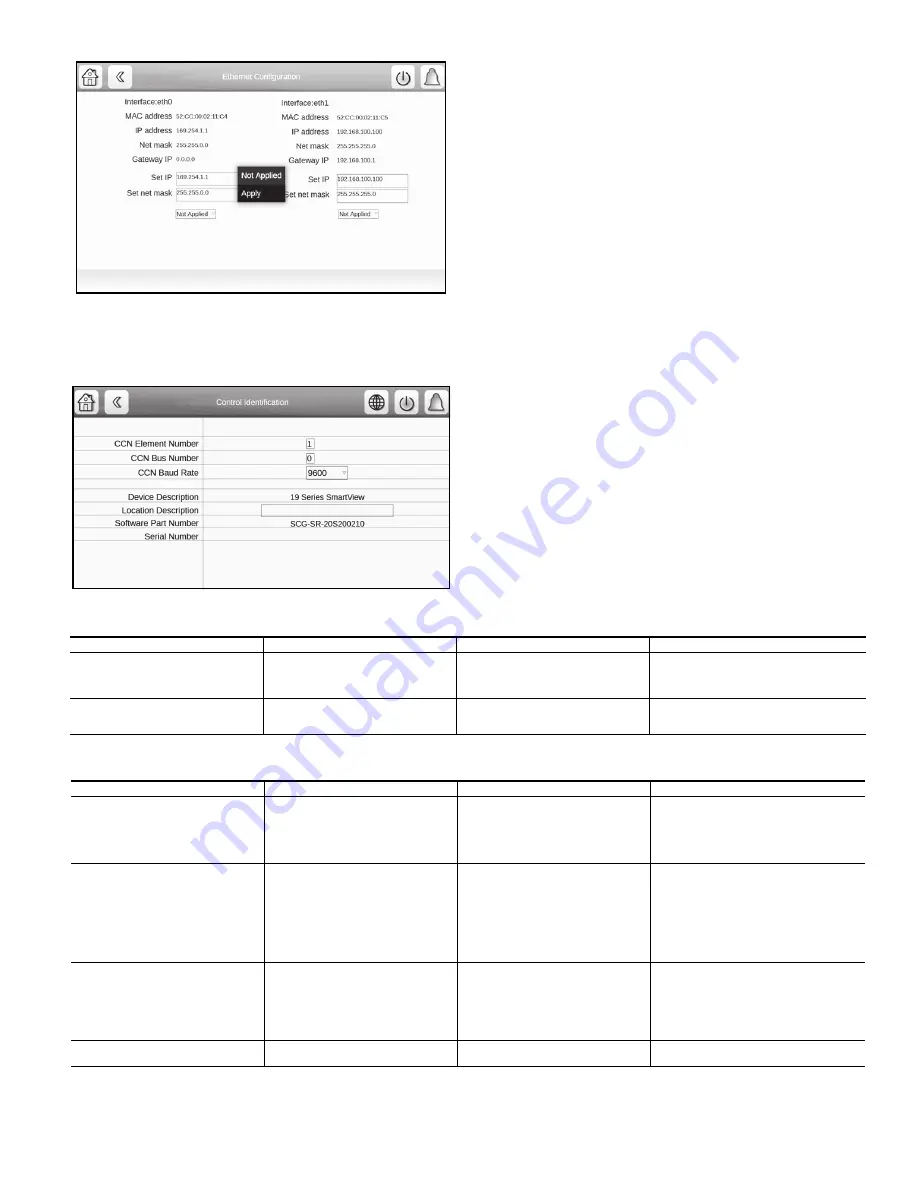
On the Control Identification screen, the device identification,
software version and CCN information are shown. See Fig. 49.
Fig. 49 — Control Identification Screen
TOUCH SCREEN CALIBRATION
Depending on the user and the position of the panel, it may be
necessary to calibrate the touch screen if the cursor does not
move precisely with the user’s touch. When the user presses and
holds an inactive part of the screen for 10 seconds, the screen
will turn black with white text displaying “Calibrating Touch
Screen” and white cross hairs. Touch the center of the cross-hair
sight with a touch pen or similar blunt-ended stylus (do not use a
metal object). When the cross-hair sight is touched, it moves to a
new position; touch the center of the cross hairs again. When all
positions have been configured, the calibration is complete and
the screen returns to the Home Screen.
COMMUNICATION PROBLEMS
Hardware Problems
See Table 18 for potential communication issues caused by
hardware problems.
Web Interface Problems
See Table 19 for potential communication issues caused by
web interface issues. The intranet site of the unit is the IP ad-
dress (see Unit IP Address on page 42).
NOTE: The unit cannot automatically obtain the network parame-
ters via a DHCP server.
Table 18 — Hardware Problems
Table 19 — Web Interface Problems
NOTES:
1.
The unit cannot automatically obtain the network parameters via a DHCP
(Dynamic Host Configuration Protocol) server.
2.
The intranet site address of the unit is the IP address.
SYMPTOMS
POSSIBLE CAUSES
CHECKS
SOLUTIONS
The unit does not respond to the
instructions sent by the supervision PC
on the CCN bus.
Problem at the RS485 converter level of
the PC or connection problem on the
primary CCN bus.
Check the CCN cable connections. The
unit CCN address is 0.1 and the com-
munication speed is 9600 baud by
default.
Replace the RS485 connector.
Communication problem when connect-
ing two buses (primary bus and sec-
ondary bus).
Electrical problem between 0 v CCN of
the primary bus and 0 v CCN of the
secondary bus.
Check the connection of the metal part
of the interface casing to earth.
Connect the metal part of the interface cas-
ing to earth.
SYMPTOMS
POSSIBLE CAUSES
CHECKS
SOLUTIONS
Start-up page loads, then goes to fault
state.
Network property details are not valid.
Ethernet network is not available.
Check the network parameters (see the
section Ethernet/IP Connection Prob-
lems on page 44).
Check to see if the orange LED on the
unit is flashing.
Contact your system administrator.
Check the Ethernet connection to the local
network if the orange LED does not flash.
While accessing the unit via the web
browser, the Java platform launches,
but remains blocked. No file is loaded.
Proxy server problem in the local net-
work.
Contact your system administrator.
In agreement with the system administrator,
open the Runtime Java control panel and
select Direct Connection in the system
parameters and/or request in the web
browser (
Tools
Options
Connection
System parameters
) that no proxy server is
used to go to the local addresses. If possi-
ble, uncheck “use of an automatic configura-
tion script.” Restart the web browser.
The application has been launched, but
the screens are not shown in the web
browser.
A proxy server is used to access the
unit and this supplies the old screens to
the browser. Incorrect configuration of
the Java application.
Check that the web browser does not
go via a proxy server to access the unit.
Check that the Java application does
not store the internet files on the PC.
Open the browser and in the system con-
nection parameters add the IP address of
the unit in the proxy exceptions.
(
Tools
Options
Connection
System
parameters
“No proxy for”
). See the
section Java Application Configuration on
page 45.
Cannot connect via http server
HTTP Server = Disable under Network
Configuration Menu
Check status in Network Configuration
Menu screen.
Set value to requirements.
Содержание AquaEdge 19DV series
Страница 6: ...6 Fig 3 IOB2 and IOB3 AVAILABLE FOR OLDER SOFTWARE...
Страница 7: ...7 Fig 4 IOB 4...
Страница 8: ...8 Fig 5 19DV Control Panel Abbreviations...
Страница 9: ...9 Fig 6 19DV Control Wiring...


