background image

7

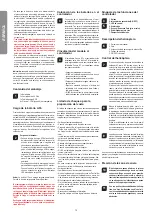
Important information concerning Lithium Polymer re-

chargeable batteries

Lithium-Polymer  (LiPo)  rechargeable  batteries  are  sig-

nificantly  more  sensitive  than  traditional  alkali-  or  NiMH-

rechargeable batteries which are normally used with radio 

control units. Therefore the instructions and warnings have 

to  be  observed  in  detail.  In  case  of  improper  use  of  LiPo 

rechargeable batteries there is a danger of fire. Always fol-

low the manufacturers´  instructions if you dispose of LiPo 

rechargeable batteries. 

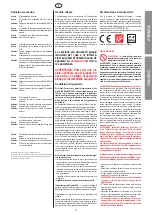
Regulations on disposal for waste electrical and elec-

tronic equipment (WEEE)

This symbol, showing refuse bins with 

a  cross  through  them,  denotes  that 

empty batteries, rechargeable batter-

ies, button cells, recharge able battery 

packs,  equipment  batteries,  disused 

electrical equipment, etc. should not be disposed of in do-

mestic  refuse, as they are harmful to the environment and 

health. Please help to preserve environment and health and 

talk to your children about the correct disposal of used bat-

teries and disused electrical equipment. Batteries and dis-

used electrical equipment should be handed in to the usual 

collection points where they can be properly recycled. 

Do not mix dissimilar battery types or employ new and used 

batteries together. Empty batteries should be removed from 

the  product.  Do  not  recharge  non-rechargeable  batteries 

due to risk of explosion. 

WARNING! 

This charger respectively USB-adapter can be used by chil-

dren aged from 8 years and above and persons with reduced 

physical, sensory or mental capabilities or lack of experience 

and knowledge if they have been given supervision or in-

struction concerning use of the charger respectively USB-

adapter in a safe way and understand the hazards involved. 

Children shall not play with the USB-adapter. Cleaning and 

user maintenance shall not be made by children unless they 

are older than 8 and supervised. Keep the charger respec-

tively USB-adapter and its cord out of reach of children less 

than 8 years. 

Never leave the battery unattended while it is 

charging

 Exhausted batteries are to be removed from the toy. 

Rechargeable batteries should be removed from the product 

before charging. Supply terminal are not to be short-circuited. 

Only use the batteries recommended or equivalent types. 

If in regular use the charger must be examined for damage 

to the cord, plug, covers and all other parts. If any signs of 

damage are found the charger may only be used again after 

repair work has been completed. The external flexible cable 

or cord of this charger cannot be replaced: If the cord is dam-

aged the charger shall be scrapped. 

The toy is only to be connected to Class II  equipment bear-

ing the following symbol. 


FCC statement

This device complies with Part 15 of the FCC Rules. 

Operation is subject to the following two conditions: 

(1) this device may not cause harmful interference, and 

(2)  this  device  must  accept  any  interference  received,  in-

cluding interference that may cause undesired operation. 

Changes  or  modifications  not  expressly  approved  by  the 

party  responsible  for  compliance  could  void  the  user’s 

 authority to operate the equipment.

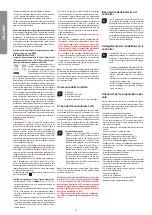
Guidelines and warnings for the use of LiPo recharge-

able batteries 

•  You  have  to  charge  the  attached  3.7 V   850 mAh /  

3.15 Wh LiPo rechargeable battery in a safe place and at a 

safe distance to flammable material.

• Never leave the battery unattended while it is charging 

•  After a flight, the rechargeable battery has to cool down to 

the ambient air temperature before charging it.

•  You must always use the corresponding LiPo charging unit 

(USB cable / remote control). In case of non-compliance 

with these directions there is a danger of fire resulting in 

a health risk and/or damage to property. NEVER use any 

other battery charger.

•  Should the rechargeable battery swell or deform while dis-

charging or recharging, you have to immediately stop charg-

ing or discharging the battery. Take the battery out as quickly 

and carefully as possible and place it in a safe and open area 

offside any inflammable material and watch it for at least 15 

minutes. In case you continue charging or discharging a bat-

tery which has already started to swell or deform there is a 

danger of fire! Even in case of slight deforming or ballooning 

the rechargeable battery has to be taken out of operation.

•  Store the rechargeable battery at ambient temperature in a 

dry place.

• 


Always recharge the battery immediately after use to 

prevent its becoming deep discharged. Please make 

sure  to  allow  a  pause  of  about  20  minutes   between 

 finishing the flight and recharging the battery. 

   Recharge  the  battery  occasionally  (suggested  every 

2-3 months). Failure to treat the battery as described 

above can lead to its becoming defective.

•  When transporting or temporarily storing the rechargeable 

battery the temperature should be between 5-50°C. If pos-

sible, do not store the battery or the model in a car and do 

not expose it to direct sunlight. In case the battery is broiled 

it can be damaged or catch fire. 

Note:

 If the battery voltage/output is low you will recognise 

that a considerable trim and/or controlling is necessary to 

avoid that the helicopter starts trundling. This usually occurs 

before reaching a battery voltage of 3 V and it is a good mo-

ment to end the flight. 

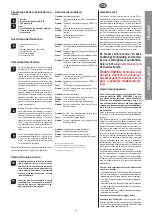
Contents of package

1


1x Helicopter


1x 2.4 GHz Controller


1x USB charging cable


4x 1.5 V Mignon AA batteries (non-rechargeable) 


Recharging the LiPo rechargeable 

battery

Make sure you only charge the LiPo rechargeable battery 

supplied  with  the  LiPo  charging  unit  also  supplied  (USB 

cable and remote control). In case you try to charge the re-

chargeable battery with a different LiPo battery charger or 

any other battery charger, this might cause serious damag-

es. Please carefully read the previous chapter about warn-

ings and guidelines on the usage of rechargeable batteries 

before proceeding. Rechargeable batteries should only be 

charged under adult supervision. Supply terminals are not 

to be short-circuited.

2


Charging via computer:

•  Connect the USB charging cable with the USB 

port of a computer. The LED on the USB charger 

cable lights green indicating that the charger unit 

is  correctly  connected  to  the  computer.  If  you 

plug  in  a  helicopter  with  a  discharged  battery, 

the  LED  on  the  USB  charging  cable  does  not 

light up; this shows that the helicopter battery is 

being charged. The USB charging cable and the 

charging socket on the helicopter are designed 

to make incorrect connection impossible.

•  It  takes  about  80  minutes  to  recharge  a  dis-

charged  battery  (but  NOT  a  deep-discharged 

one).When  the  battery  is  fully  charged,  the 

LED display on the USB charger cable lights up 

green again.

Note:

    When  supplied,  the  lipo-battery  is  already  partially 

charged so the first charging cycle may well take less time.

It is essential to follow the connection sequence given 

above! If you have the charger cable only connected to 

the helicopter and not to a source of electricity, please 

note the following: The green LED display does not nec-

essarily indicate the battery is still adequately charged.

While charging, the power switch must be in the “OFF” 

position. 

Undo the plugged connection on the helicopter if you 

are not going to use the helicopter. Failure to observe 

this precaution may cause battery damage!

Inserting the batteries in the

remote control

3

  Open the battery compartment with a screwdriver 

and  insert  the  batteries  in  the  remote  control. 

Please  keep  in  mind  the  correct  polarity.  After 

having closed the compartment you can check all 

functions of the remote control with the help of the 

power-switch on the front. With the power-switch 

turned ON and proper functioning, the top center 

LED on the remote control will light up red.


When the control LED flashes rapidly, the batter-

ies in the controller must be changed. 

Frequency bind between model 

and remote control

4

  The Carrera RC helicopter and the remote control 

are  frequency  bound  at  purchase.  Should  there 

occur any problems with the communication be-

tween the Carrera RC helicopter and the remote 

control at the beginning, please carry out a new 

frequency bind.

•  Connect the plug-in connection at the model and 

switch on the model at the ON/OFF switch.

•  The LED in the helicopter now flashes in rhyth-

mically-accelerating sequence. 

•  Switch on the controller at the ON/OFF switch.

•  Place the charged helicopter on a flat surface.

•  Allow  the  helicopter  a  few  moments  until  the 

system is correctly  initialised and is ready for 

operation. 

•  The  control  LED  now  lights  continuously  once 

again, indicating that the connection is ended.

Checklist for flight preparation

This checklist does not replace the contents of the operating 

instructions. Although it can be used as a quick-start-guide 

we strongly advise to first read the operating instructions in 

detail before you proceed. 

• Check the contents of the package

• Connect the charging unit to the source of power.

• Charge the lipo-battery as described in the section “Charg-

ing the lipo-battery”. In order to fly after charging, make the 

plugged connection to be found on the helicopter.

• Fit four AA batteries in the controller, making sure their po-

larity is correct.

• Look for a suitable environment for flying

• Place the helicopter on a flat surface

• Switch on the model at the ON/OFF switch.

• Turn the remote control on at the ON/OFF switch.

• The  LED  in  the  helicopter  now  flashes  in  rhythmically-

accelerating sequence. 

• Allow the helicopter a few moments until the system is cor-

rectly initialised and is ready for operation. The LED in the 

helicopter now lights continuously.

• Repeat the above points as required, if you wish to fly more 

helicopters at the same time.

• Check the control system

• Make yourself familiar with the control system

• Trim the helicopter as necessary as described under “Con-

trolling the helicopter”, so that when hovering the helicopter 

no longer moves from the spot, until given a command by 

the controller.

• The helicopter is now ready to be flown.

• If the helicopter displays no functions, retry the above bind-

ing procedure.

• Fly the model

• Land the model

• Switch the model off at the ON/OFF switch

• Always switch off the remote control last

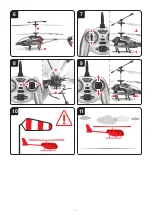
Range of functions of the 

remote control

3


1.  Antenna

2. Power switch (ON / OFF)

3. Control LED

5


4. Gas · tail  (spinning in circles) 

5. Forward/backward tail  (spinning in circles)

6. Trimmer for tail

7.  Battery compartment 

Description of helicopter

6

  1. Coaxial rotor system


2. Tail rotor


3. Plugged connection for charging the lipo battery.


4. Landing skids


5. ON-/OFF switch

EN

G

LI

S

H

Содержание Blue Hawk II

Страница 1: ...o Montage en gebruiksaanwijzing Instruções de montagem e modo de utilização Monterings och bruksanvisning Asennus ja käyttöohje Instrukcja montażu i obsługi Szerelési és használati utasítás Navodila za montažo in uporabo Návod k montáži a obsluze Návod na montáž a obsluhu Uputa za montažu i uporabu Montajse og bruksanvisning Monterings og driftsvejledning Montaj ve işletme kılavuzu 370501030 37050...

Страница 2: ...2 1 ON 4 2 3 1 4 5 6 R L 5 ON 7 3 4x 1 5 V Mignon AA batteries ALKALINE ALKALINE ALKALINE ALKALINE 4x 1 5 V Mignon AA batteries 3 7V 850mAh 3 15Wh LiPo LED OFF Charging Green Ready 2 07 2016_A12_V01 ...

Страница 3: ...11 6 2 3 1 4 5 R L R L 7 8 9 10 3 ...

Страница 4: ... oder Sachbeschädigungen kommen Es muss mit Vorsicht und Umsicht gesteuert werden und erfordert einige mechanische und auch mentale Fähigkeiten Die Anleitung enthält Sicher heitshinweise und Vorschriften sowie Hinweise fur die Wartung und den Betrieb des Produktes Es ist unabdingbar diese An leitung vor der ersten Inbetriebnahme komplett zu lesen und zu verstehen Nur so können Unfälle mit Verletzu...

Страница 5: ... verbindung und schalten Sie das Modell am ON OFF Schalter an Die LED im Helikopter blinkt nun in rhythmisch beschleunigender Folge Schalten Sie den Controller am ON OFF Schal ter ein Stellen Sie den geladenen Helikopter auf eine gerade Fläche Geben Sie dem Helikopter einen Augenblick Zeit bis das System korrekt initialisiert und be triebsbereit ist Die Kontroll LED leuchtet wieder permanent und z...

Страница 6: ... from this special warranty shall only be valid if the defect reported has not arisen by damage caused by unintended use or misuse as specified in the instruction manual the failure of the product is not due to normal wear and tear the product does not show any signs resulting from repairs or other interferences carried out by workshops not having been authorised by the manufacturer the product ha...

Страница 7: ...rts trundling This usually occurs before reaching a battery voltage of 3 V and it is a good mo ment to end the flight Contents of package 1 1x Helicopter 1x 2 4 GHz Controller 1x USB charging cable 4x 1 5 V Mignon AA batteries non rechargeable Recharging the LiPo rechargeable battery Make sure you only charge the LiPo rechargeable battery supplied with the LiPo charging unit also supplied USB cabl...

Страница 8: ...excepted Colours final design changes excepted Technical changes and design related changes excepted Pictograms symbolic photos Chère cliente Cher client Nous vous félicitons pour l achat de votre maquette d héli coptère Carrera RC qui a été fabriqué selon le niveau actuel de la technique Nous avons toujours pour ambition d amé liorer et de perfectionner nos produits et nous réservons la possibili...

Страница 9: ...s électriques usagés Remettez les batteries piles et appareils électriques usagés aux postes de collecte respectifs Ces postes veilleront à leur recyclage aux termes des réglementations en vigueur Il est strictement interdit d utiliser des types différents de bat teries ou des piles neuves avec des piles usagées Retirez toujours les batteries et piles vides du jouet En raison du risque d explosion...

Страница 10: ...s du rotor principal Si vous aug mentez la vitesse de rotation des pales du rotor principal la maquette commence à monter Si vous réduisez l amplitude du levier du gaz et donc la vitesse de rotation des pales du rotor principal l hélicoptère descend Quand la maquette a quitté le sol vous pouvez la mettre en vol stationnaire en bougeant prudemment le levier du gaz vers le haut ou vers le bas sans q...

Страница 11: ...y mentales El manual incluye instrucciones de seguridad y normas así como indicaciones relativas al mantenimiento y el manejo del producto Es imprescindible haber leído y comprendido el presente manual antes de la primera puesta en marcha del aparato Sólo así pueden evi tarse accidentes con lesiones y daños Las manos los cabellos y la ropa suelta incluidos otros objetos como lápices y destornillad...

Страница 12: ...r Coloque el helicóptero cargado sobre una su perficie recta Espere un momento hasta que el sistema del helicóptero esté correctamente inicia lizado y listo para funcionar El LED de control vuelve a permanecer encen dido indicando que ha finalizado la vinculación Listado de chequeo para la preparación del vuelo El listado de chequeo que viene a continuación no puede reemplazar en ningún caso al pr...

Страница 13: ...a privo di vizi non vengono toccati da questa garanzia Diritti derivanti da questa garanzia del produttore sepa rata esistono solo se il difetto contestato non rientra tra i danni causati da un uso non appropriato e non conforme alle disposizioni secondo le indicazioni riportate nelle istruzioni per l uso non si tratta di fenomeni di usura dovuti al funzionamento il prodotto non presenta caratteri...

Страница 14: ...etto handling dell accumulatore può causare difetti Per il trasporto o uno stoccaggio temporaneo dell accu mulatore la temperatura non dovrebbe essere inferiore a 5 C e superiore a 50 C Se possibile non conservare l accumulatore in auto e non esporlo alle radiazioni solari dirette Se l accumulatore viene esposto a calore nell auto può subire danni o incendiarsi Nota in caso di una bassa tensione p...

Страница 15: ...nte il volo l elicottero perde velocità senza motivo apparente e si abbassa Causa L accumulatore è troppo debole Rimedio Caricare l accumulatore vedi capitolo Carica dell accumulatore Problema L elicottero atterra troppo velocemente Causa Perdita di controllo sulla leva del gas Rimedio Abbassare lentamente la leva del gas Causa Abbassamento troppo veloce della leva del gas Con riserva di errori e ...

Страница 16: ... apparaten dienen op de bekende verzamelpunten afgegeven te worden Zodoen de worden ze aan een reglementair voorgeschreven recy cling onderworpen Ongelijke batterijtypes of nieuwe en gebruikte batterijen mogen niet samen gebruikt worden Lege batterijen uit het speelgoed verwijderen Niet oplaadbare batterijen mogen vanwege het ontploffingsgevaar niet worden opgeladen WAARSCHUWING De lader resp USB ...

Страница 17: ... van de rotoren te verhogen Verhoog de rota tiesnelheid van de hoofdrotorbladen en het model begint te stijgen Reduceer de uitslag van de gashendel en daar mee de rotatiesnelheid van de hoofdrotorbladen om de helicopter te doen dalen Als het model de grond heeft verlaten kunt u het door voorzichtige beweging van de gashendel naar boven en be neden in een stationaire zweefvlucht brengen zonder dat ...

Страница 18: ...contém indicações de segurança e prescrições bem como dicas para a manutenção e o funcionamento do produto É absolutamente necessário ler este manual completamente antes da primeira colocação em funcionamento e compreender o seu teor Só assim se poderá evitar acidentes com lesões e danos Manter as mãos cabelo e vestuário solto bem como outros obstáculos tais como canetas e chaves de parafusos afas...

Страница 19: ...om o interruptor ON OFF Coloque o helicóptero sobre uma superfície plana Aguarde alguns segundos até o sistema se inicializar e o helicóptero estar pronto para fun cionamento O LED de controlo volta a ficar permanentemen te aceso o que assinala que a interligação está concluída Lista de verificação checklist para preparação do voo Esta lista de verificação checklist não substitui o conteúdo das in...

Страница 20: ...rs gällande inte ligger i skador vilka har orsa kats av icke ändamålsen lig eller felaktig användning enligt föreskrifterna i bruksanvisningen det inte rör sig om driftsbetingade slitagetecken produkten inte uppvisar några kännetecken som tyder på reparation eller andra ingrepp genom verkstäder som inte har auktoriserats av tillverkaren produkten har använts endast med av tillverkaren god kända ti...

Страница 21: ...xna Kortslut inte laddare och nätdelar 2 Ladddning i datorn Koppla ihop USB laddningskabeln med datorns USB port LED på USB laddningskabeln lyser med grönt sken och anger att laddningsenheten är korrekt hopkopplad med datorn Om man sätter i en helikopter med tomt batteri slocknar LED på USB laddningskabeln vilket anger att helikopterbatteriet laddas USB ladd ningskabeln resp laddningsuttaget på he...

Страница 22: ...kikäteen sopimuksen purkamista alennusta vahingon korvausta jotka ovat voimassa kun tuote ei ollut moitteetto massa kunnossa riskin siirryttyä Tästä valmistajan myöntämän erityisen takuun piiriin kuuluvat vaatimukset ovat voimassa vain kun valituksen aiheuttanut virhe ei ole vioissa jotka on aihe uttanut käyttöohjeen ohjeiden vastainen tai epäasiallinen käyttö kyseessä ei ole käyttöön liittyvä kul...

Страница 23: ... vain aikuiset Latureita tai verkkolaitteita ei saa oikosulkea 2 Lataus tietokoneesta Liitä USB latausjohto tietokoneen USB porttiin USB latausjohdon LED syttyy vihreänä ja osoit taa että latausyksikkö on liitetty oikein tietoko neeseen Kun yhdistät helikopterin jonka akku on tyhjä USB latausjohdon LED ei enää syty ja se osoittaa että helikopterin akkua ladataan USB latausjoh to tai helikopterissa...

Страница 24: ...wę nowych lub naprawionych czę ści Nie są objęte gwarancją części podlegające zużyciu jak np akumulator łopaty wirnika nośnego dach kokpitu koła zębate itp szkody wynikłe z niewłaściwego lub niezgod nego z przeznaczeniem użytkowania produktu lub w wyniku działania osób trzecich Inne roszczenia Kupującego szcze gólnie roszczenia odszkodowawcze wobec producenta są wykluczone Gwarancja nie narusza pr...

Страница 25: ...eznacz nym zdeformowaniu lub tworzeniu się balona akumulator musi zostać usunięty Akumulator przechowujcie Państwo w temperaturze poko jowej i w suchym miejscu Po użytkowaniu prosimy bezwarunkowo ponownie naładować akumulator w celu uniknięcia tzw głębo kiego rozładowania akumulatora Prosimy Państwa o zwrócenie uwagi na zachowanie 20 minutowej przerwy między lotem i ładowaniem Prosimy o ładowanie ...

Страница 26: ...innego kanału A B C znajdującego się przy kontrolerze Problem Łopatki śmigła nie poruszają się Przyczyna Włącznik znajdujący się przy modelu lub przy kontrolerze znajduje się w pozycji OFF Sposób usunięcia usterki Przycisk Power ON OFF nastawić na ON Przyczyna Akumulator jest zbyt słaby lub wyczerpany Sposób usunięcia usterki Naładować akumulator Rozdział Ładowanie akumulatora Problem Helikopter n...

Страница 27: ...k szabályos ártalmatlanítását hulladékként történő kezelését Az elemeket és a használt elektromos készülékeket az ismert gyűjtőhelyeken kell leadni Ennek keretében biztosított szabályos újrahasznosításuk Különböző típusú elemek vagy új és használt elemek nem használhatók együtt A lemerült elemeket ki kell venni a já tékból A nem tölthető szárazelemeket a robbanásveszély miatt nem szabad feltölteni...

Страница 28: ...anézet A fő rotorlapátok forgási sebességének növeléséhez nyomja a gázkart felfelé A fő rotorlapátok forgási sebessé gének növelése esetén a modell emelkedni kezd Ha csökkenti a gázkar kilengését ezzel pedig a fő rotorlapátok forgási sebességét a helikopter süllyedni kezd Ha a modell felemelkedett a föld ről azt a gázkar óvatos felfelé vagy lefelé irányú mozgatásával helyhez kötött lebegésbe tudja...

Страница 29: ...olja Uporabljajte samo pri dobri vidljivosti in lepih vremenskih razmerah Kot uporabnik tega izdelka ste sami odgovorni za varno uporabo tako da druge osebe ali njihova lastnina ne morejo biti poškodovani ali ogroženi Vašega modela nikoli ne uporabljajte s slabimi baterijami upravljalnika Izognite se prometnim in živahnim območjem Vedno pazi te na to da je na voljo dovolj prostora Po možnosti Vaše...

Страница 30: ...ko da se helikopter pri lebdenju brez krmilnih ukazov več ne premakne z mesta Helikopter je zdaj pripravljen na uporabo V kolikor helikopter ne kaže znakov delovanja ponovno poskusite zgoraj naveden postopek povezovanja Poletite z modelom Pristanite z modelom Model izklopite Daljinsko vodenje vedno izključite nazadnje Pregled funkcij upravljalnika 3 1 Antena 2 Stikalo za vklop ON OFF 3 Kontrolna L...

Страница 31: ...anění očí Startujte a létejte jen na vhodném prostranství volná plocha žádné překážky a jen při pří mém vizuálním kontaktu Používejte jen při dobré viditel nosti a v klidných povětrnostních podmínkách Jako uživatel tohoto výrobku odpovídáte za bezpečné zacházení s výrobkem a za to že vy ani žádné jiné oso by ani jejich majetek nebude ohrožen ani neutrpí žádnou škodu Nikdy model nepoužívejte když j...

Страница 32: ...i současně létat s dalšími vrtulníky Zkontrolujte řízení Seznamte se s řízením V případě nutnosti proveďte trimování vrtulníku jak je popsá no v oddíle Ovládání vrtulníku tak aby se vrtulník při visení již nepohnul z místa pokud k tomu ovladačem nedáte pokyn Vrtulník je nyní připraven k provozu Pokud vrtulník neukazuje žádnou funkci zkuste znovu provést výše uvedené spojení Létejte s modelem Přist...

Страница 33: ... zraneniam nenechajte vrtuľník letieť blízko Vašej tváre Používanie iba v exteriéri nie v interiéri Riziko pora nenia očí Štart a lietanie len vo vhodnom teréne voľná plocha žiadne prekážky a len v rozsahu priameho vizu álneho kontaktu Používať len pri dobrej viditeľnosti a pokojných povetrnostných podmienkach Ako používateľ tohto produktu sám zodpovedáte za bez pečné zaobchádzanie aby ste neutrpe...

Страница 34: ...bsluhu Hoci ho môžete použiť ako sprievodcu rýchlym štar tom quic start guide skôr ako budete pokračovať dôrazne vám odporúčame prečítať si najprv tento návod na obsluhu Skontrolujte obsah balenia Prepojte nabíjačku so zdrojom prúdu Nabite LiPo akumulátor tak ako je opísané v časti Nabitie LiPo akumulátora Po nabíjaní spojte konektor nachádzajúci sa na vrtuľníku aby ste mohli lietať Do ovládača vl...

Страница 35: ...opasnosti nije bio slobodan od nedostataka ostaju nedirnuta kroz ovo jamstvo Prava iz ovog posebnog jamstva proizvođača postoje samo ako uzrok reklamirane greške nije šteta koja je prouzrokovana nenamjenskom uporabom ili nestručnom primjenom pre ma mjeri iz ove upute za uporabu se ne radi o pojavama habanja uvjetovanim pogonom na proizvodu nisu uočljiva obilježja koja upućuju na po pravke ili drug...

Страница 36: ...ruke 1 1x helikopter 1x 2 4 GHz upravljač 1x USB kabel za punjenje 4x 1 5 V minjon AA baterije bez mogućnosti punjenja Punjenje LiPo punjivih baterija Pazite na to da priložene LiPo punjive baterije isključivo punite sa dostavljenim LiPo punjačom USB kabel tj upravljač Ako punjivu bateriju pokušavate napuniti sa nekim drugim punjačom za punjenje LiPo punjive baterije ili drugim punjačom isto može ...

Страница 37: ...ge Megoldás Az akkut fel kell tölteni lásd Az akku feltöltése fejezetet Probléma A helikopter túl gyorsan száll le Ok A gázkar feletti kontroll elveszítése Megoldás A gázkart lassan kell lehúzni Ok A gázkart túl gyorsan húzták le Pravo na zabune i izmjene ostaje pridržano Boje konačni dizajn pravno na izmjene ostaje pridržano Pravo na tehničke izmjene i izmjene zbog dizajna ostaje pridržano Piktog...

Страница 38: ...Barn får ikke gjen nomføre rengjøring eller vedlikehold dersom de ikke er over 8 år eller overvåkes Barn som er yngre enn 8 år må holdes borte fra ladeappara tet og forbindelsesledningen La aldri akkumulatoren være uten tilsyn under opplading Det må kun brukes anbefalte batterier eller batterier av lik type Ved regelmessig bruk av ladeapparatet må dette kontrolleres på kabel forbindelse tildekning...

Страница 39: ...gjennomføres som beskrevet under Sjekkliste for forberedelse av flygning og bruk ev en annen kanal A B C på kontroller Problem Rotorbladene beveges ikke Årsak Power bryteren til modellen eller kontrolleren står på OFF Løsning ON OFF power bryter stilles på ON Årsak Akkumulatoren er svak eller tom Løsning Akkumulatoren lades opp se kapittel Lade opp akkumulator Problem Helikopteret stiger ikke opp ...

Страница 40: ...rdan apparatet anvendes og har forstået de deraf resulterende farer Børn må ikke lege med opla deren hhv USB ladekablet Rengøring og brugervedligehol delse må ikke udføres af børn undtagen hvis de over 8 år og under opsyn Børn under 8 år skal holdes væk fra opladeren og tilslut ningsledningen Lad aldrig akku en være uden tilsyn under opladningen Genopladelige batterier skal tages ud af legetøjet i...

Страница 41: ...emfør synkroniseringen som beskrevet un der Tjekliste til flyveforberedelsen og brug derved om nødvendigt en anden kanal A B C på control leren Problem Rotorbladene bevæger sig ikke Årsag Modellens hhv controllerens Power kontakt står på OFF Løsning Stil ON OFF Power kontakten på ON Årsag Akku en er for svag eller afladt Løsning Oplad akku en se kapitel Opladning af akku Problem Helikopteren lette...

Страница 42: ...sişik sensörik veya zihinsel yeteneği kısıtlı olan kişiler veya tecrübesi ve veya bilgisi noksan olan kişiler şarj aletini veya USB şarj kablosunu kul lanabilirler Çocukların şarj aleti ile veya USB şarj kablosu ile oynaması yasaktır Eğer çocuklar 8 yaşından büyükse ve gözetim altında bulunuyorlarsa onlar ancak o zaman temiz leme ve kullanıcı bakımını yapılabilirler 8 yaşından daha küçük çocukları...

Страница 43: ...del yükselmeye başlar Gaz pedalının eğilmesini azaltırsanız böylece de ana rotor kanatlarının dönme hızını azaltırsınız ve heli kopter iner Eğer model yerden kalkmışsa o zaman gaz pedalını dikkatli bir şekilde yukarıya veya aşağıya hareket ettirerek aniden yükselme veya inme olma dan stasyoner süzülme uçuşuna getirebilirsiniz 8 Sağ pedalı arka sola hareket ettiriniz ve heli kopterin burnu ana roto...

Страница 44: ...ن ممنوع القريبة السباحة حمامات أو احلديدية السكك قضبان أو العالية ملكشوفة ا ملياه ا سطحات م أو الشوارع من أية عن سار واالستف ملعلومات ا من مزيد على للحصول ودليل والعنوان بالعبوة االحتفاظ فيرجى أخرى مسائل للمشرفني ملحوظة ا ً ق الح عليها لالطالع االستعمال تركيبها مت اللعبة أن من للتحقق بالفحص قم البالغني التركيب يتم أن يتعني االستعمال دليل إلرشادات ا ً ق وف البالغني األفراد أحد إشراف حتت سنوات 12 من...

Страница 45: ... التيار مبصدر الشحن كابل بتوصيل تقم لم إذا اآلتي مراعاة رجى ُ ي ف باملروحية فقط بتوصيله ملفتوحة ا األماكن في الهليكوبتر الطائرة تطير أن ميكن العلم يرجى قليلة ٍ رياح توجد أو رياح هناك تكون ال حني إال األرض على هادئة تكون قد أنها من الرغم على بأنه إذا األرض عن بعيدة وهي حتى ًا د ج عاصفة تظل قد أنها سارة خ إلى ذلك يؤدي فقد التحذير هذا إلى االنتباه يتم لم للهليكوبتر كاملة ...

Страница 46: ...46 ...

Страница 47: ...47 ...

Страница 48: ...c Phone 420 284 000 111 Fax 420 284 000 101 Email radim kalo conquest cz Internet www cqe cz DENMARK SWEDEN NORWAY FINLAND ICELAND Tactic Games OY Raumanjuovantie 2 P O Box 4444 28101 Pori Finland Phone 358 2 624 4144 Fax 358 2 624 4211 Email info tactic net Internet www tactic net ESTONIA Anvol Ltd Madikse 7 74114 Maardu Estonia Phone 372 63 88 100 Fax 372 63 88 101 Email anvol anvol eu Internet ...

Отзывы: