background image

13

Carolina Spas™

OWNER'S MANUAL

Start-up Procedures - SE MODELS 

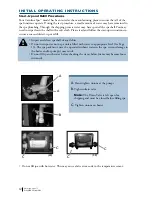
1 .  For a successful start-up, remove both filter cartridges, and fill the spa with water through 

the openings in the filter compartment .
a .  Locate the filter compartment area .
b .  Pull up and remove filter cover .
c .  Remove each filter cartridge and screen adapter by turning counter clockwise .
d .  After removing the filter cartridges and screen adapters, place a garden hose through 

one of the filter openings .

e .   Turn water on and run water until it reaches a minimum level of 2” above the top of 

the filters .


Note:


Besides filling the spa to 2” above the top of the filter, all models will need to 

be filled to 2” above the highest jet(s) in the spa . This is the minimum level allowed to 
run the spa's circulation system, and/or jet pump(s) .

2 .   Check all plumbing (clamps, unions and drain valve) connections for leaks .
3 .  Re-install filter cartridges and screen adapters by turning them clockwise . Exit garden hose 

from the spa .

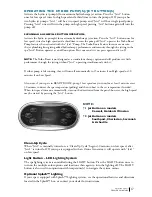
4 .   At this point turn power on to the spa control system by turning on the GFCI breaker . A 

startup sequence of numbers will appear on the display . If no button is pressed, LINK will 
appear after the startup sequence . Press any button to link the panel with the system . The spa 
will go into Priming Mode . During the Priming Mode the heater will be disabled . Priming 
Mode will end automatically in 4 minutes . (Pressing a TEMP button will exit Priming Mode 
manually) . When the Priming Mode ends Pump 1 low speed will start, however the water 
temperature will not appear for a minute or so . Press the Jets Button(s) to turn the pumps 
on and off to verify that all air is purged from the plumbing, particularly the plumbing 
associated with the heater . (Pump 1 low speed) .  If the pump(s) have been primed continue 
to next step . If the pump(s) have not primed after 2 minutes, and the water is not flowing 
from the jets in the spa it may be necessary to manually prime the pump(s) by taking the 
following steps: First turn the power off at the GFCI breaker . Next loosen, but do not 
remove, the union nut on the top most areas of the the pump(s) . Once all the air has escaped 
tighten the union nuts back down . After the pump(s) have been vented, turn on the spa 
control system by turning on the GFCI breaker . The spa will now go back into Priming 
Mode . 

5 .   After you verify the pumps are primed, turn them off by pressing the Jet(s) button(s) . The 

Priming Mode ends after 4 minutes, or Press TEMP to exit manually . The current factory 
default set temperature will display flashing 80˚F (26˚C) (The set temperature and actual 
water temperature are often different) . While the numbers are flashing, Press TEMP again 
to change the Set Temperature . Press and hold for faster adjustment . After the new Set 
Temperature stops flashing, in about 10 seconds, the actual water temperature is displayed 
again and the new set temperature is programmed . The spa will now heat to the new set 
temperature as needed . 

6 .  Re-install filter cover and allow spa to heat to desired set temperature; this normally takes 24 

hours . 110 Volt models may take up to 48 hours to reach desired set temperature .

7 .  Water must be balanced and shocked upon start-up . See your dealer or pages 32-34 of this 

manual for details . This procedure must be repeated each time the spa is drained and refilled .

It is recommended to press and release the ground fault circuit interrupter (GFCI) 
RESET button monthly to verify GFCI is working properly .


Note:


When there is a heat demand, a cool down period (30 seconds after heater turns  

off), or when the pump is running because of a filter cycle, the controller will turn the 
pump on low speed . 

!

!

Содержание Asheville

Страница 1: ...OW N E R S M A N U A L...

Страница 2: ...AV G F I L L W E I G H T AV G D R Y W E I G H T 150 gal 568 L 150 gal 568 L 240 gal 909 L 350 gal 1325 L 375 gal 1420 L 350 gal 1325 L 525 gal 1987 L 1638 lbs 743 kg 1500 lbs 680 kg 2504 lbs 1136 kg...

Страница 3: ...ck 24 Hr Clock Temp display Flip Button Operating the Hydro Pumps 17 Jet Buttons 17 Clean Up Cycle 17 Light Control Button 17 Optional Splash Lighting System 17 SE Heating Modes 18 SE Filter Cycle Mod...

Страница 4: ...duit within five feet 1 5m of the unit as needed to comply with local requirements To reduce the risk of electrocution replace all damaged cords immediately Failure to do so may result in death or ser...

Страница 5: ...mponents The use of drugs alcohol or medication before or during spa use may lead to unconsciousness with the possibility of drowning Persons using medications should consult a physician before using...

Страница 6: ...ion can greatly increase the risk of fatal hyperthermia in hot tubs and spas To Reduce The Risk of Injury The water in the spa should never exceed 104 F 40 C Water temperatures between 100 F 37 7 C an...

Страница 7: ...n t Allow children or pets to climb onto the spa cover Allow children to have unsupervised access to the spa Leave the Carolina Spas exposed to the sun without water or the cover in place Exposure to...

Страница 8: ...lbs 3 662 lbs 4 5 Asheville 80 84 36 350 gal 700 lbs 3 662 lbs 4 5 Charleston 84 84 38 375 gal 750 lbs 3 880 lbs 5 6 Southport 89 93 40 525 gal 920 lbs 5 302 lbs 6 Due to the risk of property damage a...

Страница 9: ...mate with cold snowy winters you may want to consider locating the spa close to the house for easy access In climates where it is normally warm or hot year round it would be recommended to place the s...

Страница 10: ...d 8 gauge under 50 6 gauge over 50 220 Volt model spas must be connected to a dedicated 220 volt 50 Amp grounded circuit The term dedicated means the electrical circuit is not being used for any other...

Страница 11: ...tor not smaller than No 6 AWG 7 All field installed metal components such as rail ladders drains or other similar hardware within 10 ft 3m of the spa or hot tub shall be bonded to the equipment ground...

Страница 12: ...l for fire from wires overheating The 110 Volt models may be optionally equipped with a GFCI power cord approximately 13 feet long This model must be plugged into a grounding type 110 Volt 20 Amp rece...

Страница 13: ...in the base of the equipment compartment and out from under the corner of the spa Note 110 Volt installations require a 60Hz single phase two wire electrical service plus ground Line 1 Neutral and Gr...

Страница 14: ...ions to ensure a successful start up or refill Inspect and clean spa shell of any debris Do not turn power on to spa unless filled with water to appropriate level See Page 13 The spa pack must never b...

Страница 15: ...Pump 1 low speed If the pump s have been primed continue to next step If the pump s have not primed after 2 minutes and the water is not flowing from the jets in the spa it may be necessary to manuall...

Страница 16: ...m the jets in the spa it may be necessary to manually prime the pump s by taking the following steps First turn the power off on the GFCI breaker Next loosen but do not remove the union nut on the top...

Страница 17: ...r messages and diagnostic messages as well as much more Navigating the entire menu can be accomplished with the TEMP and the LIGHT buttons From this point on the WARM and COOL will be referred to as T...

Страница 18: ...INFO and FALT LOG To engage LOCK MODE Press TEMP Press LIGHT repeatedly until LOCK appears then Press TEMP To continue Press LIGHT to toggle TEMP or PANL Press TEMP to toggle ON or OFF then Press LIGH...

Страница 19: ...1 operating simultaneously with it If either pump is left running they will turn off automatically in 15 minutes if on High speed or 30 minutes if on Low Speed Also note if your spa is in READY MODE p...

Страница 20: ...during programmed filter cycles In REST Mode it won t circulate every 30 minutes to sense the water temperature so the temperature display may not show a current temperature until the filtration pump...

Страница 21: ...Duration and Start Times of Filter Cycles To customize your filter cycles and times start by Pressing TEMP While the temperature is still flashing Press LIGHT repeatedly until FLTR1 appears flashing...

Страница 22: ...Hour Circulation Then set the duration as listed above advancing the duration hours to 24 The FLTR2 cycle start time 12 hours after the FLTR1 start time will only engage the Purge Cycle The end time...

Страница 23: ...ry 7 days Clean Filter displays CLN FLTR every 30 days Test GFCI displays TEST GFCI every 30 days Change Water displays CHNG WATR every 90 days Clean Cover displays CLN COVR every 180 days Treat Wood...

Страница 24: ...that displays the spa diagnostics i e temperature setting jet functions or error messages Temperature Control The set temperature range is from 80 F 26 C to 104 F 40 C The temperature of the spa water...

Страница 25: ...igned for maximum heat retention The unit is not designed to cool water If the set or desired temperature is below that of the ambient temperature the unit will not be able to achieve this demand Depe...

Страница 26: ...izing and balance will still be necessary even if the spa is not being used Note The last measured spa temperature displayed is current only when the pump has been running for at least 2 minutes LE FI...

Страница 27: ...LOW LOSS HFL There may not be enough water flow through the heater to carry the heat away from the heating element Heater start up will begin again after 1 minute See FLOW RELATED CHECKS below HTR FLO...

Страница 28: ...em persists contact your dealer or service organization May appear temporarily in an overheat situation and disappear when the heater cools Snb Spa is shut down The sensor that is plugged into the Sen...

Страница 29: ...ers per Day Note Heavy usage may require more frequent draining To Drain Your Spa 1 Disconnect the spa from the power supply by tripping the GFCI breaker located in the house breaker panel or at the G...

Страница 30: ...tridge and turn the cartridge clockwise until it is free from the base retainer Leave screen adapter in place 5 Place the cartridge on a clean surface and spray with a garden hose It will be necessary...

Страница 31: ...xterior The synthetic cabinet combines the durability of plastic with the look of professionally finished wood To remove any stains or dirt simply spray the skirt with water and wipe down with a soft...

Страница 32: ...STM F1346 91 standard for safety covers WINTERIZING YOUR SPA If you chose not to use your Carolina Spas model during the winter it is recommended to properly winterize your spa Any damage occurring du...

Страница 33: ...a cover over spa and lock into place 13 To restart the spa connect all hoses and close all unions Once all the hoses jet valve assemblies and pump unions are reattached follow the normal fill up proce...

Страница 34: ...tes whether water is neutral acidic or basic The drawing below shows a pH equal to 7 0 is neutral A pH below this point is acidic and a pH above this point is basic Test pH weekly Recommended Range 7...

Страница 35: ...ride Decrease calcium hardness by draining spa and replacing with water containing lower levels of calcium hardness Disinfectant Brominating Tablets Granular Bromine and Granular Chlorine are popular...

Страница 36: ...s 125 150 Non chlorine shock weekly or as needed based on spa use Test pH total alkalinity and calcium hardness weekly Test disinfectant daily Spa test kits are available through your Carolina Spas De...

Страница 37: ...ts Dirty filters Inadequate water level Air lock Closed Valve Closed Jets Clean the filters Fill spa to 2 above filters Prime the pump s by loosening unions on the pump s until air can be heard escapi...

Страница 38: ...ess the TEMP then JETS button to adjust Heat Modes FC is continuous operates same as standard mode setting Poor or no water flowing through the jets Dirty filters Inadequate water level Air lock Close...

Страница 39: ...SE Water does not clear up Bad water chemistry Dirty filter cartridges Ozone generator not operating Bromine chlorine residual levels too low Balance water Clean or replace filters Locate ozone gener...

Страница 40: ...ge caused by a dirty clogged or calcified filter cartridge damage to the spa components or spa surface determined to have been caused by improper water maintenance or improper use of chemicals refer t...

Страница 41: ...d C l e a n S p a S h e l l S p r a y C l e a n F i l t e r C a r t r i d g e S o a k F i l t e r C a r t r i d g e C o m p l e t e S p a W a t e r B a l a n c e C l e a n a n d C o n d i t i o n V i...

Страница 42: ...d C l e a n S p a S h e l l S p r a y C l e a n F i l t e r C a r t r i d g e S o a k F i l t e r C a r t r i d g e C o m p l e t e S p a W a t e r B a l a n c e C l e a n a n d C o n d i t i o n V i...

Страница 43: ......

Страница 44: ...33 Wade Road Latham NY 12110 518 786 1200 fax 518 782 0632 www carolina spas com 25011 03 15...

Отзывы: