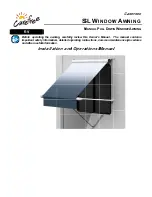
CAREFREE WINDOW AWNING
OWNER’S MANUAL/INSTALLATION INSTRUCTIONS
052769-004
THIS MANUAL CONTAINS SECTIONS FOR:SAFETY,
INSTALLATION, OPERATION, CARE AND
MAINTENANCE AND WARRANTY-CUSTOMER MUST
RECEIVE THIS MANUAL UPON INSTALLATION.
READ ENTIRE INSTRUCTIONS BEFORE BEGINNING
INSTALLATION. FOLLOW ALL CAUTIONS,
WARNINGS AND NOTES TO PREVENT INJURY OR
DAMAGE TO AWNING OR VEHICLE.
TOOLS AND SUPPLIES REQUIRED:
Drill
1/8” Drill Bit
7/32” Drill Bit
3/32” Drill Bit
Putty Tape or Silicone Sealer
Pop Rivet Gun
5/16” Socket/Nut Driver
1/4” Socket/Nut Driver
SECTION 1: SAFETY INFORMATION
CAUTION: Means a hazard that may cause minor or moderate
injury if the warning is ignored. It also may mean a hazard that
will cause damage to property.
CAUTION: DO NOT RELEASE STRAP UNTIL THE AWNING IS
AGAINST THE VEHICLE IN ITS RETRACTED POSITION. THE
SPRING RETURN WILL VIOLENTLY ROLL UP AWNING
RESULTING IN A SLAM AGAINST VEHICLE AND POSSIBLE
DAMAGE TO RV OR AWNING.
CAUTION: DO NOT USE BLEACH, CAUSTIC CLEANERS, VINYL
CLEANERS OR METAL CLEANERS ON ACRYLIC AS THEY WILL
CAUSE PERMANENT DAMAGE TO FABRIC
SECTION II: INSTALLATION
SPECIFICATIONS
IMPORTANT NOTE: BEFORE BEGINNING
INSTALLATION, BE SURE TO READ ALL STEPS
BELOW TO ENSURE THAT THE WINDOW AWNING
IS PROPERLY INSTALLED AND CORRECT SIZE IS
USED.
·
Measure the width of the window including frame. Add an
extra (2-1/4”) to each side of the frame (4-1/2” total) to allow
space for the mounting brackets. (Figure 1.)
·
Window awnings are available in six inch increments from
three feet to seven feet, and in one foot increments from 8’ to
16’. Choose an awning length one size above the measured
length. Example: Window and frame
measures 35” plus 4-1/2”
bracket allowance equals
39-1/2” total. A three
and one-half foot
(42”) awning is the
correct size.
Figure 1
SECTION III: INSTALLATION
INSTRUCTIONS
1. INSTALLATION OF AWNING RAIL
A. Remove or slide the awning rail from the canopy. Apply sealer
(putty tape or silicone) to the back surface of the rail.
B. Center rail over the window with the bottom of the rail positioned
3” above the window frame. (Figure 2)
Figure 2
NOTE: THE AWNING RAIL MUST BE INSTALLED WITH THE
SLOT POINTING UP.
C. Attach rail to RV by drilling 1/8” holes into RV and fastening with
supplied #10 x 3/4” hex head screws.
2. HANGING WINDOW AWNING
A. Attach each arm assembly to the roller assembly by inserting arm
extrusion into the end cap casting. Secure using #10 x 3/4” black
hex head screws.
B. Remove tape from roller assembly and unwrap enough material
or aluminum, to allow for easy insertion into the awning rail.
NOTE: THE SPRINGS ARE PRE-WOUND WITH THE CORRECT
NUMBER OF TURNS FOR THE SIZE OF THE ROLLER
ASSEMBLY. IT IS NOT NECESSARY TO WIND SPRINGS
DURING INSTALLATION.
C. Slide Entire window awning into awning rail and center over
window.
D. Carefully remove cotter pins from each end.
CAUTION: THE COTTER PINS ARE HOLDING THE PREWOUND
TENSION ON THE ROLLER ASSEMBLY. CARE MUST BE TAKEN
TO PREVENT ANY DAMAGE OR INJURY WHEN REMOVING
THESE PINS.
Figure 3


