background image

14

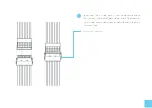
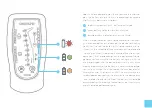
After connecting the air cuff ducts, connect an external power 
supply that will allow the central unit to work while saving the 
battery pack. The operation of the central unit without an exter-
nal power source is possible until the batteries in the device are 
discharged. The battery status is indicated by the battery char-
ge and discharge indicators. To connect an external power so-
urce, plug the power adapter end into the power socket of the 
central unit, and the power supply plug into the power outlet.

AC adapter socket

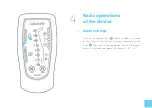
After the above steps have been taken, the device is ready for 
use. Press the ON/OFF button. After a while, the blue backli-
ghting of the buttons on the panel will light up, signalling the 
correct operation of the device.

If the device remains inactive after switching on by pressing 
the ON/OFF button, it will automatically switch off after 5 mi-
nutes to save batteries.

Comments:

Use only the power supplies included 
in the kit
Do not use the device while charging 
the battery

!

Содержание Move 8

Страница 1: ...user manual...

Страница 2: ...ting the air ducts 10 4 Basic operations of the device 15 4 1 Mode setting 15 4 2 Pressure setting 21 4 3 Time setting 21 4 4 Chamber selection setting 22 4 5 Start Pause 22 4 6 Battery charging 22 5...

Страница 3: ...of compression massage The massage takes place through air filled cuffs and chambers to which air is supplied thro ugh a system of flexible pipes from the central unit where the compressor is located...

Страница 4: ...and relaxa tion CARE PUMP Move8 works on the principle of intermit tent pneumatic compression that is it uses sliding pressure waves enabling mechanical compression instead of manu al massage Massage...

Страница 5: ...mulates its functioning impro ves the flow and accelerates the exchange of fluids in the body The benefits of applying compression massage are the same as for normal classic hand massage regeneration...

Страница 6: ...lite heavy legs and the same as for classic hand massage 1 6 Contra indications pain or numbness of an unknown origin severe atherosclerosis or severe ischemia vascular diseases are a relative contrai...

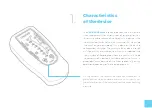
Страница 7: ...on cycle time selection button cycle time in minutes programme selection button letters denoting the type of program number of chambers in the cuffs backlighted pressure indicator buttons for pressure...

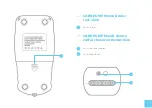
Страница 8: ...8 2 2 CARE PUMP Move8 device rear view battery cover 11 2 3 CARE PUMP Move8 device cuff air hose connector view cuff air hose connector AC adapter socket 12 13 11 12 13...

Страница 9: ...he unit heats up during operation the device must be away from direct heat sources Do not place any heat genera ting objects or objects containing water or other liquids near the device Place the devi...

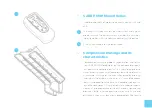
Страница 10: ...t the plug of the cuff air distributor into the socket of the central unit located on the back of the device paying attention to the notch which indicates the correct connec tion unit s air socket uni...

Страница 11: ...11 Connect the single cuff wires to the dual splitter socket paying attention to the notch that indicates the correct connection air hose connector with cuff B...

Страница 12: ...12 If you use only one cuff connect its cable directly to the unit s air socket on the back of the unit paying attention to the notch that indicates the correct connection C...

Страница 13: ...nnect the air tube push it into the correct socket so that you hear the latch of both side buttons To disconnect the air tube press two buttons on both sides of the plug at the same time disconnect bu...

Страница 14: ...er adapter end into the power socket of the central unit and the power supply plug into the power outlet AC adapter socket After the above steps have been taken the device is ready for use Press the O...

Страница 15: ...4 1 Mode settings Pressing the mode button selects the operating mode of A B C D or E When the MODE button is pressed the indi cator lights up the selected option in blue Subsequent presses switch be...

Страница 16: ...ratory mode and is therefore more delicate and less noticeable than the other modes Even if you set the right pressure it is lower about 20 30 mmHg less noticeable than the other modes The massage is...

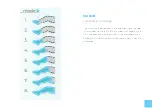
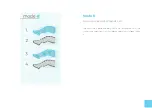
Страница 17: ...massage is performed in the direction from the foot 1st chamber to the thigh 6th chamber with keeping the air in the previous chambers after all the chambers are in flated the air is discharged simult...

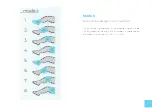
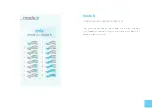
Страница 18: ...18 Mode C sequential massage in two chambers The massage is performed in the direction from the foot 1 2 chamber to the thigh 5 6 chamber in sequence of 2 chambers simultaneously 1 2 3 4 5 6...

Страница 19: ...19 Mode D sequential overall compression The massage is performed by inflating all chambers 1 6 at the same time and then simultaneously releasing air from them all...

Страница 20: ...20 Mode E mode A and mode B combined The massage combines two modes alternately Mode A with Mode B a sequential massage in one chamber with a compression massage...

Страница 21: ...A B 4 3 Time setting When you press the Time button the operating time of the set mode increases by 10 minutes After reaching 60 minutes pressing the TIME button again returns and sets the time output...

Страница 22: ...d will not be taken into account and pumped during a given massage After setting the above functions we start work by pressing the START button we can interrupt the cycle selected by us by pressing th...

Страница 23: ...he scheduled time and connect the device to the charger When the device is charged the green light comes on further procedures can be performed Do not perform treatments while the battery is charging...

Страница 24: ...hock or damage to the unit If the unit starts to swell disconnect it from the mains immediately by pulling the plug from the wall socket Do not leave the unit with the plug plugged into a wall outlet...

Страница 25: ...rapidly during use and cause skin injuries 5 2 Possible injuries The device may not be used in children under 15 years old Wearing a child in a cuff and inflating the cuff can cause very serious injur...

Страница 26: ...ption the volume of the limb The battery operating time cannot be clearly defined 5 4 Safety using of cuffs Before putting on the cuff remove your watch and jewelry and empty your pockets they may cau...

Страница 27: ...g Number of operating modes 5 A B C D E Overlapping chambers so called Fishbone Treatment time 10 60 min Additional battery power supply Optional switch off individual chambers Weight 2 Kg Dimensions...

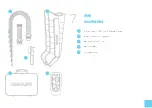
Страница 28: ...28 7 Set contents 6 chambers CARE PUMP Move8 Device lower climb cuff 2 pieces double air duct 1 set power supply transport bag A B C D E A B C D E...

Страница 29: ...29 8 Optional accesories upper limb cuff abdominal hip belt short pants A B C A B C...

Страница 30: ...he notes included in it regarding safe use The product should only be used as described in this manual and only with the original parts inc luded in the packaging Otherwise the device may be damaged o...

Страница 31: ...All repairs and maintenance may only be car ried out by the manufacturer or an authorized service center in the event of self repair we are not responsible for any damages the devices should be period...

Страница 32: ...tances or substances conta ining free chlorine and oxygen they can cause damage cuffs are best cleaned with a cloth using warm water and dissolved soap 11 Cleaning and disinfection The product should...

Страница 33: ...services using spare parts other than original ones To obtain a manufacturer s warranty please report it to the manufacturer using the service form and attached warranty card and a copy of the proof o...

Страница 34: ...epump Move 8 are in conformity with the provisions of the following EC directives EC Electromagnetic Compatibility EMC Directive 2014 30 EU EC Low Voltage Directive LVD 2014 35 EU Declaration of confo...

Страница 35: ...Manufacturer and Service BardoMed Sp z o o 6 66 Konecznego Str 31 216 Krakow Poland...

Отзывы: