


21
3.1
Console Display
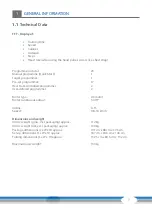
Display
Description
SPEED
+
Display of the current speed in km/h
+
Display range: 0.8–18 km/h
+
Setting range: 0.8-18 km/h (Adjustable in steps of 0.1 km/h
increments)
PULSE
+
Display of the current heart rate in beats per minute
INCLINE
+
Display of the current inclince level
+
Display range: 0–15
+
Setting range: 0–15 (Adjustable in steps of 1)
TIME
+
Display of the training time in min.
DISTANCE
+
Display of the training distance in km
CALORIES
+
Display of the calories in kcal
Содержание CCST-TX50-3
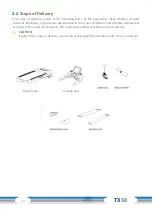
Страница 2: ...2 TX50...
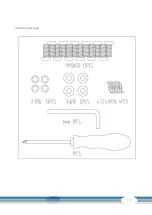
Страница 13: ...13 Hardware package...
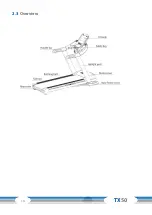
Страница 14: ...14 TX50 2 3 Overview...
Страница 47: ...53 EXPLODED DRAWING 1 47 6 1 Exploded Drawing...
Страница 48: ...54 EXPLODED DRAWING 2 48 TX50...
Страница 53: ...53 Notes...
Страница 54: ...54 TX50 Notes...
Страница 55: ...55...
Страница 56: ...Treadmill TX50...


