background image

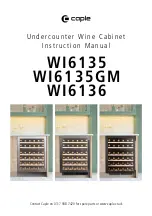
U n d e r c o u n t e r   W i n e   C a b i n e t 

I n s t r u c t i o n   M a n u a l

Contact Caple on 0117 938 7420 for spare parts or www.caple.co.uk

WI6135 

WI6135GM 

WI6136

Содержание WI6135GM

Страница 1: ...Undercounter Wine Cabinet Instruction Manual Contact Caple on 0117 938 7420 for spare parts or www caple co uk WI6135 WI6135GM WI6136 ...

Страница 2: ... the best results from your new wine cabinet we strongly suggest that you read this instruction manual thoroughly before use If treated with care your Caple product should give you years of trouble free use To register ownership please ensure you complete and return the guarantee card supplied with the appliance or visit www caple co uk and register here This instruction manual is designed to prov...

Страница 3: ... shops offices and other working environments Bed and breakfast type environments By clients in hotels motels and any other residential type environments This appliance is intended to be used exclusively for the storage of wine I M P O R TA N T Caple cannot be held liable for any non compliance with these instructions E L E C T R I C A L S H O C K H A Z A R D Read all instructions before using the...

Страница 4: ...plies with all applicable legislation Low Voltage Directive LVD and Electromagnetic Compatibility EMC TECHNICAL FI C HE This appliance conforms to all current and applicable energy regulations To view the Technical Fiche that supports the energy labelling data please visit the product page on our website www caple co uk Symbol ISO 7010 W021 Warning Risk of fire flammable materials This appliance c...

Страница 5: ...eturn to normal thickness a little faster INSTALLATION OF YOUR WINE CABINET Place your wine cabinet on a floor that is strong enough to support it when it is fully loaded To level your wine cabinet adjust the front levelling leg at the bottom of the cabinet Ensure it is perfectly level as this will minimise any vibrations This appliance uses flammable refrigerant Never damage the cooling pipework ...

Страница 6: ... mode is currently in operation Button Used to switch the internal light on off Button To switch the appliance on off press and hold this buttons for approximately 3 seconds Button Used to raise the temperature in 1ºC increments Button Used to lower the temperature by in 1ºC increments Setting the temperature To set the temperature connect the power cord to a properly grounded outlet In the event ...

Страница 7: ... below 1 Lower hinge Right 2 Screws 4 Door 5 Top hinge Right 7 Top hinge Left 8 Decorative plugs 10 Door limit device 11 Screw 1 Open the door to 90 degrees take out 2 screws 2 from low then pull out the door and door axis Fig A 2 Put the door down safely and take out the plug 12 from to 11 at bottom and remove the door limit device 10 then i of door frame please use spare plug 12 to block the hol...

Страница 8: ...sh to reduce your plinth height the smaller slot on plinth grille see page 16 should be used 1 Open the door to 90 degrees take out 2 screws 2 from lower door axis 3 remove the door 4 then pull out the door and door axis Fig A 2 Put the door down safely and take out the plug 12 from top of door frame unscrew 1 screw 11 at bottom and remove the door limit device 10 then install the door limit devic...

Страница 9: ...rence 15 FITTING A KITCHEN PLINTH This model is also supplied with a slot on plinth grille if the previous method grille is not preferred A H55mm vent slot is required in the plinth to ensure air is able to ventilate correctly See diagram below g a kitchen plinth odel is also supplied with a slot on plinth grille if the previous method grille is not preferred mm vent slot is required in the plinth...

Страница 10: ...RAC KE T INSTALLATION DIMENSIONS Fixing the top fixing bracket After installing the wine cabinet please min 583mm inc door 573mm min 825mm 600mm 595mm 820 885mm 716mm This bracket will keep the product secure and help prevent it moving when in use After installing the wine cabinet please open the door adjust the fixing bracket and fix this into the work surface with three screws using a screwdrive...

Страница 11: ...es and rack Wash the inside surfaces with a warm water and baking soda solution The solution should be about 2 tablespoons of baking soda to 2 pints of water Wash the shelves with a mild detergent solution Wring excess water out of the sponge or cloth when cleaning area of the controls or any electrical parts Wash the outside cabinet with warm water and mild liquid detergent Rinse well and wipe dr...

Страница 12: ...essor turns on and off frequently The room temperature is hotter than normal A large amount of contents has been added to the wine cabinet The door is opened too often The door is not closed completely The temperature control is not set correctly The door gasket does not seal properly The light does not work Not plugged in The circuit breaker tripped or a blown fuse The bulb has burned out The lig...

Страница 13: ...f humidity is too low insert the small plastic reservoir on to the top shelf Fill this reservoir 3 4 full with water Check the water level occasionally and refill as necessary DRINK TYPE RECOMMENDED TEMPERATURE Champagne NV Sparkling 6 C Champagne Vintage 10 C Dry White Semillon Sauvignon Blanc 8 C Dry White Gewürztraminer Riesling 10 C Dry White Chardonnay 10 C Vintage Chardonnay 14 C Sweet White...

Страница 14: ...nstruction manual Wi6135 Wi6135GM Wi6136 Instruction manual Wi6135 Wi6135GM Wi6136 Please keep this instruction manual for future reference Please keep this instruction manual for future reference NOTES NOTES ...

Страница 15: ...Caple Service Fourth Way Avonmouth Bristol BS11 8DW T 0117 938 1900 E service caple co uk www caple co uk ...

Отзывы: