background image

22

DE

PFLEGE UND WARTUNG

Hinweis

: Wie bei allen Trainingsgeräten mit mechanischen, beweglichen 

Komponenten kann es auch bei diesem Produkt vorkommen, dass sich 

Schrauben durch häufigen Gebrauch lockern. Wir empfehlen sie daher 

regelmäßig zu kontrollieren und ggf. mit einem passenden Schlüssel 
nachzuziehen. Reinigen Sie Ihr Trainingsgerät regelmäßig mit einem 

feuchten Tuch, um die Oberflächen von Schweiß und Staub zu säubern. 

•  Entnehmen Sie die Batterie des Bedienfelds, wenn Sie das Gerät über 

einen längeren Zeitraum nicht verwenden.

•  Reinigen Sie das Gerät regelmäßig mit einem sauberen Tuch, um das 

saubere Erscheinungsbild aufrecht zu erhalten.

•  Die sichere Verwendung des Geräts kann nur dann gewährleistet werden, 

wenn das Gerät regelmäßig auf Schäden und Abnutzungen überprüft wird 
(beispielsweise an Handgriffen, Pedalen, Sattel etc.). Es ist essentiell, dass 
beschädigte Geräteteile ersetzt werden und das Gerät erst nach erfolgter 
Reparatur wieder verwendet wird.

•  Überprüfen Sie regelmäßig, ob Schrauben und Muttern richtig fixiert sind.

•  Fetten Sie bewegliche Geräteteile regelmäßig ein.
•  Achten Sie insbesondere auf Komponenten, welche besonders anfällig für 

Abnutzungen sind, wie beispielsweise das Bremsensystem, Fußauflage etc.

•  Da Schweiß sehr aggressiv ist, darf dieser nicht mit den emaillierten 

oder verchromten Teilen des Gerätes, insbesondere dem Computer, in 

Berührung kommen. Wischen Sie das Gerät nach Gebrauch sofort ab. Die 

emaillierten Teile können mit einem feuchten Schwamm gereinigt werden. 
Alle aggressiven oder korrosiven Produkte müssen bei der Reinigung 
vermieden werden.

•  Lagern Sie das Gerät in einer sauberen und trockenen Umgebung 

außerhalb der Reichweite von Kindern.

Содержание Azura Fusion 10033788

Страница 1: ...10033788 Azura Fusion Fahrrad Heimtrainer Exercise Bike Bicicleta Estática Vélo d exercice Cyclette ...

Страница 2: ......

Страница 3: ...itere Informationen rund um das Produkt zu erhalten INHALTSVERZEICHNIS Sicherheitshinweise 4 Zusammenbau 6 Trainingspositionen und Umbau 11 Cardiotraining im Überblick 17 Aufwärmung vor dem Training 20 Pflege und Wartung 22 Producer 23 HERSTELLER Chal Tec GmbH Wallstraße 16 10179 Berlin Deutschland WARNUNG Dieses stationäre Trainingsgerät ist nicht für Zwecke mit hoher Genauigkeit geeignet Das Sys...

Страница 4: ...t um feststellen zu lassen ob Sie körperliche oder gesundheitliche Probleme haben welche durch die Verwendung des Geräts ein Risiko für Ihre Gesundheit und Sicherheit darstellen könnten oder Sie daran hindern das Gerät ordnungsgemäß zu verwenden Der Rat Ihres Arztes ist lebenswichtig wenn Sie Medikamente einnehmen welche Einfluss auf Puls Blutdruck oder den Cholesterinspiegel haben Achten Sie auf ...

Страница 5: ...nes Freilaufsystems was ein ernsthaftes Risiko darstellt Halten Sie das Netzstromkabel fern von Wärmequellen Stecken Sie keine Gegenstände in die Geräteöffnungen Schalten Sie das Gerät aus und ziehen Sie den Netzstecker bevor Sie das Gerät bewegen oder reinigen Reiben Sie die Oberflächen zur Reinigung mit einem milden Reinigungsmittel und einem feuchten Tuch ab Verwenden Sie keinesfalls Lösungsmit...

Страница 6: ...6 DE ZUSAMMENBAU Übersicht ...

Страница 7: ...7 DE Kleinteile Spanner x1 Schlüssel 15 19 x1 Einstellknopf x1 Schraube M8 P1 25 20 x4 Unterlegscheibe M8 x4 Inbusschlüssel x1 ...

Страница 8: ...len indem Sie den Stift 68 in das rechte Loch stecken sobald die Höhe stimmt 2 Entfernen Sie die Hutmuttern 44 die Unterlegscheiben 43 und die Schrauben 41 vom vorderen Stabilisator 40 und vom hinteren Stabilisator 45 und bewahren Sie sie gut auf Befestigen Sie den vorderen Stabilisator 40 mit Transportrollen am Hauptrahmen 1 und befestigen Sie die Hutmuttern 44 die Unterlegscheiben 43 und die Sch...

Страница 9: ...n 43 am unteren Ende des Sattelstütze 47 Ziehen Sie die Schrauben mit dem Inbusschlüssel fest 5 Passen Sie die Höhe der Sattelstütze 47 mit Hilfe des Stifts 55 an 6 Schieben Sie die Lenkerstütze 69 in den Schaft am Hauptrahmen 60 schieben Stellen Sie die Lenkerstütze auf die gewünschte Höhe ein und ziehen Sie sie dann mit dem Knopf 73 fest Überschreiten Sie nicht die STOP Markierung Befestigen Sie...

Страница 10: ...est in die Kurbel 38 Ziehen Sie die Kontermutter R 78R fest an Jetzt ist das Gerät fertig montiert Kleine Unebenheiten können durch Anpassen des Endstopfens 46 ausgeglichen werden 8 Stellen Sie sicher dass die Stopfen 52 an den Querstreben 69 82 am Lenker und unter dem Sitz 47 befestigt sind Schieben Sie dann die 4 Polster 51 wie abgebildet auf die Querstreben 9 Befestigen Sie zum Schluss den Tabl...

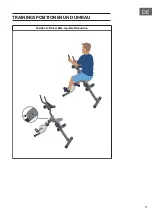
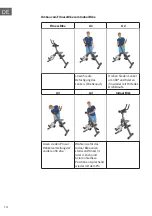
Страница 11: ...11 DE TRAININGSPOSITIONEN UND UMBAU Position A Fitness Bike reguläre Sitzposition ...

Страница 12: ...12 DE Position B Indoor Bike stehende Position ...

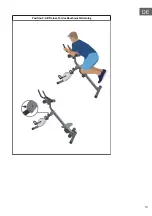
Страница 13: ...13 DE Position C AB Trainer für das Bauchmuskeltraining ...

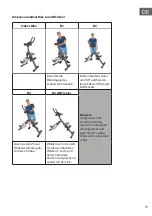
Страница 14: ...rs Drehknauf Drehen Sie den Lenker um 180 und fixieren ihn wieder mit Hilfe des Drehknaufs A3 A4 Indoor Bike Lösen sie den Pin zur Winkelverstellung der vorderen Strebe Wählen sie für das Indoor Bike einen steileren Winkel 3 oder 4 Loch und fixieren Sie diese Position entsprechend wieder mit dem Pin ...

Страница 15: ...er mit Hilfe des Drehknaufs B3 B4 AB Trainer Hinweis Vergewissern Sie sich in jedem Fall dass der Pin komplett durchgesteckt und gesichert ist sodass Ihr Azura Fusion stabil steht Lösen sie den Pin zur Winkelverstellung der vorderen Strebe Wählen sie für den AB Trainer den flachsten Winkel 1 Loch und fixieren Sie diese Position entsprechend wieder mit dem Pin ...

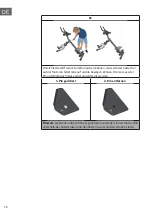
Страница 16: ...hinteren Sitzstrebe auf und ab bewegen können Hierzu muss der Pin unterhalb des Sitzes gelöst und entfernt werden 1 Pin gesichert 2 Pin entfernen Hinweis Sie können die Sitzhöhe ergonomisch verstellen indem Sie den Pin unterhalb des Sattels lösen und den Sattel in einer anderen Höhe fixieren ...

Страница 17: ...tehenden Trainingsergebnisse Ein optimales Training beinhaltet eine Aufwärmphase 1 eine intensivere Cardio Trainingsphase 2 sowie die abschließende Erholungsphase 3 Wenn Sie Fortschritte machen oder Kalorien verbrennen wollen sollten Sie diese 3 Phasen durchlaufen und so mindestens 20 30 Minuten auf dem Ergometer trainieren 1 Aufwärmphase Beginnen Sie Ihr Training immer mit einem geringen Widersta...

Страница 18: ...winnen Die anaerobe Energiegewinnung ist zwar in kleinem Umfang auch aktiv aber nur so weit als alle dadurch produzierte Milchsäure gleichzeitig wieder abgebaut werden kann In diesem aeroben Trainingsbereich sollten Sie den Großteil Ihres Trainings absolvieren Wenn Sie die Belastung weiter steigern dann kommen Sie irgendwann an eine Grenze an der die auf Sauerstoff basierte Energiegewinnung nicht ...

Страница 19: ...ng durchführen Essen und Trinken Trinken Sie vor während und nach dem Training Trinken Sie während des Trainings mindestens 2 Schluck Wasser 10 bis 20 cl alle 10 15 Minuten Wenn Ihr Training länger als 1 Stunde dauert sollten Sie ein Sportgetränk trinken um dem Körper vor dem Dehydrieren beim Sport zu schützen Für ein optimales Cardio Training ist eine angepasste Ernährung sowohl vor als auch nach...

Страница 20: ...20 DE AUFWÄRMUNG VOR DEM TRAINING ...

Страница 21: ...estreckt nach oben Verbleiben Sie in dieser Position jeweils einige Sekunden pro Seite 4 Hüfte beugen beide Arme oben geschlossen Auch hier verbleiben Sie auf jeder Seite die Übung ist nun etwas intensiver da der zweite Arm mitzieht 5 Stellen sie sich auf ein Bein und halten den Spann mit der Hand Hier mobilisieren Sie ihr Fußgelenk und strecken den Oberschenkel leicht Stützen Sie sich gegebenenfa...

Страница 22: ... auf Schäden und Abnutzungen überprüft wird beispielsweise an Handgriffen Pedalen Sattel etc Es ist essentiell dass beschädigte Geräteteile ersetzt werden und das Gerät erst nach erfolgter Reparatur wieder verwendet wird Überprüfen Sie regelmäßig ob Schrauben und Muttern richtig fixiert sind Fetten Sie bewegliche Geräteteile regelmäßig ein Achten Sie insbesondere auf Komponenten welche besonders a...

Страница 23: ...t user mannual and other information about the product CONTENT Safety Instructions 24 Assembly 26 Training Positions and Conversion 31 Overview of Cardio Training 37 Warming up before a Workout 40 Care and Maintenance 42 PRODUCER Chal Tec GmbH Wallstraße 16 10179 Berlin Germany WARNING This stationary training device is not suitable for high accuracy purposes The heart rate monitoring system may b...

Страница 24: ...xercise program you must consult your doctor to determine if you have any physical or health conditions that could create a risk to your health and safety or prevent you from using the equipment properly Your doctor s advice is essential if you are taking medication that affects your heart rate blood pressure or cholesterol level Be aware of your body s signals Incorrect or excessive exercise can ...

Страница 25: ...ay from heat sources Do not insert or drop any object into any opening Unplug exercise bike before moving or cleaning it To clean wipe surfaces down with mild detergents and a slightly damp cloth only never use solvents Do not use the exercise bike in any location that is not temperature controlled such as but not limited to garages porches pool rooms bathrooms car ports or outdoors Use the bike o...

Страница 26: ...26 EN ASSEMBLY Overview ...

Страница 27: ...27 EN Small Parts Spanner x1 Spanner 15 19 x1 Adjusting knob x1 Screw M8 P1 25 20 x4 Washer M8 x4 Allen wrench x1 ...

Страница 28: ...lding height by inserting the pin 68 into the right hole as soon as the height is correct 2 Remove the cap nuts 44 washers 43 and screws 41 from the front stabilizer 40 and rear stabilizer 45 and keep them in a safe place Attach the front stabilizer 40 to the main frame 1 using transport rollers and reattach the cap nuts 44 washers 43 and screws 41 to the front stabilizer 40 and rear stabilizer 45...

Страница 29: ... of the seat post 47 using bolts 70 and washers 43 Tighten the bolts with the Allen wrench 5 Adjust the height of the seat post 47 using the pin 55 6 Slide the handlebar support 69 into the shaft on the main frame 60 Adjust the handlebar support to the desired height and then tighten with the knob 73 Do not exceed the STOP mark Then attach the handlebar 71 to the handlebar support 69 using screws ...

Страница 30: ...lock nut R 78R tightly The unit is now fully assembled Small irregularities can be compensated by adjusting the end plug 46 8 Please make sure all the plugs 52 are fixed on handle bar support set 69 bar 82 to be fixed on the seat support set 47 well then insert the 4 sponge sheathes 51 separately onto the bars through the plug 52 properly as shown 9 Finally attach the Tablet Smartphone Holder to t...

Страница 31: ...31 EN TRAINING POSITIONS AND CONVERSION Position A Fitness Bike regular sitting position ...

Страница 32: ...32 EN Position B Indoor Bike standing position ...

Страница 33: ...33 EN Position C AB Trainer for abdominal muscle training ...

Страница 34: ...sen the handlebar attachment turning knob Turn the handlebar by 180 and fix it again using the knob A3 A4 Indoor Bike Release the pin for angle adjustment of the front strut Choose a steeper angle 3rd or 4th hole for the indoor bike and fix this position again with the pin ...

Страница 35: ...e handlebar by 180 and fix it again using the knob B3 B4 AB Trainer Note Always make sure that the pin is fully inserted and secured so that your Azura Fusion is stable Release the pin for angle adjustment of the front strut Select the flattest angle 1st hole for the AB Trainer and fix this position again with the pin ...

Страница 36: ... to move freely up and down on the rear seat stay The pin underneath the seat must be loosened and removed 1 Bracket secured 2 Open bracket 90 Note You can adjust the seat height ergonomically by loosening the pin below the saddle and fixing the saddle at a different height ...

Страница 37: ...ted results An optimal training session includes 1 a warm up phase 2 an intensive cardio training phase and finally 3 a cool down phase If you want to progress or burn calories you should go through these 3 phases as well as exercise for at least 20 30 minutes on the ergometer 1 Warm up Phase Always start your training session with a low resistance level A warm up phase of 5 10 minutes is importan...

Страница 38: ...acilitate energy production At the same time the anaerobic production of energy is also active but only to a small extent The lactic acid produced in this process can be broken down to produce energy Most of your training should be aerobic training If you continue to increase the intensity you will eventually come to the threshold where aerobic energy production is no longer able to increase its o...

Страница 39: ...r by doing a more demanding interval training Eating and Drinking Drink before during and after training Drink at least 2 sips of water 10 to 20 cl every 10 15 minutes during a training session If your workout lasts for more than 1 hour you should drink a sports drink to protect the body from dehydration while training For optimal cardio training suitable nutrition before and after any physical ac...

Страница 40: ...40 EN WARMING UP BEFORE A WORKOUT ...

Страница 41: ...this position for several seconds on each side 4 Bend to the side and raise both arms above your head with palms together Again remain on each side for several seconds The exercise is now a bit more intense with the second arm joining 5 Stand on one leg and hold the instep of the other foot with your hand Mobilize it so as to stretch the thigh lightly If necessary hold onto something to keep your ...

Страница 42: ...ed if it is regularly examined for damage and or wear and tear e g handle bar pedals and seat etc It is vital that any faulty parts are replaced and the it is not used until completed repaired Regularly check that the elements fastened with nuts and bolts are correctly tightened Remember regularly to grease moving parts Special attention to the component most of them are susceptible to wear like b...

Страница 43: ...formations supplémentaires concernant le produit SOMMAIRE Consignes de sécurité 46 Assemblage 48 Positions d entraînement et transformations 53 Aperçu de l entrainement cardio 59 Échauffement avant l entrainement 62 Entretien et maintenance 64 FABRICANT Chal Tec GmbH Wallstraße 16 10179 Berlin Allemagne MISE EN GARDE Cet appareil d entraînement fixe ne convient pas à des objectifs de haute précisi...

Страница 44: ...vez pas de problèmes physiques ou de santé qui pourraient mettre votre santé ou votre sécurité en danger pendant l utilisation de l appareil ou vous empêcheraient de l utiliser convenablement Le conseil de votre médecin est d importance vitale si vous prenez des médicaments qui affectent votre rythme cardiaque votre tension artérielle ou votre taux de cholestérol Soyez attentif aux signaux de votr...

Страница 45: ...n risque grave Tenez le câble d alimentation à l écart des sources de chaleur N insérez aucun objet dans les ouvertures de l appareil Éteignez l appareil et débranchez le câble d alimentation avant de déplacer ou de nettoyer l appareil Pour le nettoyage essuyez les surfaces avec un détergent doux et un chiffon humide N utilisez jamais de solvants N utilisez pas l appareil dans un endroit non tempé...

Страница 46: ...46 FR ASSEMBLAGE Aperçu ...

Страница 47: ...47 FR Petits éléments Clé multiple x1 Clé plate 15 19 x1 Bouton de réglage x1 Vis M8 P1 25 20 x4 Rondelle M8 x4 Clé Allen x1 ...

Страница 48: ... de l ouverture en insérant la goupille 68 dans le trou de droite lorsque la hauteur vous semble correcte 2 Retirez les écrous borgnes 44 les rondelles 43 et les vis 41 des stabilisateurs avant 40 et arrière 45 et rangez les bien Fixez le stabilisateur avant 40 avec les roulettes de transport au cadre principal 1 et remettez en place les écrous borgnes 44 les rondelles 43 et les vis 41 des stabili...

Страница 49: ...a tige de selle 47 à l aide de vis 70 et de rondelles 43 Serrez les vis avec la clé Allen 5 Ajustez la hauteur de la tige de selle 47 à l aide de la goupille 55 6 Faites glisser le support de guidon 69 dans l arbre du cadre principal 60 Réglez le support de guidon à la hauteur souhaitée puis serrez le à l aide du bouton 73 Ne dépassez pas le repère STOP Fixez ensuite le guidon 71 au support de gui...

Страница 50: ...aiguilles d une montre dans la manivelle 38 Serrez fermement le contre écrou R 78R L appareil est maintenant entièrement assemblé Vous pouvez compense les petites inégalités avec l embout 46 8 Veillez à ce que les bouchons 52 soient fixés sur les traverses 69 82 du guidon et sous le siège 47 Glisser ensuite les 4 patins 51 sur les barres transversales comme indiqué 9 Enfin fixez le support de tabl...

Страница 51: ...51 FR POSITIONS D ENTRAÎNEMENT ET TRANSFORMATIONS Position A vélo Fitness position assise normale ...

Страница 52: ...52 FR Position B vélo d intérieur Position debout ...

Страница 53: ...53 FR Position C AB Trainer pour la musculation des abdominaux ...

Страница 54: ...ixation du guidon molette Tournez le guidon à 180 et fixez le à nouveau à l aide de la molette A3 A4 Indoor Bike Desserrez la goupille pour régler l angle du montant avant Choisissez un angle plus relevé 3ème ou 4ème trou pour le vélo indoor et fixez cette position à nouveau avec la goupille ...

Страница 55: ...n à 180 et fixez le à nouveau à l aide de la molette B3 B4 AB Trainer Remarque Vérifiez que la goupille est complètement insérée et sécurisée afin que votre Azura Fusion soit stable Desserrez la goupille pour régler l angle du montant avant Choisissez l angle le plus bas pour l AB Trainer 1er trou et fixez le à nouveau avec la goupille ...

Страница 56: ...ière Pour ce faire desserrez le boulon de retenue situé sous le siège et retirez le Pour ce faire suivez les quatre étapes comme indiqué sur le schéma 1 attache fermée 2 retirer l attache Remarque Vous pouvez régler la hauteur d assise de manière ergonomique en desserrant l axe sous la selle et en fixant la selle à une hauteur différente ...

Страница 57: ...ment comprend une phase d échauffement 1 une phase plus intense d entraînement cardio 2 et une phase finale de récupération 3 Si vous voulez progresser ou brûler des calories vous devez passer par ces 3 phases et vous entraîner pendant au moins 20 30 minutes sur l ergomètre 1 Phase d échauffement Commencez toujours votre entraînement avec une faible résistance La période d échauffement de 5 10 min...

Страница 58: ...n utilisant l oxygène de la production d énergie aérobie La production anaérobie est également active à petite échelle mais seulement dans la mesure où tout l acide lactique qu elle produit peut être dégradé en même temps Vous devriez passer la majeure partie de votre entraînement dans cette zone aérobie Si vous continuez à augmenter la charge alors vous finirez par arriver à une limite à partir d...

Страница 59: ... en suivant un entraînement par intervalles plus exigeant Manger et boire Buvez avant pendant et après l exercice Pendant l entraînement buvez au moins 2 gorgées d eau 10 à 20 cl toutes les 10 15 minutes Si votre entraînement dure plus d une heure prenez une boisson pour sportifs afin de protéger le corps de la déshydratation pendant l exercice Pour un entraînement cardio optimal une bonne aliment...

Страница 60: ...60 FR ÉCHAUFFEMENT AVANT L ENTRAINEMENT ...

Страница 61: ...villes accompagnent la rotation du corps 3 Pliez vos hanches un bras tendu vers le haut Restez dans cette position une seconde de chaque côté 4 Pliez vos hanches les deux bras joints vers le haut Encore une fois maintenez cette position de chaque côté L exercice est un peu plus intense car le deuxième bras est également tendu 5 Tenez vous sur une jambe et tenez le cou de pied avec votre main Cela ...

Страница 62: ...e bon état et le niveau d usure de l appareil sont régulièrement vérifiés par exemple les poignées les pédales la selle etc Il est essentiel de remplacer les pièces endommagées de l appareil et de ne réutiliser l appareil qu après réparation Vérifiez régulièrement que les vis et les écrous sont correctement serrés Lubrifiez les pièces mobiles régulièrement Portez une attention particulière aux com...

Страница 63: ...el producto ÍNDICE Instrucciones de seguridad 66 Montaje 68 Posiciones de entrenamiento y conversión 73 Calentamiento antes del entrenamiento 82 Cuidado y mantenimiento 84 FABRICANTE Chal Tec GmbH Wallstraße 16 10179 Berlín Alemania ATENCIÓN Este aparato estático de entrenamiento no es apto para fines de gran exactitud El sistema de control de la frecuencia cardíaca puede ser defectuoso Un entrena...

Страница 64: ...guridad al usar el aparato o que le impidan usarlo debidamente El consejo de su médico es vital si usted toma cualquier medicamento que afecte su pulso presión arterial o nivel de colesterol Preste atención a las señales de su cuerpo El ejercicio inadecuado o excesivo puede perjudicar su salud Interrumpa el ejercicio si experimenta cualquiera de los siguientes síntomas dolor opresión en el pecho l...

Страница 65: ...or No introduzca ningún objeto en las aberturas del aparato Apague el aparato y desconecte la corriente antes de moverlo o limpiarlo Para limpiarlo frote las superficies con un detergente suave y un paño húmedo No use disolventes No use el aparato en lugares donde no se controle la temperatura como garajes terrazas baños cocheras o al aire libre Use el aparato solamente como se describe en las ins...

Страница 66: ...66 ES MONTAJE Resumen ...

Страница 67: ...67 ES Piezas pequeñas Tensor x1 Llave 15 19 x1 Perilla de ajuste x1 Tornillo M8 P1 25 20 x4 Arandela M8 x4 Llave Allen x1 ...

Страница 68: ... perno 68 en el orificio derecho tan pronto como la altura sea correcta 2 Quite las tuercas ciegas 44 las arandelas 43 y los tornillos 41 del estabilizador delantero 40 y del estabilizador trasero 45 y guárdelas bien Fije el estabilizador frontal 40 con ruedas de desplazamiento alcuadro principal 1 y vuelva a ajustar las tuercas ciegas 44 las arandelas 43 y los tornillos 41 al estabilizador delant...

Страница 69: ...tornillos 70 y arandelas 43 en el xtremo inferior del tubo del sillín 47 Apriete los tornillos con la llave Allen 5 Adapte la altura del tubo del sillín 47 con ayuda del perno 55 6 Deslice el tubo del manillar 69 en el tronco del cuadro principal 60 Ajuste el tubo del manillar a la altura deseada y apriételo con la perilla 73 No se pase de la marca STOP Después fije el manillar 71 al tubo del mani...

Страница 70: ...j en la manivela 38 Ajuste con fuerza la contratuerca 78R en el eje El aparato ya está completamente ensamblado Las pequeñas irregularidades se pueden compensar ajustando el tapón de extremo 46 8 Asegúrese de que los obturadores 52 estén fijados en los travesaños 69 82 del manillar y debajo del asiento 47 A continuación deslice las 4 zapatas 51 sobre las barras transversales como se muestra en la ...

Страница 71: ...71 ES POSICIONES DE ENTRENAMIENTO Y CONVERSIÓN Posición A bicicleta de ejercicio sentado normalmente ...

Страница 72: ...72 ES Posición B bicicleta de interior parado ...

Страница 73: ...73 ES Posición C entrenador AB para el entrenamiento de los músculos abdominales ...

Страница 74: ...e del manillar pomo giratorio Gire el manillar 180 y sujételo en su sitio de nuevo con ayuda del pomo rotatorio A3 A4 Bicicleta de interior Suelte el perno para ajustar el ángulo del puntal delantero Para la bicicleta de interior elija un ángulo más pronunciado 3 o 4 orificio y fije esta posición de nuevo con el perno ...

Страница 75: ... sitio de nuevo con ayuda del pomo rotatorio B3 B4 entrenador AB Advertencia En todo caso asegúrese de que el perno esté totalmente insertado y asegurado para que su bicicleta Azura Fusion tenga estabilidad Suelte el perno para ajustar el ángulo del puntal delantero Para el entrenador AB seleccione el ángulo más plano 1 orificio y fije esta posición de nuevo con el perno ...

Страница 76: ...ra ello se debe aflojar y quitar el perno de unión situado debajo del asiento Siga los cuatro pasos para retirar el perno de unión como se muestra en el diagrama 1 Pinza ajustada 2 Quitar la pinza Nota Puede ajustar la altura del asiento de forma ergonómica aflojando el pasador situado debajo del asiento y fijando el asiento a una altura diferente ...

Страница 77: ...l entrenamiento y los resultados del mismo Un entrenamiento óptimo incluye una fase de calentamiento 1 una fase intensiva de cardio 2 y una fase de recuperación final 3 Si hace progresos o quiere quemar calorías debe realizar estas 3 fases y entrenarse como mínimo durante 20 30 minutos en el ergómetro 1 Fase de calentamiento Comience su entrenamiento con una resistencia reducida Es importante real...

Страница 78: ...ción de energía aeróbica La obtención de energía anaeróbica es también activa a pequeña escala pero solo hasta cierto punto pues el ácido láctico producido en este proceso puede extraerse para producir energía Gran parte de su ejercicio debe consistir en un tipo de entrenamiento aeróbico Si continúa aumentando la carga llegará en algún momento a un límite donde su obtención de energía por oxígeno ...

Страница 79: ...por intervalos exigente Comida y bebida Beba antes durante y después del entrenamiento Durante el entrenamiento beba al menos 2 sorbos de agua 10 a 20 cl cada 10 15 minutos Si su entrenamiento dura más de 1 hora debe beberse una botella de deporte completa para proteger al cuerpo de la deshidratación durante la sesión Para un entrenamiento de cardio óptimo es muy importante una alimentación adecua...

Страница 80: ...80 ES CALENTAMIENTO ANTES DEL ENTRENAMIENTO ...

Страница 81: ...sión del cuerpo 3 Doble la cadera con un brazo extendido hacia arriba Manténgase en esa posición unos segundos para cada lado 4 Flexione la cadera con ambos brazos unidos hacia arriba Manténgase también en esta posición para que el ejercicio sea un poco más intenso ya que el segundo brazo participa 5 Colóquese sobre una pierna y agarre el empeine con la mano Aquí moviliza la articulación del pie y...

Страница 82: ... si este se limpia regularmente y se inspecciona para detectar daños o desgastes p ej en pedales manillares sillín etc Es indispensable sustituir las piezas dañadas y utilizar el aparato solo cuando se haya finalizado dicha reparación Compruebe habitualmente si los tornillos y las tuercas están bien fijados Engrase todas las piezas móviles Controle especialmente todos los componentes que tiendan a...

Страница 83: ...o INDICE Avvertenze di sicurezza 86 Assemblaggio 88 Posizioni di allenamento e conversione 93 Descrizione dell allenamento cardio 99 Riscaldamento prima dell allenamento 102 Pulizia e manutenzione 104 PRODUTTORE Chal Tec GmbH Wallstraße 16 10179 Berlino Germania ATTENZIONE Questo dispositivo fisso per l allenamento non è adatto a scopi di alta precisione Il sistema di monitoraggio della frequenza ...

Страница 84: ...rappresentare un rischio per la tua salute e sicurezza durante l utilizzo del dispositivo o che ti impediscano di utilizzarlo correttamente È indispensabile consultare un medico se si stanno assumendo farmaci che influenzano la frequenza cardiaca la pressione sanguigna o il livello di colesterolo Sii consapevole dei segnali da parte del tuo corpo Un allenamento sbagliato o eccessivo può essere dan...

Страница 85: ...a che può causare gravi rischi Tieni il cavo di alimentazione lontano da fonti di calore Non inserire oggetti nelle aperture dell apparecchio Spegni l apparecchio e stacca la spina prima di spostarlo o pulirlo Pulisci il dispositivo strofinando le superfici con un panno umido e un detergente delicato Non utilizzare mai solventi Non utilizzare l apparecchio in luoghi a temperatura non controllata c...

Страница 86: ...86 IT ASSEMBLAGGIO Panoramica ...

Страница 87: ...87 IT Parti di piccole dimensioni Tenditore x1 Chiave 15 19 x1 Manopola di regolazione x1 Vite M8 P1 25 20 x4 Rondella M8 x4 Chiave a brugola x1 ...

Страница 88: ...l perno 68 nel foro destro non appena raggiunta l altezza desiderata 2 Rimuovi i dadi a cappello 44 le rondelle 43 e le viti 41 dallo stabilizzatore anteriore 40 e posteriore 45 e conservali in un luogo sicuro Fissa lo stabilizzatore anteriore 40 al telaio principale 1 utilizzando le rotelle di trasporto e riavvita i dadi a cappello 44 le rondelle 43 e le viti 41 allo stabilizzatore anteriore 40 e...

Страница 89: ...nferiore del reggisella 47 con i bulloni 70 e le rondelle 43 Serra le viti con la chiave a brugola 5 Regola l altezza del reggisella 47 con il perno 55 6 Inserisci il supporto del manubrio 69 nell albero del telaio principale 60 Regola il supporto del manubrio all altezza desiderata quindi serralo con la manopola 73 Non superare il segno di STOP Quindi fissa il manubrio 71 al supporto del manubrio...

Страница 90: ...IGHT nella pedivella 38 Avvita a fondo il controdado R 78R Ora il dispositivo è completamente assemblato Piccole irregolarità possono essere compensate regolando il tappo terminale 46 8 Assicurarsi che i tappi 52 siano fissati alle barre del manubrio 69 82 e sotto il sedile 47 Quindi far scorrere i 4 pattini freno 51 sulle traverse come mostrato in figura 9 Infine collega il supporto per tablet sm...

Страница 91: ...91 IT POSIZIONI DI ALLENAMENTO E CONVERSIONE Posizione A Fitness Bike posizione seduta regolare ...

Страница 92: ...92 IT Posizione B Indoor Bike in piedi ...

Страница 93: ...93 IT Posizione C AB Trainer allenamento della muscolatura addominale ...

Страница 94: ...manubrio con la manopola girevole Ruota il manubrio di 180 e fissalo nuovamente con la manopola A3 A4 Indoor Bike Rilascia il perno per la regolazione dell angolo della barra anteriore Per la Indoor Bike scegli un angolo più ripido 3 o 4 foro e fissa nuovamente questa posizione con il perno ...

Страница 95: ...80 e fissalo nuovamente con la manopola B3 B4 Trainer AB Nota Assicurati sempre che il perno sia completamente inserito e fissato in modo che la tua Azura Fusion sia stabile Rilascia il perno per la regolazione dell angolo della barra anteriore Per l AB Trainer scegli l angolo più piatto 1 foro e fissa nuovamente questa posizione con il perno ...

Страница 96: ...edi alla rimozione del bullone di fissaggio seguendo i quattro passaggi come mostrato in figura 1 Il morsetto è fissato 2 Rimuovi il morsetto Nota Assicurati di fissare sempre il bullone di fissaggio con il morsetto quando la Azura Fusion viene convertita in Fitness Bike o Indoor Bike Il morsetto deve essere inserito nel bullone di fissaggio e ruotato in modo che la posizione finale corrisponda al...

Страница 97: ...amento e per i risultati ad esso collegati Un allenamento ottimale comprende una fase di riscaldamento 1 una fase di allenamento cardio più intensa 2 e la fase di recupero finale 3 Per fare progressi o bruciare calorie eseguire queste 3 fasi e allenarsi sull ergometro per almeno 20 30 minuti 1 Fase di riscaldamento Iniziare sempre l allenamento con una resistenza bassa Un periodo di riscaldamento ...

Страница 98: ... anche la produzione di energia anaerobica sia attiva lo è solo in minima parte L acido lattico prodotto in questo processo può essere scomposto per produrre energia La maggior parte dell allenamento si dovrebbe completare nella fase di allenamento aerobico Se si aumenta ulteriormente l intensità si raggiunge un limite nel quale l energia aerobica non sarà più in grado di aumentare la sua produzio...

Страница 99: ...gnativo Mangiare e bere Bere prima durante e dopo l allenamento Bere almeno 2 sorsi d acqua 10 20 cl ogni 10 15 minuti durante l allenamento Se l allenamento dura più di 1 ora si consiglia di bere uno sport drink per idratarsi durante gli esercizi Per un allenamento cardio ottimale è molto importante seguire un alimentazione adeguata sia prima che dopo l attività fisica Prima dell allenamento è pr...

Страница 100: ...100 IT RISCALDAMENTO PRIMA DELL ALLENAMENTO ...

Страница 101: ...corpo 3 Piegare i fianchi un braccio disteso verso l alto Mantenere questa posizione per alcuni secondi per ogni lato 4 Piegare i fianchi con entrambe le braccia verso l alto tenendo le mani unite Anche in questo caso mantenere la posizione per ogni lato Questo esercizio è leggermente più intenso dato che anche il secondo braccio esercita tensione 5 Posizionarsi su una gamba e mantenere la tension...

Страница 102: ... regolarmente che non presenti danni o segni di usura ad es su maniglie pedali sedile ecc È essenziale che le parti danneggiate del dispositivo vengano sostituite e che questo non venga riutilizzato fino a quando non è stato riparato Controllare regolarmente che le viti e i dadi siano fissati correttamente Lubrificare regolarmente le parti mobili Prestare attenzione ai componenti particolarmente s...

Страница 103: ......

Страница 104: ......

Отзывы: