28
z
Loading File to Video Input List
1.
Click on
Input Video
icon to load a video file to
Video Input List
. A window will pop up
prompting for file for conversion. Specify the path and click
OK
to confirm.
2.
Click on
Output Video
icon to specify the destination path. A window will pop up prompting
for the location. The default path is
C:\MTV_OUTPUT\
3.
The selected file will be displayed at
Video Input List
. Click and drag the slider at the bottom
to review attributes of the highlighted file. Right click on the highlighted file and left click on
Delete
to remove it.
z
Advanced Setting
1.
Right click and click on
Advanced Setting
on the highlighted file in
Video Input List
or
simply click on
Advanced Setting
at
Conversion Functions
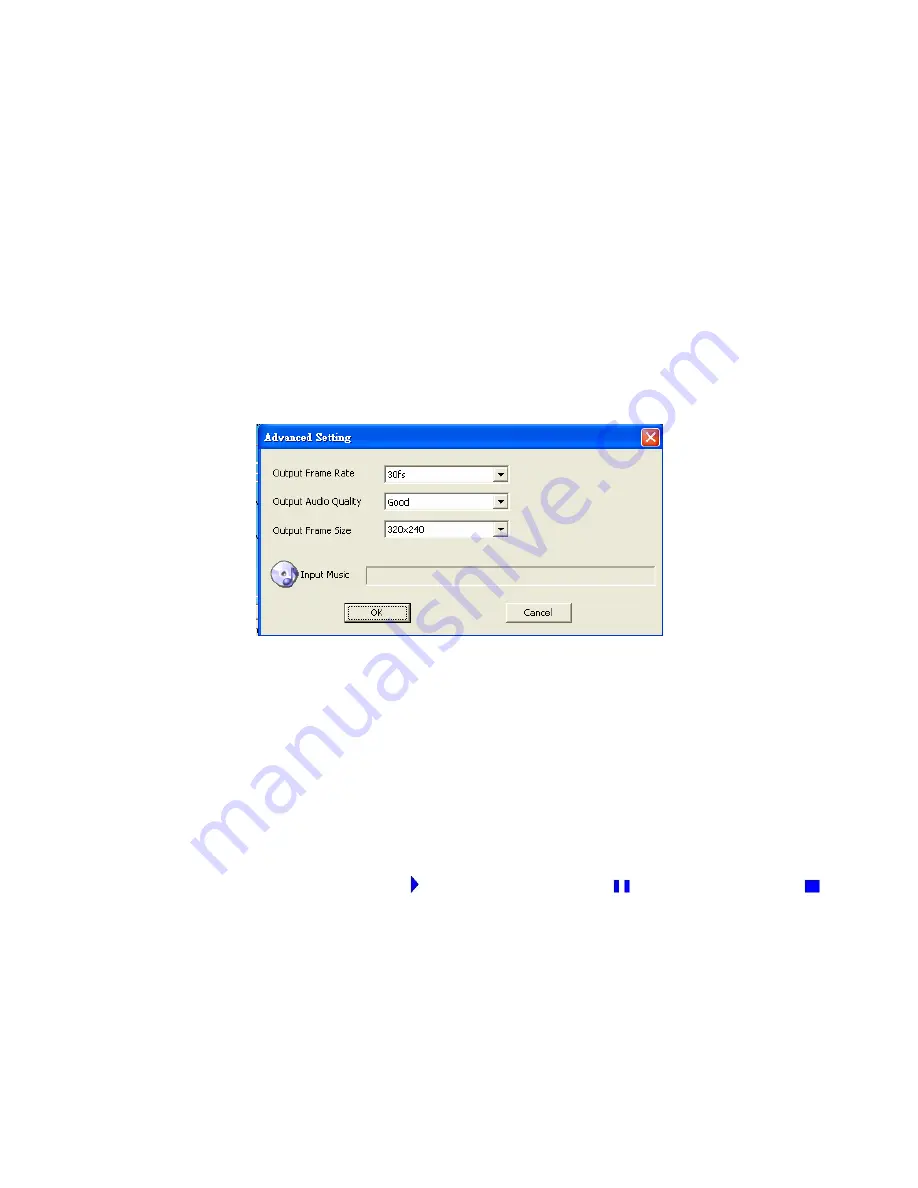
area. A window as shown
below will pop up for more detailed setting.
2.
To redefine file attributes, click and select from drop down text box to modify each category.
1.
Output Frame Rate
defines how frequent the video frame refreshes itself.
2.
Output Audio Quality
defines the quality of audio.
3.
Output Frame Size
defines the resolution of the video file.
4.
Click on
Input Music
to insert a different background audio. A window will pop up
prompting for the location of file. Specify the file path and click
OK
to confirm.
z
Video File Editing
1.
At
Editing Functions
panel, click to start preview playback,
to pause playback, and
to stop playback.
2.
Drag
Volume
vertical slider to adjust audio volume and horizontal slider to start playback at
a specific time point.
3.
Click on
→
to select a starting point of the video clip and
←
to specify the end point.
z
Video File Preview and Conversion
1.
At
Conversion Functions
field, place a
ˇ
on
MTV Preview
check box to activate preview
function. The video will be displayed as edited.
2.
Click on the check box again to activate conversion function. Click on
Start Conversion
to


