9
STEP-BY-STEP GUIDE
9
X1
8
X1
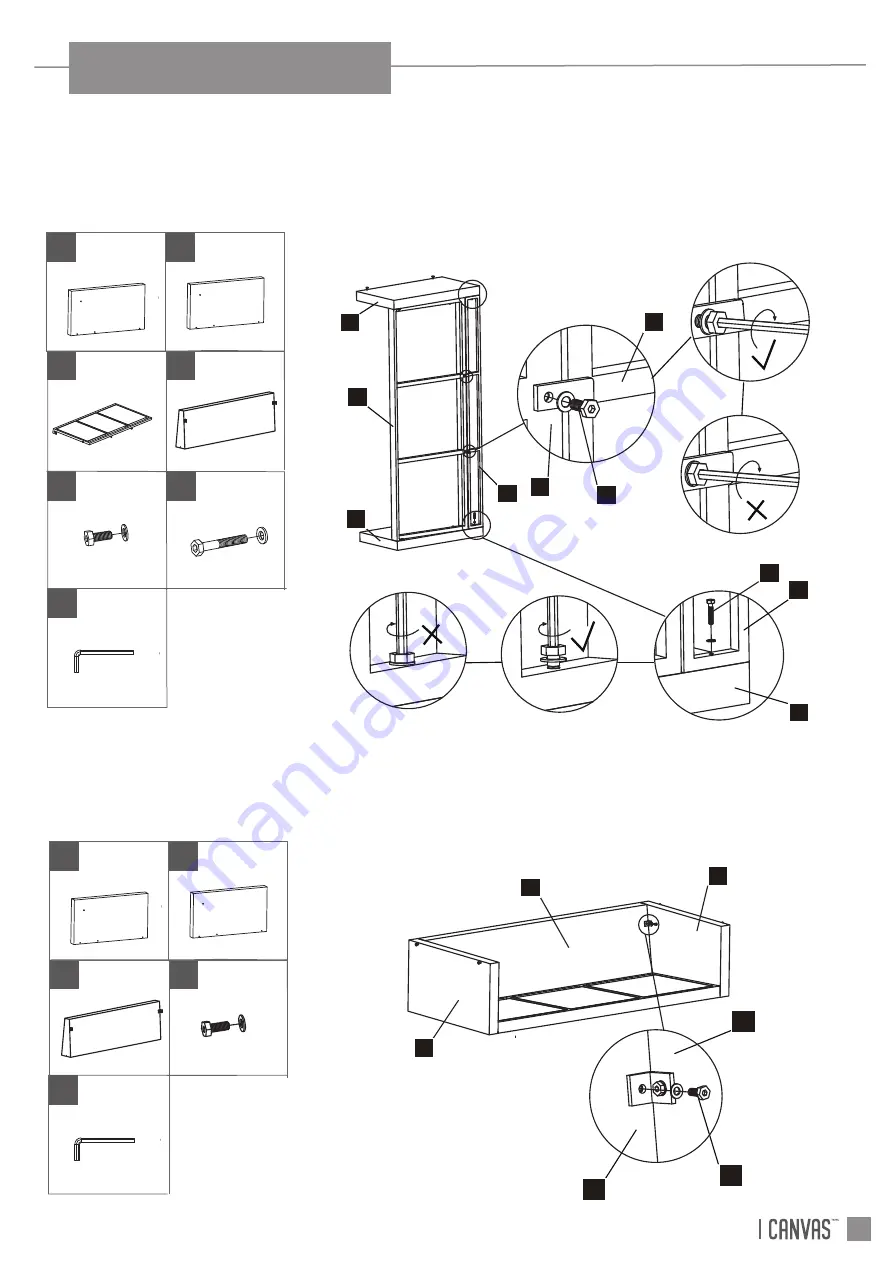
STEP 7
First attach the back
9
to the assembled frame
6 & 7 & 8,
using the bolt
B
with
washer and secure it into the right arm
6
. Second, using the bolt
A
with washer
secure it into the seat
8
. Repeat procedure for the other side.
Do not tighten
completely.
A
X2
STEP 8
Using the bolt
A
with washer secure it into the back
9
. Do not tighten completely.
Repeat procedure for the other side.
When assembled, securely tighten all bolts with the allen wrench
H
for steps 5 - 8.
H
X1
B
X2
7
6
8
9
B
9
6
9
8
A
HIGHFIELD BALANCELLE
7
X1
6
X1
Right
H
X1
Left
7
6
9
A
9
7
A
X2
9
X1
7
X1
6
X1
Right
Left
Содержание HIGHFIELD BALANCELLE 088-2299-0
Страница 14: ...INSPIRED BY CANADA ...


