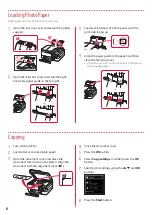
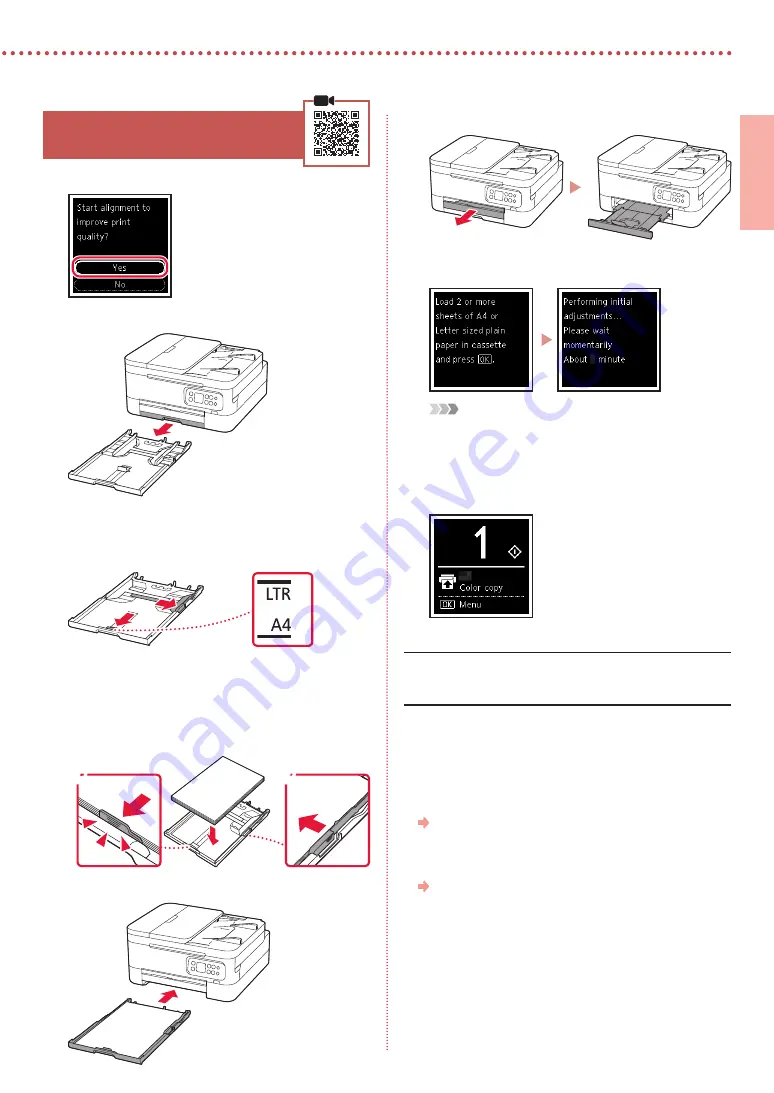
Canon TR7000 Series Скачать руководство пользователя страница 5

3

ENGLISH

5. Loading Paper

Press the 

OK

 button.

Remove the cassette from the printer.

Slide apart the paper guides.

• 

Slide the right paper guide to the right edge. Align 
the front paper guide with the Letter or A4 mark.

Load paper.

• 

Load 2 or more sheets of Letter or A4 sized plain 
paper.

• 

Place the paper against the front paper guide, and 
align the right paper guide to the width of the paper.

a

b

Replace the cassette.

Pull out the paper output tray.

Press the 

OK

 button.

 Note

The alignment process prints out two double sided sheets.
Do not pull out the paper or use the printer until alignment is 

complete.

Check that the following screen appears.

If you will use the printer without connecting any other 
devices, setup is now complete.

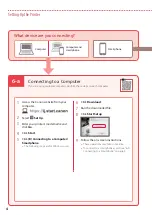
Select the connection method that best matches how you 
will use the printer.

• 

To use the printer without connecting to any other 
devices

  Setup is now complete.

• 

To use the printer connecting to a computer or 
smartphone

  Proceed to the next page.

Содержание TR7000 Series

Страница 1: ...Lea primero Información de seguridad e información importante apéndice Guía de inicio Getting Started Read Safety and Important Information addendum first ...

Страница 2: ... impresora Conexión con un ordenador teléfono inteligente o tableta página 4 Instalación de la impresora página 1 Installing the Printer page 1 Connecting to a Computer Smartphone or Tablet page 4 Holding the Printer ...

Страница 3: ...f the orange tape and protective material inside b a 3 Close the scanning unit cover Open the scanning unit cover fully and then close it Caution Watch your fingers a b 3 Turning on the Printer 1 Connect the power cord Back 2 Press the ON button 3 Use the and buttons to select a language and then press the OK button For Setup visit the URL https ij start canon TR7020 or scan the code with your mob...

Страница 4: ...ive tape It could stain your hands or surrounding objects Do not touch the areas shown in the figure Otherwise the printer may not print correctly 4 Set the Color FINE cartridge in the FINE cartridge holder Important Do not bump the FINE cartridge Doing so may cause a malfunction 5 Push down the ink cartridge locking cover firmly until it snaps into place to close it completely 6 Repeat steps 2 to...

Страница 5: ...per a b 5 Replace the cassette 6 Pull out the paper output tray 7 Press the OK button Note The alignment process prints out two double sided sheets Do not pull out the paper or use the printer until alignment is complete 8 Check that the following screen appears If you will use the printer without connecting any other devices setup is now complete Select the connection method that best matches how...

Страница 6: ...et Up 3 Enter your printer s model name and click Go 4 Click Start 5 Click B Connecting to a Computer Smartphone The following steps are for Windows users 6 Click Download 7 Run the downloaded file 8 Click Start Setup 9 Follow the on screen instructions These operations may take some time To connect to a smartphone as well see 6 b Connecting to a Smartphone on page 5 What device are you connecting...

Страница 7: ...Access the Canon website to download the app 2 Open the installed app and follow the on screen instructions in the app to add your printer Once you have added your printer you can print from your smartphone To print photos see Loading Photo Paper on page 6 Connecting to a Smartphone If you are using multiple smartphones perform these steps on each smartphone ...

Страница 8: ...ed slot cover Follow the on screen instructions to set information for the loaded paper Copying Photo paper can only be loaded in the rear tray 1 Turn on the printer 2 Load Letter or A4 sized plain paper 3 Open the document cover and place the document face down on the platen Align the document with the alignment mark 4 Close the document cover 5 Press the OK button 6 Select Copy settings and then...

Страница 9: ... hay dentro b a 3 Cierre la cubierta unidad de escaneado Abra la cubierta unidad de escaneado completamente y luego ciérrela Precaución Tenga cuidado con los dedos a b 3 Encender la impresora 1 Conecte el cable de alimentación Atrás 2 Pulse el botón ACTIVADO ON 3 Utilice los botones y para seleccionar un idioma y a continuación pulse el botón OK Para la configuración visite la URL https ij start c...

Страница 10: ...bjetos que se encuentran a su alrededor No toque las áreas que se muestran en la imagen Si lo hace puede que la impresora no imprima correctamente 4 Coloque el cartucho FINE de color en el soporte de cartucho FINE Importante No golpee el cartucho FINE Si se golpea puede funcionar mal 5 Empuje hacia abajo la tapa de bloqueo del cartucho de tinta firmemente hasta que encaje en su lugar para cerrarla...

Страница 11: ... el cassette 6 Extraiga la bandeja de salida del papel 7 Pulse el botón OK Nota El proceso de alineación imprime dos hojas de doble cara No extraiga el papel o use la impresora hasta que se haya completado la alineación 8 Compruebe que aparezca la siguiente pantalla Si va a utilizar la impresora sin conectar con ningún otro dispositivo la configuración ya se ha completado Seleccione el método de c...

Страница 12: ...lic en Ir 4 Haga clic en Iniciar 5 Haga clic en B Conexión con un ordenador teléfono inteligente Los siguientes pasos son para usuarios de Windows 6 Haga clic en Descargar 7 Ejecute el archivo descargado 8 Haga clic en Iniciar configuración Start Setup 9 Siga las instrucciones que aparezcan en pantalla Estas operaciones pueden llevar algún tiempo Para conectar con un teléfono inteligente también c...

Страница 13: ...ra descargar la aplicación 2 Abra la aplicación instalada y luego siga las instrucciones en la aplicación para agregar su impresora Cuando haya agregado la impresora podrá imprimir desde su teléfono inteligente Para imprimir fotos consulte Carga de papel fotográfico en la página 6 Conexión con un teléfono inteligente Si utiliza varios teléfonos inteligentes realice estos pasos en cada teléfono int...

Страница 14: ...ntación Siga las instrucciones en pantalla para definir la información para el papel cargado Copia El papel fotográfico solo se puede cargar en la bandeja posterior 1 Encienda la impresora 2 Cargue papel Carta o papel normal de tamaño A4 3 Abra la cubierta de documentos y coloque el documento cara abajo en la platina Alinee el documento con la marca de alineación 4 Cierre la cubierta de documentos...

Страница 15: ...How To Video Library Videoteca sobre procedimientos RMC Regulatory Model Code K10516 ...

Страница 16: ...Desde su navegador Acceso al Manual en línea Access Online Manual From your browser PRINTED IN XXXXXXXX QT6 3636 V01 CANON INC 2020 XXXXXXXX ...

Отзывы: