


4
4
4-46
4-46
Parts Replacement and Cleaning Procedure > Motors > Removing the Front Alignment Motor (M4) > Preparation
Parts Replacement and Cleaning Procedure > Motors > Removing the Front Alignment Motor (M4) > Preparation
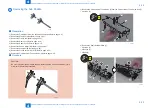
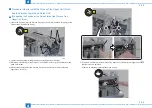
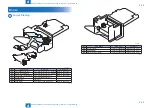
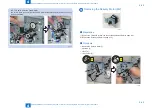
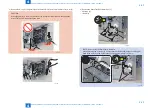
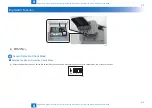
NOTE: How to install the Delivery Motor
Be sure to hook the belt [3] on the gear [5] of the Delivery Motor [1] and tighten the
screws [2] at the position where tension is applied to the belt under the motor's own
weight when assembling.
[1]
[5]
[2]
[3]
1x
F-4-122
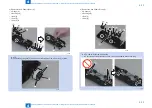
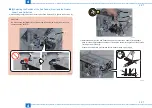
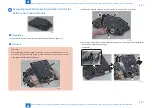
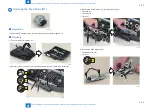
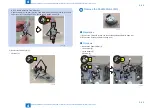
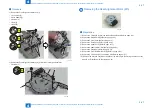
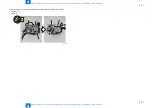
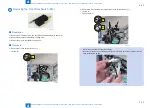
Removing the Front Alignment Motor (M4)
■
Preparation
1) Remove the Finisher Unit from the connected equipment(Refer to page 4-9).
2) Remove the Staple Cartridge(Refer to page 4-22).
3) Remove the Front Cover(Refer to page 4-15).
4) Remove the Rear Cover(Refer to page 4-16).
5) Remove the Upper Cover(Refer to page 4-17).
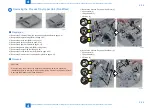
6) Remove the Paddle Motor (M3) (Refer to page 4-44).
7) Remove the Staple Unit(Refer to page 4-23).
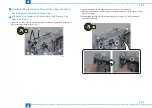
8) Remove the Front Door Switch (S15) (Refer to page 4-53).
9) Remove the Finisher Lower Feed Guide Unit(Refer to page 4-27).
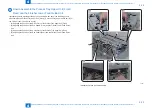
10) Remove the Process Tray Upper Unit (Front) by referring to "Removing the Process Tray
Upper Unit (Front/Rear)" (Refer to page 4-35).
F-4-123
Содержание Staple Finisher-S1
Страница 6: ...Safety Precautions Notes Before Servicing Points to Note at Cleaning ...
Страница 8: ...1 1 Product Outline Product Outline Features Specifications Names of Parts ...
Страница 36: ...3 3 Periodic Servicing Periodic Servicing List of Work for Scheduled Servicing ...
Страница 94: ...5 5 Adjustment Adjustment Adjustment Item Dip Switch Function ...
Страница 113: ...Appendix Service Tools General Circuit Diagram ...


