


3
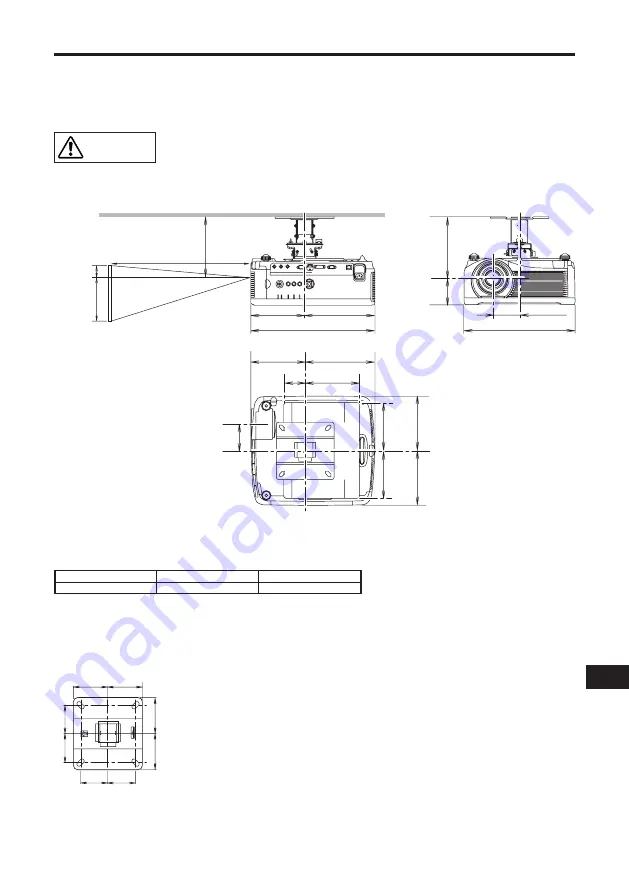
194 mm
236 mm
430 mm
380 mm
92 mm
209 mm
91 mm
194 mm
236 mm
80 mm
183 mm
92 mm
167 mm
167 mm
190 mm
190 mm
● Before mounting the Ceiling Attachment, be sure to check the strength of the
ceiling. The ceiling should be strong enough to support the projector and Ceiling
Attachment (and optional extension pipe). If the ceiling is not strong enough, be
sure to reinforce it. The projector may fall and you may get injured.
● To prevent falling caused by earthquake or vibration, take anti-fall measures using
tension wires or the like for installation. The projector may fall and you may get
injured.
Mounting Position
This manual describes how to assemble and install the ceiling attachment using WUX4000.
Install the projector straight in front of the screen. You can adjust the screen position and keystone using the
lens shift feature. For details, refer to the user's manual provided with the projector.
For more detailed information on the screen sizes (H1, H2) and the
projection distance, please refer to the user's manual provided with
the projector.
l
Projection Distance
Side view
Front view
H2(Height)
H1(Height)
Top view
Distance from ceiling to lens center (l)
RS-CL11
When RS-CL08 is used
When RS-CL09 is used
21 cm/0.7'
56 cm/1.8' to 76 cm/2.5'
76 cm/2.5' to 116 cm/3.8'
100 mm 100 mm
80 mm 80 mm
100 mm
100 mm
80
m
m
80
m
m
Ceiling-mount bracket
Caution
RS-CL11
Содержание RS-CL11
Страница 79: ...YT1 7398 000 CANON INC 2010 ...


