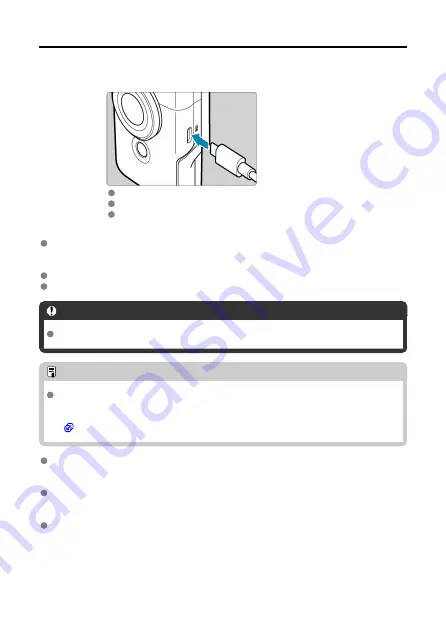
Charging the Camera
1.
Charge the camera.
Charge the camera over a USB connection with the included cable.
After charging begins, the indicator turns orange.
The indicator goes off after the camera is fully charged.
Charging the camera when it is fully depleted takes approx. 1 hr. and 50 min. at
room temperature (23°C/73°F).
The time required to charge the battery will vary greatly
depending on the ambient temperature and the battery's remaining capacity.
For safety, charging in low temperatures (5–10°C/41–50°F) takes longer.
The camera can also be used while plugged in for charging.
Caution
Charging may stop if the camera becomes hot.
Note
For charging and powering the camera, an optional USB Power Adapter PD-E1 is
recommended. Some commercially available power adapters (USB Type-C) have
also been confirmed to work with the camera. For details, check the Canon website
(
).
Upon purchase, the built-in battery is not fully charged.
Charge the battery before use.
Charge the camera on the day you will use it or the day before.
The built-in battery will gradually lose its charge, even if it is not used.
Use the camera where the temperature is 0–35°C (32–95°F).
For optimal camera performance, use where the ambient temperature is 0–35°C (32–
95°F). Lower temperatures may temporarily reduce the performance and life of the built-
in battery. Higher temperatures may prevent continuous shooting if the camera becomes
hot.
26
Содержание RowerShot V10
Страница 1: ...Advanced User Guide E CT2 D251 A CANON INC 2023 ...
Страница 13: ...Note To stream video see Live Streaming 13 ...
Страница 22: ...Part Names Attaching the Strap 3 4 2 1 5 6 7 8 11 12 13 14 15 16 17 19 18 9 10 20 21 22 23 24 22 ...
Страница 24: ...Attaching the Strap Attach the included wrist strap to the camera strap mount 24 ...
Страница 28: ...3 Close the cover 28 ...
Страница 37: ...Menu Operations and Settings Menu Screen Menu Setting Procedure Dimmed Menu Items 37 ...
Страница 86: ...Grid A grid can be displayed on the screen 1 Select Grid display 2 Select an option 86 ...
Страница 96: ...Caution When shooting by tapping with Review duration set to Hold you can take the next shot by tapping 96 ...
Страница 111: ...Note You can also magnify display by double tapping with one finger 111 ...
Страница 119: ...4 Erase the image Select Erase 119 ...
Страница 121: ...4 Erase the images Select OK 121 ...
Страница 123: ...4 Erase the images Select OK 123 ...
Страница 152: ...Note When you will not use Bluetooth setting Bluetooth settings to Disable is recommended 152 ...
Страница 181: ...5 Set the IP address Go to Setting the IP Address 181 ...
Страница 184: ...4 Set the IP address Go to Setting the IP Address 184 ...
Страница 197: ...3 Use the connected device as needed 197 ...
Страница 203: ...1 Select Wi Fi settings 2 Select MAC address 3 Check the MAC address 203 ...
Страница 213: ...91 Other error A problem other than error code number 11 to 83 occurred Turn the camera s power switch off and on 213 ...
Страница 226: ...3 Select OK 226 ...
Страница 241: ...Language 1 Select Language To set it initially select Language 2 Set the desired language 241 ...
Страница 258: ...The camera turns off by itself A power saving feature is enabled 258 ...
Страница 284: ...3 Remove the back cover 4 Remove the seven screws There is no need to remove the small screws next to screw 1 284 ...


