background image

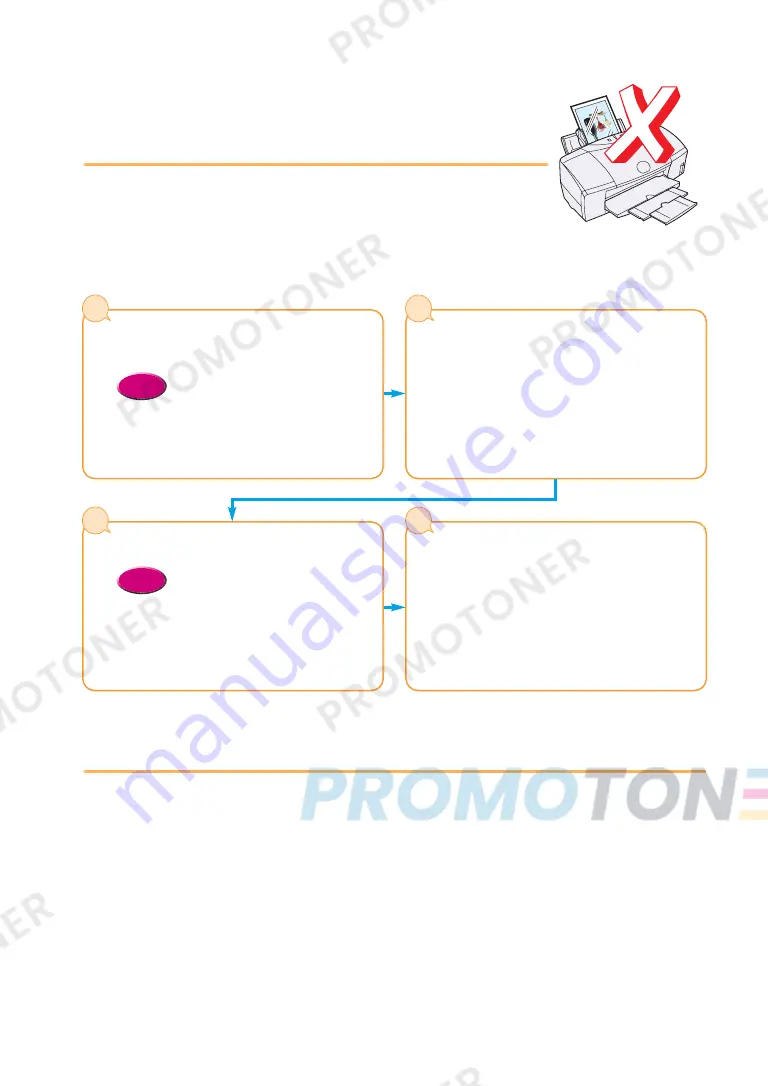
Scanner Cartridge does

not operate correctly

If the Scanner Cartridge does not operate after it is installed, follow the
procedure below to correct the problem.

Is the Scanner Cartridge installed
correctly?

• Make sure the scanner cartridge is

installed correctly. (P.16)

Reference

1

76

Is the printer cable connected securely
to the computer and printer?

Check the cable connections at the computer and
printer and make sure that the connections are
tight.

2

Is the scanner driver installed correctly?

• For details about installing the

software for IS-52, refer to the Quick
Start Guide.

Reference

3

Scanned images are unsatisfactory?
Other problems such as communication
error occurred?

If the scanned images are wavy, faded, or
unsatisfactory in any way, refer to the
troubleshooting section of the IS-52 Reference
Guide provided on the CD-ROM.

4

When connected via USB

When the printer is connected to the computer via the USB port, note the following:

Never disconnect the USB cable from the printer or computer while printing or when the
operating system is starting up.

After the printer driver has been installed, if you must remove and re-insert the USB cable from
the printer or computer, always wait as least five seconds after you remove the cable before you
re-insert it. Never remove the USB cable and re-insert it immediately.

 chap-4 (E)  10/6/99 2:22 PM  Page 76

Содержание Q30-3201-US1

Страница 1: ...BE BUBBLE JET PRINTER User s Guide QA7 0884 V01 ...

Страница 2: ...hat promotes energy saving through the use of computers and other office equipment The program backs the development and dissemination of products with functions that effectively reduce energy consumption It is an open system in which businesses can participate voluntarily The targeted products are office equipment such as computers monitors printers facsimiles and copiers Their standards and logo...

Страница 3: ...A loose or poorly connected plug could cause a fire or electric shock Never cut modify stretch bend or twist the power cord and never place heavy objects on the power cord A power leak from a damaged power cord could cause a fire or electric shock Never plug the printer power cord into a power outlet power board double adapter etc that is shared by other devices or office equipment To prevent the ...

Страница 4: ... near the printer Gases in the spray could cause a fire or electric shock if they come in contact with electrical components inside the printer Choosing a location Never set the printer on a surface that is unstable or subject to excessive vibration The printer could tip or fall and cause injury Never use the printer in a location that is subject to high humidity dust high temperatures or direct s...

Страница 5: ...r supply voltages for this printer are determined by the country of purchase USA Canada AC 120V 60 Hz Australia AC 240V 50 Hz Europe AC 230V 10 50 Hz Working around the printer Never insert your fingers or hands inside the printer while it is printing The printer contains moving parts which could cause injury Never place anything on top of the printer especially metal objects paper clips staples e...

Страница 6: ...rated by a fluorescent lamp placed too close to the printer could cause the printer to malfunction Regulations for the United Kingdom This equipment is approved under approval number NS G 12345 J 100003 for indirect connection to public telecommunication systems in the United Kingdom i e when connected to the correct interface of a type approved apparatus in accordance with the instructions for us...

Страница 7: ...3 5 Changing the paper size 34 Macintosh 1 Opening the printer driver 35 2 Selecting the printer driver options 36 3 Selecting a print mode 37 4 Selecting a media type 37 5 Changing the paper size 38 Chapter 3 Loading Paper and Special Print Media Media that you can use with this printer 39 Setting media correctly 42 Loading Photo Paper Pro PR 101 42 Loading plain paper or High Resolution Paper HR...

Страница 8: ...ctory 60 Using the recommended paper or special media 60 Changing the printer driver settings 60 Aligning the print head 62 Reading the print head alignment pattern 65 Adjusting color 66 A printout is unclear faded 67 Printing a nozzle check pattern 68 Cleaning the print head 70 Deep cleaning the print head 72 Replacing an ink tank 74 Color is strange 75 Scanner Cartridge does not operate correctl...

Страница 9: ...onnecting the printer and computer installing the printer driver and scanner drivers You will need the Quick Start Guide if you move or transport the printer Store this guide in a safe place so you can find it for future reference Memo After setting up the printer read the User s Guide to become familiar with the basic operations Printing a photograph Using the optional Scanner Cartridge Using the...

Страница 10: ...he CD ROM drive On the first screen click the Reference Guide button For Mac Insert the CD ROM in the CD ROM drive Open the Manual folder then select the desired language In order to open Reference Guide you must have Adobe Acrobat Reader installed on your computer For details refer to the instruction booklet provided with the CD ROM Reference Reference Guides on CD ROM On line Help The printer dr...

Страница 11: ... seconds then lights steadily green When the POWER ERROR lamp lights and remains on the printer is ready to print If the POWER ERROR lamp flashes or lights orange an error has occurred For details see Chapter 4 Is the printer cable securely connected to the printer and computer If the printer cable is not connected to the printer and computer correctly an error can occur or meaningless characters ...

Страница 12: ...per Pro PR 101 is recommended when you need to achieve the best quality in printing photographs Slightly thicker than High Resolution Paper HR 101 the print side of Photo Paper Pro is the side with the glossy surface For details about Photo Paper Pro and other special print media see Chapter 3 Summary of printing photographs If you have the optional Color Image Scanner Cartridge IS 52 you can scan...

Страница 13: ...e lit green Make sure that the printer is selected as the default printer Click the Start button point to Settings and click Printers If the printer is not marked with a check mark right click the Canon BJC 8200 printer icon and select Set as Default Start the software application From the File menu select Open and open the photo image file that you want to print From the File menu select Print Th...

Страница 14: ...a digital camera click Camera for the Print Mode You can not only reproduce photos as they were taken Before you start the print job you can select options to enhance image to create artistic effects For more details about printer driver options refer to the BJC 8200 Reference Guide on the CD ROM Click the OK button to start the print job The image begins to print 8 Reference Memo 7 6 Click Click ...

Страница 15: ...or details refer to the Loading Paper and Special Print Media in Chapter 3 Make sure the printer is switched on The POWER lamp should be lit green From the File menu select Open and open the photo image file that you want to print The image file opens From the File menu select Print The Print dialog box opens 4 3 2 Reference 1 ON Printing a photograph with the Macintosh 2 2 Click Click ...

Страница 16: ...Printing About your guides 15 Click the Photo icon for the Print Mode Select the Media Type for your print job Click the Print button The image begins to print 7 6 5 Click Click ...

Страница 17: ...ter For details about installing IS Scan refer to the printer Quick Start Guide For details about using the Scanner Cartridge refer to the IS 52 Reference Guide on the CD ROM provided with the printer The description in this section is written on the assumption that you have already installed the printer driver and aligned the print head For details refer to the Quick Start Guide If you experience...

Страница 18: ... required to convert the printer into a scanner scan an original and print it 5 5 4 4 3 3 2 2 1 1 Install the Scanner Cartridge in the printer Perform white level calibration Scan the original photograph Save the scanned image Install the BJ Print Head and print the scanned image Now let s scan a photograph and print it ...

Страница 19: ...er removing it from the printer The electrical contacts become very hot during printing To avoid spilling ink on your hands or clothing handle the BJ Print Head carefully to avoid dropping it When you are finished scanning remove the Scanner Cartridge from the printer and install the BJ Print Head in the printer Do not leave the Scanner Cartridge installed in the printer Install the Scanner Cartri...

Страница 20: ...t software application see the IS 52 Reference Guide Click the Capture Image button Click the Custom button Click the White Level button Set the white level calibration sheet 1 Slide the paper guide completely to the left 2 Align the white calibration sheet with the right side of the sheet feeder and insert it into the printer until it stops 3 Slide the paper guide to the left edge of the sheet Ma...

Страница 21: ...ght side of the Sheet Feeder 3 Slide the paper guide to the left edge of the scanning holder Click the Scan button You can start the scanning job here without making any settings The Sheet Feeder feeds the scanning holder in small increments as it scans the original The scanned image is displayed in the Preview Area 4 3 2 1 20 Click the OK button The white level calibration sheet feeds into the pr...

Страница 22: ...ed to the file 3 2 1 To print the scanned image you must remove the Scanner Cartridge and re install the BJ Print Head Open the front cover The Scanner Cartridge moves to the centre automatically Remove the Scanner Cartridge and store it in the storage container 1 Raise the lock lever and remove the Scanner Cartridge 2 Place the Scanner Cartridge in the storage container Install the BJ Print Head ...

Страница 23: ...rties button 4 In the Choose Print Mode box click SuperPhoto select the Media Type and click the OK button 5 Click the OK button 6 Make sure that the POWER ERROR lamp lights green then click the Print button to start printing When the media is ejected from the printer printing has completed 7 To exit IS San Plus click the Exit button 6 Reference 5 Click Click Click Click Click Click Click Click ...

Страница 24: ...gs from the pop up menu Click the White Level button Insert the white calibration sheet in the printer 1 Slide the paper guide completely to the left 2 Align the white calibration sheet with the right side of the sheet feeder and insert it into the printer until it stops 3 Slide the paper guide to the left edge of the sheet Make sure that the paper thickness lever is set to the up posittion Click ...

Страница 25: ...he original in the sheet feeder 1 Slide the paper guide completely to the left 2 With the closed end of the scanning holder pointing down and the original facing up align the scanning holder with the right side of the sheet feeder 3 Slide the paper guide to the left edge of the scanning holder Click the Scan button The scanning holder feeds in small increments as the original is scanned The scanne...

Страница 26: ...ter a file name for the image that you want to save Enter a file name and click the Save button The area you selected in Step 1 is saved to the file Click the Close box to close IS Scan 4 3 2 1 Saving the scanned image 4 4 To print the scanned image you must remove the Scanner Cartridge and re install the BJ Print Head Open the front cover The Scanner Cartridge moves to the centre automatically Re...

Страница 27: ...der see Chapter 3 Start the print job 1 Open the image that you saved from the software application such as SimpleText 2 From the File menu select Print 3 For the Print Mode select Photo 4 For the Media Type select the media that you set in the printer 5 Make sure that the POWER ERROR lamp lights green then click the Print button to start printing When the media is ejected from the printer printin...

Страница 28: ...print a photograph taken with a digital camera 4 4 3 3 2 2 1 1 Acquire the photograph from the digital camera and save it Set the media in the printer Perform the settings in the printer driver Print the file Now let s print a digital photograph Digital camera resolution The resolution of photographs taken with a digital camera depends on the capabilities of the camera The greater the number of pi...

Страница 29: ...JC 8200 is not selected click the Name down arrow and select Canon BJC 8200 from the drop down list Click the Properties button The printer driver Properties dialog box opens Click the Camera icon for the Print Mode and select the Media Type for your print job Click the OK button This completes setting the printer driver for printing the digital photograph 4 3 2 1 The preparation for printing the ...

Страница 30: ...the Apple menu select Chooser then select BJC 8200 as the printer Click the Photo icon for the Print Mode selection The current settings for Photo selection are displayed For the Media Type select the media that you set in the printer This completes setting the printer driver for printing the photograph 4 3 2 1 The preparation for printing the photograph is complete Now let s start printing the di...

Страница 31: ...lication to a format that the printer can understand and then sends it to the printer The printer driver also provides many useful features that you can use to set up special print jobs Separate printer drivers are provided for Windows and the Macintosh Here is a summary of what is presented in your hands on introduction to the printer driver As you read this chapter open the printer driver and pe...

Страница 32: ... for the printer Name If the BJC 8200 is not selected click the Name down arrow and select Canon BJC 8200 from the drop down list 3 2 1 Printer Properties dialog box Opening the printer driver 1 1 Memo In order to perform printer maintenance and other procedures you can also open the printer driver from the Windows desktop Click the Start button point to Settings select Printers right click the Ca...

Страница 33: ...e Media Type is selected automatically after you select the print mode However you can select another media manually from the pull down list Make sure the setting suits the print job that you want to execute Click the Advanced button to view the settings that the print mode selection has set for you automatically You can also adjust these settings Quality Special Effects etc manually Memo Displays...

Страница 34: ...ics and adjusts the printing for the best results Click the Camera icon to print photographs taken with a digital camera to attain the best color reproduction This setting also compensates for underexposure and overexposure in the original image Click the Draft icon to print drafts so you can proof read copy confirm layout settings etc The Draft mode prints fast and conserves ink As explained earl...

Страница 35: ...oftware application or if you cannot select any page size in the software application Click the Page Layout tab For the Page Size click the down arrow and select a page size from the drop down list To enable the setting click the OK button to close the Printer Properties dialog box 1 This concludes the overview of the basic printer driver features Experiment with some of the other settings on your...

Страница 36: ...he software application that you are using For details refer to the software application manual Reference Open the Apple menu select Chooser then click the BJC 8200 icon Start Simple Text Open the printer driver Open the print dialog box From the File menu select Print The Print dialog box opens Open the Paper Setting dialog box From the File menu select Page Setup The Page Setup dialog box opens ...

Страница 37: ...to the BJC 8200 Reference Guide on the CD ROM Reference Print dialog box Page Setup dialog box Printer Utility dialog box This dialog provides the selections for print head cleaning printing test prints and other maintenance tasks Execute print head cleaning to correct poor print quality Selecting the printer driver options 2 2 Scale Click the select the amount of enlargement or reduction Paper Si...

Страница 38: ...r illustrations that contain sharp lines Photo Click this icon to print photographs or graphic images that contain gradations of color Reproduces natural colors without graininess Manual Click this icon then click Details to create and save your own palette icon with settings that you choose Make sure that you select a Media Type appropriate for the print job Memo Here we will show you how to sele...

Страница 39: ...rom the pull down list To enable the setting click the OK button to close the Page Setup dialog box 2 1 38 This concludes the overview of the basic printer driver features Experiment with some of the other settings on your own For details about the printer driver features refer to the BJC 8200 Reference Guide on the CD ROM Changing the paper size 5 5 Printing on Plain Paper Printing on High Resolu...

Страница 40: ...rinter and the special procedures to follow when handling paper and special media Plain paper You can use plain paper 64 90 gsm and Canon Bubble Jet Paper LC 301 Envelopes You can use standard European DL or U S Commercial No 10 envelopes with this printer Using envelopes of other sizes is not recommended For optimal printing results Canon recommends that you use Canon genuine media for Canon BJ p...

Страница 41: ...pecial card of the same paper stock as Glossy Photo Paper GP 301 Print over the perforated borders then remove the borders to trim away unwanted white margins Use this media when you want to print an image over the entire card Canon creative media Transparencies CF 102 Use to prepare presentations for an overhead projector Never attempt to use photocopier or laser beam printer OHP film with this p...

Страница 42: ... paper Damp paper Excessively thin paper thinner than 64 gsm Excessively thick paper thicker than 0 6 mm Paper with pasted photos stickers etc Envelopes with flaps overlapping Envelopes with self sealing flaps Tractor feed paper Perforated paper Punched paper Paper with any type of fasteners ribbons etc attached To avoid jamming the printer and other problems never load paper thicker than 0 6 mm i...

Страница 43: ... Cleaning Plate with the right side of the sheet feeder The Roller Cleaning Plate is used to load Photo Paper Pro as well as clean the paper rollers With the glossy side facing up place the sheet of Photo Paper Pro on top of the Roller Cleaning Plate align the sheet with the right side of the sheet feeder and insert the sheet into the printer until it stops Handle media carefully by its edges Neve...

Страница 44: ...o not touch the whiter print side Slide the paper guide completely to the left With the whiter side facing up align the stack with the right side of the sheet feeder and set the stack in the printer You can load up to 100 sheets 64 gsm of plain paper or 80 sheets of High Resolution Paper in the sheet feeder at one time Do not allow plain paper and High Resolution Paper to stack higher than 50 shee...

Страница 45: ...until it stops Handle media carefully by its edges Never touch the print surface of the sheets Dirt or fingerprints on the print surface will adversely affect print quality You can load only 1 sheet of High Gloss Photo Film in the sheet feeder Load the sheet of High Gloss Photo Film with the cut corner in the upper right corner to ensure that the correct print side is facing up Move the paper guid...

Страница 46: ...aper as well as clean the paper rollers With the glossy side facing up place the sheet of Glossy Photo Paper on top of the Roller Cleaning Plate align the sheet with the right side of the sheet feeder and insert the sheet into the printer until it stops If you load more than one sheet fan the sheets to remove static cling and tap the edges against a flat surface to align the sheets Handle media ca...

Страница 47: ...rled or bent and confirm that the edges of the card and the Loading Support Sheet are aligned before setting them in the printer Align the stack with the right side of the sheet feeder and insert it into the printer Slide the paper guide to the left edge of the stack To prevent a paper jam make sure the sheets are straight and flat in the sheet feeder Handle media carefully by the edges Never touc...

Страница 48: ... them as flat as possible by expelling all the air inside the envelopes To avoid paper jams make sure the envelopes are flat before you load them in the sheet feeder Slide the paper feed guide completely to the left With the return address facing up and pointed down align the stack with the right side of the sheet feeder and insert the stack in the printer You can load up to 10 standard European D...

Страница 49: ... OHP film presentations T Shirt Transfer TR 201 Create original T shirts Use T Shirt Transfer to transfer colorful designs and photographs to cotton T shirts Create a design in a graphics software application scan or capture photograph from a digital camera and print the image in the T Shirt Transfer By transferring the image to a T shirt with a household iron you can create original designs Banne...

Страница 50: ...de on the CD ROM Reference Here is an overview of what is described in this chapter Cannot install the printer or scanner driver 50 Printer prints meaningless characters and symbols 51 Cancelling a print job 52 Printing on a thick paper 53 Paper Jams 54 Low ink alert 56 Printer beeps and it does not print 57 Error message appears 58 Printing quality is unsatisfactory 60 Adjusting color 66 A printo...

Страница 51: ...e background Quit all other software applications that are running in the background and start the installation again Make sure that the drive holding the CD ROM was specified correctly After you set the CD ROM in the CD ROM drive normally the setup screen opens automatically If the initial screen does not open automatically double click the My Computer icon and double click the CD ROM icon Follow...

Страница 52: ...ttings and click Printers Double click the Canon BJC 8200 icon If any unfinished print jobs are listed cancel them For details about cancelling a print job refer to your Windows manual or on line Help Confirm that the correct printer driver was selected for the print job Start the print procedure again and make sure Canon BJC 8200 is displayed in the Name entry box of the Print dialog Meaningless ...

Страница 53: ... More than one method can be used to cancel a print job using the BJ Backgrounder BJ Print Monitor and so on For details about all the methods for cancelling a print job see the BJC 8200 Reference Guide on the CD ROM Reference A Windows Cancelling a print job while the computer is sending the printing data to the printer 52 During printing rapidly press the POWER button twice The print job is canc...

Страница 54: ...lly align the sheet with the left side of the manual feed slot insert the sheet until the printer grabs it and feeds it partially In the printer driver select the setting for thick paper On the Main sheet select Other Paper for the Media Type When the message asks you to confirm your selection click the OK button In the Print dialog box select Other Paper for the Media Type When the message asks y...

Страница 55: ...ce it If you cannot remove the jammed paper press the POWER button twice to eject the jammed paper automatically Start the print job and try again If you have switched printer off the print job data has been lost You will have to start the print job again Use A5 size paper only for printing text To avoid excessive curl and jamming the paper output we do not recommend using A5 paper to print photog...

Страница 56: ...e the jammed paper press the POWER button twice to eject the jammed paper automatically Start the print job and try again If you have switched the printer off the printer job data has been lost You will have to start the print job again Use A5 size paper only for printing text To avoid excessive curl and jamming the paper output we do not recommend using A5 paper to print photographs or graphic il...

Страница 57: ...ank After the ink tank is replaced the printer will automatically clean the print head and the POWER ERROR lamp will flash When the lamp stops flashing and lights green ink tank replacement is completed For details about replacing an ink tank see Replacing an in tank in this User s Guide Reference Windows Macintosh Open the BJ Print Monitor to confirm the low ink alert Read the BJ Status Monitor m...

Страница 58: ... in place remove it check the sensitive electrical contact area for any blockage or any protective tape Put it back in properly Replacing the BJ Print Head P 77 Make sure the BJ Print Head is installed correctly When you are using the Scanner Cartridge make sure the Scanner Cartridge is installed correctly Replacing the BJ Print Head P 77 If not corrected by pressing the POWER button twice replace...

Страница 59: ...tions provided by the BJ Status Monitor to solve the problem Memo Error message appears During a print job when paper runs out ink runs low or paper jams the BJ Status Monitor BJ Print Monitor or your operating system displays an error message on the screen For more details about printer errors and solving problems refer to Chapter 6 Troubleshooting of the Printer Reference Guide on the CD ROM Ref...

Страница 60: ...witched on Are the printer and computer securely connected Is the printer port operating correctly Windows Common system errors include writing to LPT1 or USBPRN application software errors or general protection faults The Macintosh will display an Error Number 300 message where the asterisk is replaced by a letter of the alphabet depending on the error Operating System Errors Macintosh ...

Страница 61: ...icture or an image by using the recommended paper or special media Special media best suited for printing color are Photo Paper Pro PR 101 High Resolution Paper HR 101 Glossy Photo Paper GP 301 and High Gloss Photo Film HG 201 These special media reproduce colors better than plain paper For details refer to Loading Paper and the Special Print Media in Chapter 3 Windows Adjusting the print mode set...

Страница 62: ...tion use the Color Optimizer feature The Color Optimizer adjusts color balance automatically if the image data color is unsatisfactory When Camera is selected for the Print Mode the Photo Optimizer is automatically selected Memo Adjusting the Detailed Setting Improve the printing quality by adjusting the Detailed Setting For a sharper image you can adjust options in the Detailed Setting Open the P...

Страница 63: ...ing the print head could solve the problem To align the print head correctly you will need one sheet of High Resolution Paper Macintosh P 64 Before aligning the print head 62 After aligning the print head Before aligning the print head After aligning the print head P 63 Windows ...

Страница 64: ...0 icon and then select Properties Click the Maintenance tab then click the Print Head Alignment icon Read the message and click the OK button Read the message and click the OK button The print head alignment pattern starts to print While looking at the printed print head alignment pattern enter the numbers in the Print Head Alignment dialog box For details see Reading the print head alignment patt...

Страница 65: ... the down arrow to select Test Print Click the Print Head Alignment icon Read the message and click the OK button to continue The print head alignment pattern starts to print While looking at the print head alignment pattern enter the numbers in the Print Head Alignment dialog box For details see Reading the print head alignment pattern P 65 Click the Send button Print Head Alignment is now comple...

Страница 66: ...hest numbers For D select the same number entered for A Black For E select the same number entered for B Cyan Bl directional Alignment Enter the number of the pattern where the vertical white streaks are the least obvious If you cannot decide on a selection enter the acceptable pattern whith the lowest number Uneven Most even Uneven White streaking obvious No white streaking White streaking obviou...

Страница 67: ... 2 1 Adjusting color You can adjust color by adjusting the Color Balance Output Style and Brightness Make major color adjustments with the application software and use the printer driver options only for fine color adjustment Memo Windows Open the printer driver click the Manual icon and click the Details button Click the Color icon In this dialog you can adjust the settings for Color Correction M...

Страница 68: ...he nozzle check pattern is not crisp and clear perform print head deep cleaning and print another nozzle check pattern Clean the print head P 70 If the nozzle check is not crisp and clear clean the print head and print another nozzle check pattern Print a nozzle check pattern P 68 1 2 3 Contact the Canon Customer Care Center You may need to replace the BJ Print Head P 77 4 Did you check the ink ta...

Страница 69: ...d closes when printing is completed Read the message and click the OK button Check the nozzle check pattern If part of pattern 1 is missing clean the print head If pattern 2 is not smooth or if pattern 3 is streaked vertically with white align the print head Cleaning the print head P 70 Aligning the print head P 62 Reference 7 6 5 Memo 4 3 2 Reference 1 Printing a nozzle check pattern 1 1 The sens...

Страница 70: ...down arrow to select Test Print Click the Nozzle Check Pattern icon To print a nozzle check pattern with the printer operation panel press down and hold the RESUME button until you hear two beeps then release it Read the message and click OK The nozzle check pattern starts printing Check the nozzle check pattern If part of pattern 1 is missing clean the print head If pattern 2 is not smooth or if ...

Страница 71: ...he BJ Status Monitor to check the amount of ink remaining or visually check the ink levels of the ink tanks 1 If an ink tank is empty replace it 2 If there is sufficient ink execute print head deep cleaning If the printer is not used for a long period it may not print normally and even up to 5 print head cleanings may not solve the problem If this problem occurs try to clean the print head with pr...

Страница 72: ...es green for about 30 seconds until print head cleaning is completed Wait for the POWER ERROR lamp to stop flashing Print a nozzle check pattern to check the results of the cleaning If there is no change after cleaning use the BJ Status Monitor to check the amount of ink remaining or visually check the ink levels of the ink tanks 1 If an ink tank is empty replace it 2 If there is sufficient ink ex...

Страница 73: ...remains on you can resume printing Print a nozzle check pattern and check the results of the print head deep cleaning After executing print head cleaning five times and print head deep cleaning if the results of the nozzle check pattern are still not satisfactory the BJ Print Head may be damaged or worn out Replace the BJ Print Head Printing a nozzle check pattern P 68 Replacing the BJ Print Head ...

Страница 74: ...eps and release Read the message and click the OK button Print head deep cleaning begins and the POWER ERROR lamp flashes for 1 minute until deep cleaning is completed Wait for the POWER ERROR lamp to stop flashing When the POWER ERROR lamp lights and remains on you can resume printing Print a nozzle check pattern to check the results of the print head deep cleaning After executing print head clea...

Страница 75: ...nk as shown in the illustration and twist off the orange protective cap in the direction of the arrow To avoid spilling ink never press in on the sides of an ink tank Discard the protective cap and never attempt to reattach it to an ink tank according to the environmental laws of your country Hold the new ink tank at a slight angle align it with the correct slot and then insert it Make sure you in...

Страница 76: ...oved the ink tanks inserted in the wrong slots and re inserted them in the correct slots the printer may not print correctly until you have cleaned the print head After cleaning the print head print a nozzle check pattern Confirm that every color is printing correctly If the colors are not satisfactory alternately clean the print head and print nozzle check pattern until the colors print normally ...

Страница 77: ... Quick Start Guide Reference 3 Scanned images are unsatisfactory Other problems such as communication error occurred If the scanned images are wavy faded or unsatisfactory in any way refer to the troubleshooting section of the IS 52 Reference Guide provided on the CD ROM 4 When connected via USB When the printer is connected to the computer via the USB port note the following Never disconnect the ...

Страница 78: ... is switched on then open the front cover The print head holder moves to the centre automatically Raise the lock lever to unlock the BJ Print Head Grip the pads on both sides of the BJ Print Head and remove the entire BJ Print Head with the ink tanks in place To avoid staining your hands clothing or areas in the work site handle the BJ Print Head carefully Never touch the metal contacts of the BJ ...

Страница 79: ...ir package or from the old BJ Print Head If an ink tank dries out it cannot be used Replacing an ink tank P 74 Close the front cover The print head holder returns to the home position and print head cleaning starts automatically The POWER ERROR lamp flashes for about 1 minute until print head cleaning is finished Always align the print head after replacing the BJ Print Head To align the print head...

Страница 80: ... 5 C 35 C 41 F 95 F Humidity 10 to 90 no condensation Temperature 0 C 35 C 32 F 95 F Humidity 5 90 no condensation USA Canada AC 120V 60Hz Australia AC 240V 50 Hz Europe AC 230V 10 50 Hz Standby approx 8 watts Printing approx 45 watts 450 x 333 x 205 mm W x D x H with paper support paper output tray not extended 5 9 kg 2 7 lb Plain Paper Photo Paper Pro High Resolution Paper Transparencies High Gl...

Страница 81: ...he time measurement does not include the time required data transfer to the computer paper loading time or paper eject time 2 The USB interface is compliant with Windows 98 only 3 At installation the following amount of space should be available on the hard disk For Windows 5 MB should be available for IS Scan and 10 MB available for IS Scan Plus For Mac OS 8 MB should be available for IS Scan and...

Страница 82: ...der warranty 1 757 413 2848 Speak to a technician currently 24 99 per call during holidays and days hours not listed above regarding urgent product questions or for products no longer under warranty 1 800 423 2366 The same service is available for a charge of 2 50 per minute to a maximum or 25 00 per call 1 900 246 1200 E mail support via Canon Computer Systems Inc Web site www ccsi canon com 24 h...

Страница 83: ... approx 25 MB including disk space for temporary files Space required for Mac OS 8 1 or later is approx 30 MB When connected via USB with Windows 98 The following items are requred to connect the printer via the USB with Windows 98 Windows 98 installed beforehand USB port operation assured by the computer manufacturer To use the BJ Status Monitor use parallel port LPT1 and a parallel cable capable...

Страница 84: ... United Kingdom CANON FRANCE S A 17 Quai du Pré7sident Paul Doumer 92414 Courbevoie Cedex France CANON DEUTSCHLAND GMBH Postfach 528 47705 Krefeld Germany CANON LATIN AMERICA INC 6505 Blue Lagoon Drive Suite 325 Miami Florida 33126 U S A CANON HONGKONG COMPANY LTD 10 F Lippo Sun Plaza 28 Canton Road Tsimshatsui Kowloon Hong Kong CANON SINGAPORE PTE LTD 79 Anson Road 09 01 06 Singapore 079906 CANON...

Отзывы: